SD Custom Painting

September 25, 2025 Sdcustom No Comments

5 Types of Crown Molding and How to Use Them in Your Home

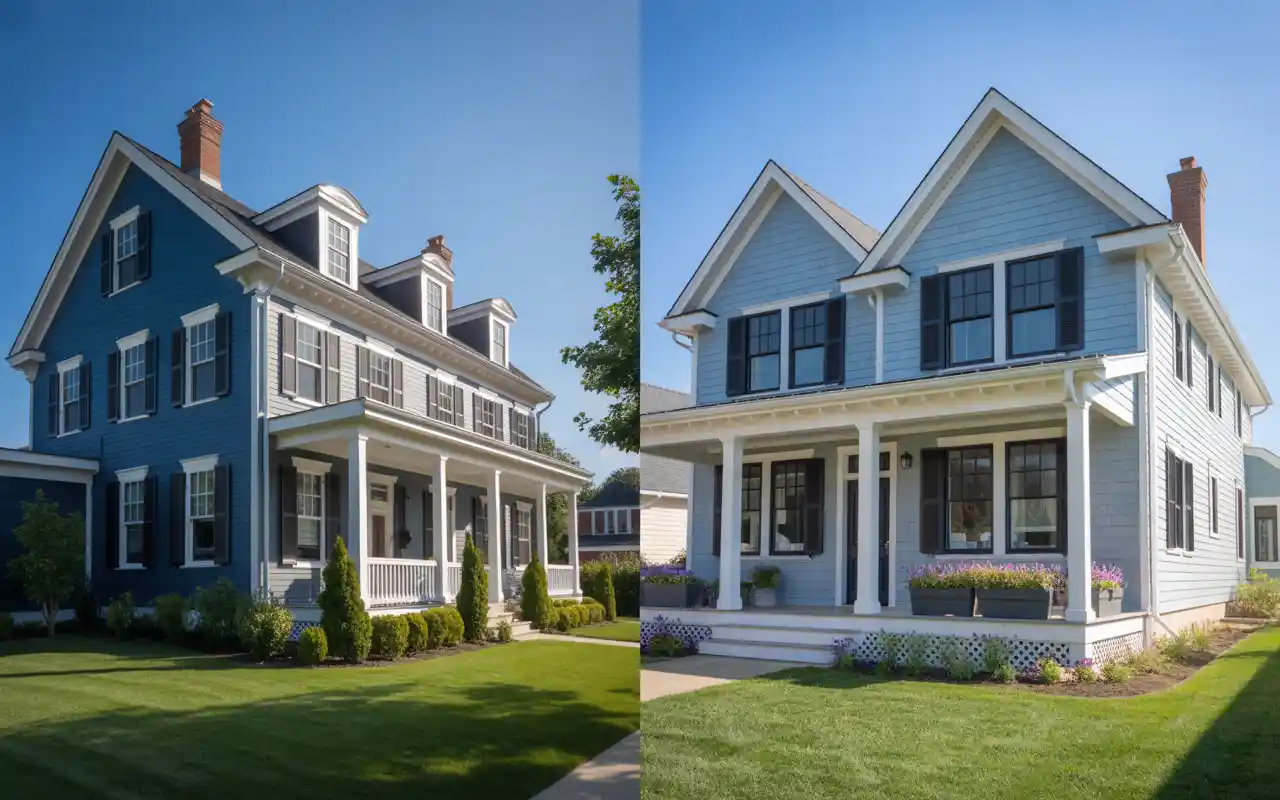
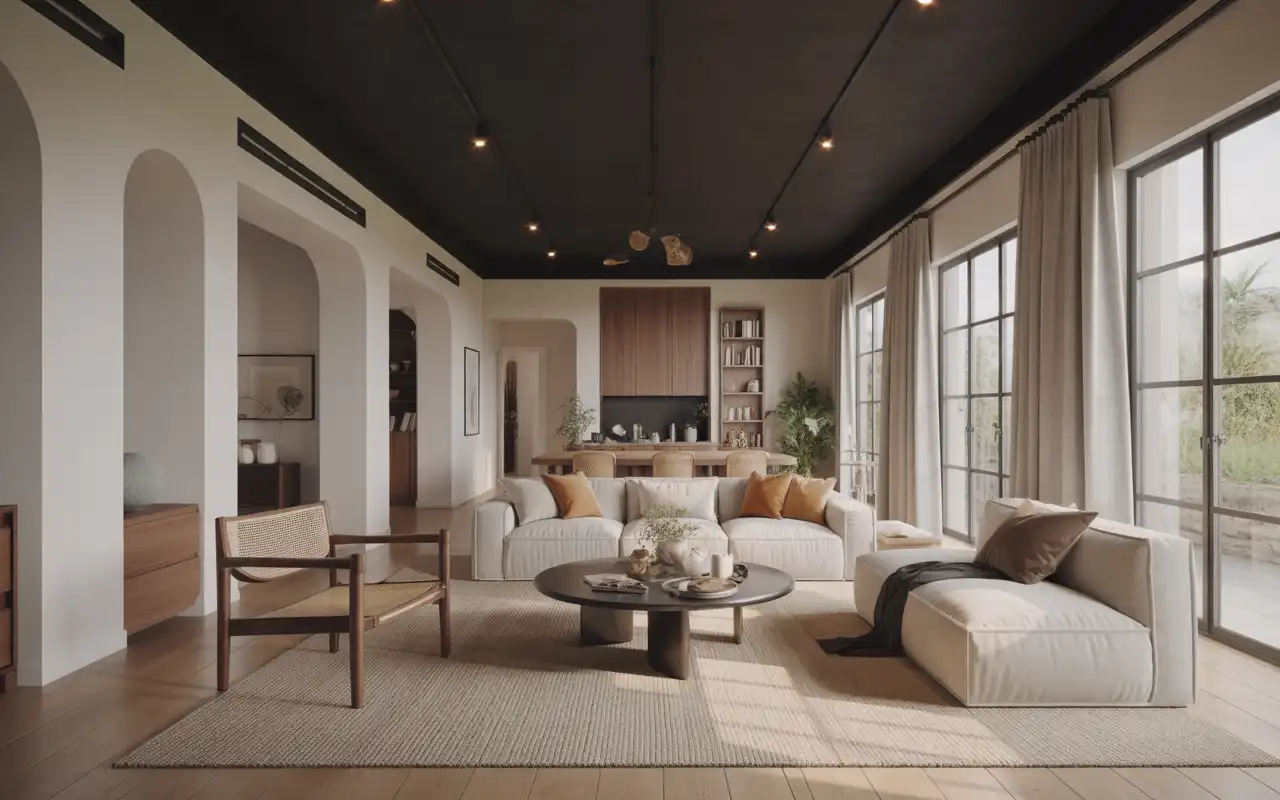
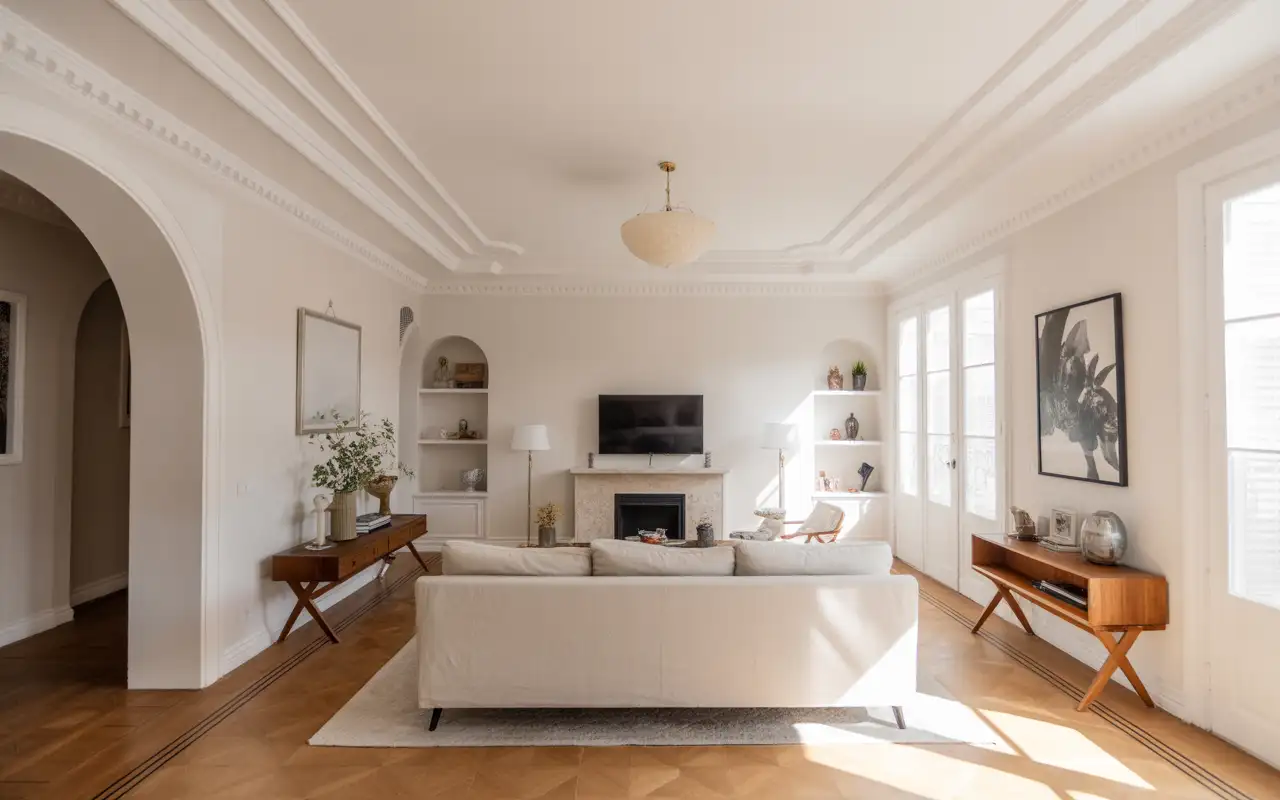
Home / Crown molding transforms ordinary rooms into spaces with visual appeal and character. This decorative trim creates a smooth transition between walls and ceilings while adding architectural interest. Many homeowners wonder about different styles and how to pick the right one for their space. Understanding the types of crown molding helps you make smart design choices. Each style offers unique benefits and works better in certain rooms. This guide covers five popular crown molding options and shows you exactly how to use them. What is Crown Molding? Crown molding is decorative trim installed where walls meet ceilings. Originally designed to hide gaps between building materials, it now serves as a key design element. This architectural detail draws the eye upward and makes rooms feel taller and more finished. Modern crown molding comes in various materials including wood, MDF, plaster, and polyurethane. The trim can be painted or stained to match your decor. Quality crown molding installation creates clean lines and adds value to your home. Is Crown Molding Out of Style? Crown molding remains a timeless design choice when selected properly. The key is choosing crown molding styles that match your home’s architecture. Traditional homes benefit from classic profiles while modern spaces look better with simpler designs. Current design trends favor crown molding in main living areas. Many new construction homes include this feature in kitchens, dining rooms, and living spaces. The trick is picking the right size and style for your specific room and ceiling height. Where Should You Install Crown Molding? Not every room needs crown molding, but certain spaces benefit greatly from this upgrade. Focus on areas where you entertain guests and spend the most time. These rooms create the biggest impact and return on investment. Best Rooms for Crown Molding Living Rooms: Crown molding adds elegance and draws attention to architectural features. Large living spaces can handle wider profiles while smaller rooms need simpler styles. Dining Rooms: Formal dining areas benefit from ornate crown molding designs. This space traditionally features more decorative elements and crown trim enhances the formal atmosphere. Kitchens: Kitchen cabinet crown molding creates a finished, custom look. Crown molding for kitchen cabinets bridges the gap between upper cabinets and ceilings for a built-in appearance. Master Bedrooms: Bedrooms can use crown molding to create a cozy, upscale feel. Choose simpler profiles that won’t overwhelm the relaxing atmosphere. Different Types of Crown Molding and Their Best Uses 1. Traditional Crown Molding Traditional crown molding features the classic S-curve profile that works in most homes. This versatile style includes gentle curves and sometimes a small bead detail at the base. The design complements both formal and casual decorating styles. Best Applications: Living rooms with standard 8-9 foot ceilings Dining rooms in traditional or transitional homes Bedrooms where you want subtle elegance Hallways to create visual continuity Traditional profiles come in various sizes from 3 inches to 8 inches tall. Smaller profiles work in compact rooms while larger ones suit spacious areas with higher ceilings. This style is easy to install and widely available at most home improvement stores. 2. Egg and Dart Crown Molding Egg and dart molding features repeating oval and arrow-shaped patterns inspired by ancient Greek architecture. This ornate style adds sophistication and works best in formal settings. The detailed pattern creates visual interest and historical charm. Best Applications: Formal dining rooms Home libraries or studies Victorian or Colonial-style homes Spaces with high ceilings over 10 feet Egg and dart patterns can be carved from wood, cast in plaster, or molded in polyurethane. Wood versions cost more but offer the most authentic look. This style requires careful installation to align the patterns at corners properly. 3. Dentil Crown Molding Dentil molding includes evenly spaced rectangular blocks along the bottom edge. This design element comes from Classical architecture and adds structured detail. The repeating block pattern creates rhythm and visual interest without being overly ornate. Best Applications: Colonial or Neoclassical homes Formal living rooms Kitchen cabinet crown molding applications Exterior trim on porches or dormers Dentil spacing varies from tight patterns with small blocks to wider spacing with larger elements. Consider your room size when choosing dentil proportions. Smaller dentils work in compact spaces while larger patterns suit bigger rooms. 4. Cove Crown Molding Cove molding features a simple curved profile that creates a gentle arc between walls and ceilings. This understated style works well in both traditional and contemporary spaces. The smooth curve adds softness without competing with other room elements. Best Applications: Modern or minimalist interiors Bedrooms and bathrooms Smaller rooms with lower ceilings Spaces where you want subtle definition Cove molding installation is straightforward since the simple profile hides minor imperfections. This style comes in various sizes and can be painted to match walls or ceilings. It’s an excellent choice for first-time crown molding installations. 5. Step Crown Molding Step molding features angular, geometric profiles instead of curves. This contemporary style includes distinct horizontal and vertical lines that create a modern appearance. Step profiles work well in houses with clean, linear design elements. Best Applications: Contemporary and modern homes Art Deco or mid-century modern spaces Rooms with geometric tile or architectural features Spaces with clean, minimal decoration Step molding comes in various configurations from simple two-step designs to complex multi-level profiles. The angular lines complement modern furniture and fixtures. This style requires precise installation since imperfections show more clearly than curved profiles. Crown Molding Materials and Finishes Wood Crown Molding Solid wood offers the most premium option with natural grain patterns and staining possibilities. Popular wood choices include pine, oak, maple, and cherry. Wood crown molding can be painted or stained to match other trim elements. MDF and Composite Materials Medium-density fiberboard (MDF) provides a cost-effective alternative to solid wood. This material takes paint well and won’t crack or split like wood. MDF works best in interior applications and must be painted since it cannot be stained. Polyurethane and Flex Molding Polyurethane molding offers durability and moisture resistance. Flex varieties

September 24, 2025 Sdcustom No Comments

10 Best Exterior Blue Paint Colors and Palettes

Home / Choosing the right blue exterior paint color can transform your home’s curb appeal instantly. Blue siding house colors work beautifully with various architectural styles and complement natural elements like stone, brick, and wood. The best exterior blue paint colors range from deep navy tones to soft coastal shades that enhance your home’s character. Whether you’re planning a complete exterior makeover or updating your current color scheme, blue paint colors offer versatility that few other options can match. From dramatic dark blue exterior paint colors to refreshing light blues, the right shade depends on your home’s style, lighting conditions, and surrounding landscape. Is Blue a Good Color for Exteriors? Blue exterior paint ranks among the top choices for homeowners seeking both style and practicality. Unlike neutral grays or whites, shades of blue add personality while maintaining broad appeal for resale value. Blue exterior house paint works exceptionally well with red brick homes, natural stone, and wooden accents. The psychology behind blue creates feelings of calm and trust, making it an excellent choice for your home’s exterior. Blue paint adapts to different lighting conditions throughout the day, appearing deeper in shadows and brighter in direct sunlight. This adaptability helps blue maintain visual interest without being overwhelming. Climate and Durability Considerations Your geographic location significantly impacts how blue exterior paint colors perform over time. In high-altitude areas or regions with intense sunlight, colors appear 4-5 times brighter than indoor samples suggest. Southern climates with strong UV exposure may cause certain blue pigments to fade faster than others. Northern climates with less direct sunlight allow darker blues to maintain their richness without appearing overwhelming. Coastal areas benefit from blue’s natural harmony with ocean and sky tones. Consider your local weather patterns when selecting between light and dark options for optimal longevity. #1 // Needlepoint Navy by Sherwin Williams Needlepoint Navy offers the perfect balance between bold navy and subtle sophistication. With an LRV of 13, this color provides dramatic impact without appearing too dark or harsh. The undertones lean slightly warm, making it compatible with various exterior materials including brick, stone, and wood trim. This versatile navy works beautifully on both traditional and contemporary home styles. Pair it with crisp white trim for classic contrast, or choose warm off-white shades for a softer appearance. Needlepoint Navy particularly shines on homes with natural landscaping, as the color complements green foliage naturally. For architectural details, consider using lighter blue-gray shades as accent colors. This creates depth and visual interest while maintaining color harmony. The color performs well in various lighting conditions, appearing rich and sophisticated throughout different times of day. #2 // Hale Navy by Benjamin Moore Hale Navy stands as one of the most popular navy paint colors for good reason. This complex dark blue contains muted gray tones that prevent it from appearing flat or monotonous. Despite looking nearly black on paint chips, Hale Navy reveals its rich blue character when applied to exterior surfaces. The sophisticated blend works exceptionally well with copper accents, wood elements, and natural stone features. White trim creates stunning contrast that enhances architectural details. For front door options, consider warm colors like deep red or forest green to complement Hale Navy’s undertones. This color adapts beautifully to different architectural styles, from historic colonials to modern farmhouse designs. The muted quality ensures it won’t compete with landscaping or hardscaping elements while providing an elegant backdrop for your home’s features. #3 // Naval by Sherwin Williams For those seeking an even deeper navy option, Naval delivers dramatic sophistication with an LRV of only 4. This near-black navy contains subtle purple undertones that create stunning depth and richness. The color works particularly well with natural stone and plants featuring purple or burgundy tones. Naval’s intensity allows for bolder accent colors that might overpower lighter blues. Consider vibrant front door colors like chartreuse or coral for contemporary appeal. The dark base provides excellent contrast for highlighting architectural details in lighter colors. This color choice works best on homes with ample natural light or interesting architectural features that benefit from dramatic emphasis. The deep tone creates a striking backdrop that makes landscaping and accent colors appear more vibrant by comparison. #4 // James Hardie Evening Blue James Hardie’s Evening Blue comes factory-finished on their fiber cement siding, offering convenience and consistency. This dramatic navy brings instant sophistication to split-level homes and contemporary designs. The baked-in finish provides superior durability compared to field-applied paint options. Evening Blue pairs beautifully with copper and wood accents for rustic appeal, or with light gray and off-white combinations for sleek, modern aesthetics. The pre-finished option eliminates concerns about color matching and ensures even coverage across all siding pieces. Consider this option if you’re installing new siding and want guaranteed color consistency. The factory finish typically outlasts field-applied paint, making it an excellent long-term investment for your home’s exterior. #5 // Bravo Blue by Sherwin Williams Bravo Blue represents the lighter end of the blue spectrum while maintaining enough color intensity to create visual impact. This pastel tone works particularly well for coastal homes or properties where you want color without overwhelming the architecture. The light tone pairs beautifully with white trim for clean, crisp contrast. This airy blue gray option brings refreshing energy to traditional home styles while maintaining sophisticated appeal. The color works exceptionally well in bright, sunny climates where darker colors might appear too intense. Beach house aesthetics benefit greatly from this soft, welcoming shade. For accent colors, consider natural wood tones or soft gray options that complement rather than compete with the gentle blue base. This creates a serene, coastal-inspired palette that feels both current and timeless. #6 // Palladian Blue by Benjamin Moore Palladian Blue captures the essence of sky and water in a sophisticated paint color perfect for waterfront properties. This ideal sky-blue shade creates light, refreshing appeal when paired with white accents and natural materials. The color evokes coastal serenity while maintaining enough sophistication for upscale homes. Light gray stone

September 23, 2025 Sdcustom No Comments

When is Black Ceiling Paint the Right Choice?

Home / Most homeowners never think about their ceiling as design space. They paint it white and forget about it. But your ceiling is actually the fifth wall of your room. Black ceiling paint can transform any space from boring to bold. It creates drama, hides flaws, and makes rooms feel more intimate. The question isn’t whether black ceilings look good. They do. The real question is when they work best for your specific space. Some rooms benefit greatly from dark ceilings and light walls, while others don’t. Let’s explore when black ceiling paint becomes the perfect choice for your home. Table of Contents If You Have High Ceilings but Want a Cozy Space High ceilings are beautiful but can make rooms feel cold and empty. Your space might feel like a museum instead of a comfortable home. Black ceiling paint solves this problem by visually lowering the ceiling height. It creates an intimate feeling without changing the actual room dimensions. Rooms with black ceilings feel warmer and more inviting. The dark color draws your eye up and then back down, creating a cocooning effect. This works especially well in bedrooms where you want to create a relaxing atmosphere. Benjamin Moore Midnight offers excellent coverage for high ceiling spaces. The deep color makes even 12-foot ceilings feel more proportional to the room below. You keep all your vertical space while gaining comfort and warmth. If You Want a Unique Design Element A black ceiling serves as a dramatic focal point in any room. It’s like hanging artwork above your head. This bold choice immediately makes your space stand out from typical white paint schemes. Your guests will notice the difference the moment they walk in. Open floor plans benefit greatly from black ceiling design. You can paint just one section black to define different areas. This creates visual boundaries without adding walls or furniture. The basement ceiling painted black works particularly well for entertainment spaces. Black and white color schemes never go out of style. They’re timeless and work with any decor. You can change your furniture, artwork, and accessories while keeping the striking ceiling as your constant design anchor. If Your Space Has Geometric Designs Coffered ceilings, crown molding, and exposed beams look amazing with black paint. The dark color makes architectural details pop by creating strong contrast. White beams against a black ceiling create stunning visual interest. Each design element becomes more noticeable and impressive. Cathedral ceilings and barrel-vault designs also benefit from black treatment. The paint emphasizes the unique shape and draws attention to these special features. Your ceiling becomes an architectural statement instead of just empty space above. Black metal ceiling tiles work well in industrial-style homes. They complement exposed ductwork, brick walls, and concrete floors. The dark ceiling ties all these elements together for a cohesive design theme. If You’re Looking to Hide Ceiling Elements Stains, cracks, and surface imperfections disappear against black paint. Light colors highlight every flaw, but dark ceiling paint hides them completely. This is especially useful in older homes where ceiling repairs might be expensive or difficult. Exposed pipes, ductwork, and electrical conduits become invisible against black ceilings. This industrial look works perfectly in basements, garages, and commercial spaces. You save money by not boxing in these elements while creating a modern aesthetic. Black tile ceiling options also hide maintenance issues well. Water stains and discoloration that would show on white paint simply disappear. This makes black a practical choice for bathrooms and kitchens where moisture problems occur. Why Are Black Ceilings Appealing? Black is a neutral color that works with everything. It pairs beautifully with any wall color, furniture style, or decorative scheme. You can redecorate your entire room while keeping the black ceiling as your foundation. This flexibility makes it a smart long-term choice. The psychological effect of black ceilings creates intimacy and comfort. Your space feels more like a cozy retreat than an institutional building. This works especially well in the black ceiling bedroom where relaxation is the primary goal. Dark ceiling light walls combinations make rooms appear larger. The walls seem to extend infinitely while the ceiling provides a defined boundary. This optical illusion works particularly well in smaller spaces where you want to maximize the feeling of openness. Choosing the Right Black Paint Color Not all blacks are the same. Some have blue or green undertones, while others feel warmer with hints of brown. Choosing the best black paint for ceiling use depends on the mood you want. Popular options include: Benjamin Moore Midnight (2131-20): A deep, rich black that feels modern. Benjamin Moore Black (2132-10): A true, classic black. Sherwin-Williams Caviar (SW6990): A soft black with subtle warmth. For bedrooms, matte or flat finishes help create a restful vibe and hide imperfections. In smaller bathrooms, satin or semi-gloss reflects more light, making the black ceiling bathroom feel less heavy. Glossy finishes reflect light dramatically, but they also highlight flaws. Use them only if your ceiling surface is perfectly smooth. Room-Specific Considerations Black ceiling bathroom designs create spa-like atmospheres. The dark color makes white fixtures and chrome accents pop beautifully. Just ensure you have adequate ventilation and lighting to prevent the space from feeling too dark. Basement spaces naturally have lower ceilings and limited natural light. Black ceiling paint works perfectly here because it embraces the cozy, den-like feeling instead of fighting it. Add warm lighting and the space becomes an intimate retreat. Living rooms with black ceilings need careful lighting planning. Table lamps, floor lamps, and accent lighting become more important than overhead fixtures. The dark ceiling absorbs light, so you need multiple light sources to maintain comfort. Lighting Strategies for Black Ceilings Recessed lights work beautifully in black ceilings because they create dramatic pools of light. The fixtures almost disappear into the dark paint, leaving only the light effect visible. This creates a clean, modern look without visible hardware. Pendant lights and chandeliers become stunning focal points against black backgrounds. The contrast makes

September 12, 2025 Sdcustom No Comments

Is It Safe to Sleep in Freshly Painted Rooms? Expert Tips

Home / You’ve just painted your bedroom, and the walls look amazing. Now, you are asking yourself if it is safe to sleep in a freshly painted room tonight. This question runs through the mind of every homeowner after a paint job. The fumes from paint can affect your health, and it all comes down to how long you breathe in the fumes. In short, it all depends on several factors. The paint type matters. The ventilation of your space matters. In general, lower VOC is better than oil-based paint. What Are Paint Fumes and Why Are They Bad for You? A gas formed when paint dries, paint fumes are made up of organics with high vapour pressure, also referred to as VOCs for short. The EPA has warned that inhaling those fumes is not a trivial matter and that exposure may lead to serious health problems.  Common issues people experience when exposed to them include: Headaches and dizziness Nausea and fatigue Eye, nose, and throat irritation Trouble breathing Skin irritations Long-term exposure to paint fumes can affect your central nervous system, and some people develop memory issues or problems with concentration. Children, pregnant women, and people with asthma and respiratory issues are at higher risk of experiencing health issues from exposure.  Generally, water-based paints compared to oil-based paints have fewer VOCs. However, inhaling any amount of a low-VOC product inside a poorly ventilated area can result in health concerns. Types of Paint and Their Safety Levels Water-Based Paints Most modern interior paints are water-based. These paints usually cure faster, and they produce fewer fumes containing just as many harmful chemicals. With good ventilation, you can often sleep in the room the next day. Low-VOC and Zero-VOC Paints These types of paints have minimal or no Volatile Organic Compounds (VOCs) in their formulation. They are the safest for indoor use in bedrooms. Many people can actually sleep in bedrooms after some application that day, using a low-VOC or zero-VOC product. Oil-Based Paints Oil-based paints will take a much longer time to cure, and they will have overpowering fumes persisting for days or even weeks after application. Oil-based paints are rarely used on interior walls anymore because of safety concerns. The drying time will also vary based on the type of paint. Water-based paints may feel dry in 2-4 hours, but will take at least 24-48 hours to cure completely. Vulnerable Populations at Higher Risk Some populations are at risk from paint fumes, including Children and infants: As developing entities, exposure to these chemicals can be particularly harmful. Wait at least 48-72 hours before allowing kids to sleep in newly painted rooms. Pregnant women: Exposure to VOCs during pregnancy can impact fetal development. Pregnant women should not sleep in a room with new paint for several days. Individuals with respiratory diseases: If an individual has asthma, COPD, or allergies, they may experience severe reactions to paint fumes. Older adults often have less robust immune systems, making them potentially more susceptible to chemical irritants. Pet Safety: Dogs and cats are at risk as well to paint fumes. Keep pets out of new paint contexts until odours are completely gone. How Long After Painting Can You Sleep in a Room? The waiting time depends on several factors: Paint Type Timeline Zero-VOC Paint: Same day with good ventilation Low-VOC Paint: 8-24 hours Standard Latex Paint: 24-48 hours Oil-Based Paint: 3-7 days minimum Room Size and Ventilation Smaller rooms trap fumes longer than larger spaces. Poor ventilation extends the waiting period significantly. Always keep windows open and use fans to circulate fresh air. Climate Factors Hot, humid weather slows paint drying. Cold temperatures also extend curing times. Dry climates help paints dry faster, but you still need adequate ventilation. The Smell Test If you can smell paint fumes, it’s not safe to sleep in the room. Your nose is a good indicator of air quality. Wait until the room smells normal again. Signs It’s Too Soon to Sleep in a Painted Room Watch for these warning signs: Strong paint odor remains You feel dizzy or nauseous in the room Your eyes water or burn You experience breathing difficulties The paint still feels tacky to touch Protect Yourself After Painting With These Precautions Maximize Airflow In the painted area, open all the windows you can reach. Place box fans in the windows to draw in fresh air and push stale air out. Cross-ventilation is the most effective approach when windows or vents are located on opposite walls. Turn on all ceiling fans to high speed and place portable fans as needed to create airflow. The goal is for the air in the room to be exchanged completely several times per hour. Natural Options for Air Purification Place bowls of activated charcoal in the painted area. Charcoal helps naturally absorb odours and volatile organic compounds (VOCs). Baking soda is another method that can help neutralize paint odours. Houseplants like spider plants or peace lilies may help improve air quality, but shouldn’t be relied upon to filter all the paint fumes from the paint. Air Purifiers HEPA air purifiers are most effective when they have activated carbon filters. Air purifiers should be kept on continuously for 24-48 hours after painting to reduce volatile organic compounds (VOCs) effectively. Ensure the air purifiers you purchase or have at home can handle the size of the room you’re purifying, such as the one affected by paint fumes. Larger purifiers will be able to hold spaces much better than smaller units. Room Size and Layout Rooms that are large and have high or vaulted ceilings provide better ventilation than small enclosed areas. Chests, closets, and bathrooms require more attention for ventilation due to their poor airflow. If possible, remove all furniture and belongings from the patio area. This improves airflow in the room and prevents your objects from absorbing the paint odour. How to Remove Paint Smell Quickly Immediate Steps Open windows immediately after finishing Use multiple fans for air circulation

September 11, 2025 Sdcustom No Comments

How to Paint Stripes on a Wall: No Bleeding Technique

Home / Painting stripes transforms any room from plain to stunning in just one weekend. Vertical stripes make your ceiling look higher, while horizontal stripes make narrow rooms feel wider. Many homeowners avoid this project because they worry about crooked lines or paint bleeding under tape. Learning how to paint stripes on a wall isn’t as hard as it seems. With the right tools, proper technique, and patience, you can create perfectly straight stripes that rival professional work. This guide covers everything from planning your design to achieving crisp, clean lines that won’t bleed. How to Paint Perfectly Straight Stripes on Your Wall Creating straight paint lines requires careful planning and the right approach. The key to success lies in proper preparation and using proven techniques that prevent common mistakes. Professional painters use specific methods to ensure clean, sharp edges every time. Essential Tools and Materials You’ll Need Before starting your striped accent wall project, gather these supplies: Basic Tools: High-quality painter’s tape or Frog Tape 4-inch paint roller with covers 2.5-inch angled brush Level tool or laser level Tape measure Pencil Drop cloths Paint trays Paint and Prep Materials: Base color paint (usually the lighter shade) Stripe color paint Primer (if needed) Clear caulk Sandpaper (120-grit) Clean rags Plastic sheeting Pro tip: Invest in quality tape. Cheap tape often causes paint bleeding, ruining your hard work. Step 1: Plan Your Stripe Design Start by deciding on your stripe pattern. Measure your wall carefully to determine the best stripe width and spacing. For vertical stripes: Measure wall width and divide by your desired number of stripes. Standard stripe widths range from 4 to 12 inches. For horizontal stripes: Measure wall height and divide by the number of stripes you want. Consider these design principles: Odd numbers of stripes often look more balanced Wider stripes work better in large rooms Narrow stripes suit smaller spaces Keep stripe widths consistent throughout the room Step 2: Prep the Wall Proper wall preparation ensures your paint adheres well and looks smooth. Remove all furniture and wall hangings from the area. Cover floors with drop cloths to protect from paint spills. Clean your walls with warm water and a damp cloth. Let them dry completely before proceeding. Fill any holes or cracks with a spackling compound. Once dry, sand smooth with 120-grit sandpaper. Wipe away all dust with a clean rag. If your walls haven’t been painted recently or you’re going from dark to light colors, apply a coat of high-quality primer. This step is crucial for achieving even color coverage. Step 3: Paint the Base Color Your base color should typically be the lighter of your two chosen colors. This makes measuring and taping easier while providing better coverage for your stripe color. Apply the base color using standard painting techniques. Cut in edges with your angled brush, then use a roller for the main wall area. Most walls need two coats for even coverage. Allow each coat to dry completely according to the paint manufacturer’s instructions. Wait at least 24 hours before moving to the taping stage. Rushing this step can damage your fresh paint when applying tape. Step 4: Draw and Tape the Stripes This step requires patience and precision. Take your time to ensure perfectly straight lines. Mark your stripe locations with light pencil marks. Use your level to draw straight lines across the entire wall. Pro technique: A laser level eliminates the need for pencil lines and ensures perfect accuracy. Apply your painter’s tape along the pencil lines. Press firmly along all edges using your fingernail or a putty knife. This prevents paint from seeping under the tape. Secret technique for crisp lines: Apply a thin bead of clear caulk along the tape edge. Smooth it with a damp finger. This seals any gaps between tape and wall, preventing paint bleeding. Step 5: Paint the Stripes Now comes the exciting part – creating your stripe pattern. Critical step: Before applying your stripe color, paint a thin coat of your base color over the tape edges. This seals any microscopic gaps and guarantees crisp lines. Let this sealing coat dry completely, then apply your stripe color. Use smooth, even strokes with your roller. Work from top to bottom for vertical stripes, maintaining consistent pressure. Two thin coats usually provide better coverage than one thick coat. Thick paint is more likely to bleed under tape edges. Step 6: Apply Second Coat Once your first stripe coat is dry, apply the second coat following the same technique. Work systematically to ensure even coverage across all stripes. Pay special attention to areas where you might have missed spots during the first coat. Step 7: Remove the Tape Timing is crucial for this final step. Remove tape while the final coat is still slightly wet but not dripping. Pull tape at a 45-degree angle, working slowly and steadily. This prevents paint from peeling off with the tape. If you notice any imperfections, touch them up with a small artist’s brush once the paint is completely dry. How to Paint Horizontal Stripes on a Wall Painting horizontal stripes follows the same basic process but requires different planning considerations. Horizontal stripes work well in narrow hallways, making them appear wider. They also suit rooms with high ceilings, helping create a more intimate feel. Key differences for horizontal stripes: Measure wall height instead of width Use a longer level for accuracy Work more carefully around electrical outlets Consider ceiling height when choosing stripe width The taping and painting process remains identical. Focus extra attention on keeping your horizontal lines perfectly level, as crooked horizontal lines are more noticeable than slightly off vertical ones. Advanced Techniques for Professional Results Dealing with Textured Walls Textured walls present unique challenges for painting stripes. The texture can prevent tape from sealing properly, leading to paint bleeding. Press tape down extra firmly on textured surfaces. Consider using a putty knife to ensure good contact with all surface irregularities. The caulk sealing technique

September 9, 2025 Sdcustom No Comments

How to Paint an Accent Wall in One Weekend (Easy Guide)

Home / Painting an accent wall is one of the fastest ways to breathe new life into any room. This simple DIY project can completely change your space’s mood and style without breaking the bank. A single painted accent wall creates visual interest and serves as a perfect focal point for your room design. Most homeowners can finish this project in just one weekend with the right tools and techniques. Learning how to paint an accent wall opens up endless possibilities for your home decor. Whether you want to add a pop of color to your living room or create a cozy atmosphere in your bedroom, an accent wall delivers maximum impact with minimal effort. This guide covers everything you need to know to achieve professional-looking results. Choosing Which Wall to Paint as Accent Wall The success of your accent wall project starts with selecting the right wall. The best accent walls naturally draw attention and enhance your room’s layout. Look for walls behind your bed, sofa, or fireplace as these already serve as natural focal points. Consider your room’s lighting when choosing an accent wall. Walls that receive natural light throughout the day showcase paint colors beautifully. Dark colors work especially well on walls with good lighting, while lighter accent colors can brighten up dimmer areas. Avoid walls with too many windows, doors, or built-in features. These elements can break up your accent wall’s visual impact and make the space feel cluttered rather than cohesive. Understanding Color Psychology for Accent Walls Your accent color choice affects how people feel in your space. Dark colors like deep blues or charcoal create intimate, cozy feelings perfect for bedrooms and reading nooks. Bold colors like red or orange energize spaces and work well in dining rooms or home offices. Neutral accent walls in warm grays or beiges add sophistication without overwhelming your existing decor. These colors complement most furniture styles and make rooms feel larger and more open. Consider how your accent wall color works with your current paint color on the other walls. The best accent walls create contrast without clashing with your room’s overall color scheme. How to Quickly Paint a Wall: Essential Speed Tips Professional painters know that preparation saves time during the actual painting process. Clean your wall thoroughly and fix any holes or cracks before you start. This preparation step ensures smooth, even coverage that lasts longer. Use high-quality brushes and rollers designed for your paint type. Cheap tools create streaky finishes and require more coats to achieve good coverage. Invest in proper equipment to speed up your project and improve your results. Work in natural light whenever possible. Good lighting helps you spot missed areas and ensures even coverage across your entire accent wall. Prepping to Paint an Accent Wall Start by removing all wall decorations and furniture from your chosen wall. Cover nearby furniture with plastic sheeting or old sheets to protect from paint splatters. Apply painter’s tape carefully along edges where your accent wall meets adjacent walls and the ceiling. Press the tape down firmly to prevent paint from bleeding underneath. Quality painter’s tape makes the difference between amateur and professional-looking results. Fill nail holes and small cracks with spackling compounds. Let it dry completely, then sand smooth. Clean the wall with a damp cloth to remove dust and dirt that could affect paint adhesion. Prime your wall if you’re making a dramatic color change or painting over a darker existing color. Primer ensures your new accent color looks true to its intended shade and provides better coverage. Gather Your Supplies and Choose Your Color Quality paint makes your accent wall project easier and more successful. Choose interior paint in the finish that matches your room’s needs. Satin and eggshell finishes work well for most accent walls, offering durability and subtle shine. Popular accent wall colors include Sherwin Williams Urbane Bronze for sophisticated spaces and deep navy for dramatic impact. Behr Marquee Interior Paint provides excellent coverage and comes in hundreds of color options. Essential supplies include: High-quality roller and extension pole Angled brush for cutting in edges Paint tray and liners Drop cloths Painter’s tape Ladder or step stool Calculate paint quantity by measuring your wall’s square footage. Most rooms need one quart of paint for a single accent wall, but larger walls may require more. Painting an Accent Wall: Step-by-Step Process Begin by cutting in the edges with a brush. Paint a 2-3 inch border around your wall’s perimeter, including where it meets the ceiling and adjacent walls. This technique ensures clean lines and professional-looking results. Load your roller with paint and start from the top corner, working in 3-foot sections. Use a “W” pattern to distribute paint evenly, then fill in with parallel strokes. Maintain a wet edge to avoid lap marks and ensure smooth coverage. Apply thin, even coats rather than trying to cover everything with one thick application. Two thin coats provide better coverage and a more durable finish than one heavy coat. Most accent walls need two coats for complete coverage, especially when painting over lighter colors with darker paint. Let the first coat dry completely before applying the second coat. Advanced Techniques: Adding Wall Paneling Transform your accent wall project into a stunning focal point by adding decorative wall paneling. This upgrade creates texture and visual interest that plain painted walls cannot achieve. Choose between MDF panels for budget-friendly options or select pine for higher durability. Plan your panel layout on paper before cutting any materials to ensure balanced, symmetrical results. Install horizontal or vertical panels depending on your room’s proportions. Vertical panels make ceilings appear higher, while horizontal panels make narrow rooms feel wider. Add the Trim for Professional Results Start with the perimeter trim pieces, ensuring they’re level and properly aligned. Use a level for horizontal pieces and a plumb line for vertical elements. Create your grid pattern by marking equal spacing between panels. Most designs work best with panels between 16-24 inches wide,

September 8, 2025 Sdcustom No Comments

How to Prep a Room for Painting: 7 Pro Steps

Home / Painting your walls can transform any space, but rushing into the job without proper preparation leads to poor results and wasted time. Most homeowners skip the prep work and end up with uneven coverage, paint drips, and a finish that doesn’t last. Learning how to prep a room for painting properly makes the difference between a professional-looking result and an amateur paint job. Good room preparation takes time, but it saves hours of touch-ups later. The right prep work helps paint stick better, covers more evenly, and creates a smooth finish that lasts for years. What You’ll Need to Prep Your Walls for Painting Getting the right tools and materials before you start makes room preparation much easier. Here’s what you need for a complete prep job: Basic Cleaning Supplies: Mild soap or TSP cleaner Clean rags and sponges Bucket for water Vacuum cleaner Dust cloths Repair Materials: Spackling compound or wood filler Putty knife (2-inch and 4-inch) Fine-grit sandpaper (120-150 grit) Sanding sponge Drywall repair patches Protection and Taping: High-quality painter’s tape Canvas or plastic drop cloths Plastic sheeting for furniture Newspaper for small items Additional Tools: Screwdriver for outlet covers Labeled bags for hardware Caulk and caulk gun Primer for problem areas Clear the Room Starting with a clean, empty space makes every other step easier and safer. Remove all furniture possible from the room before beginning any prep work. Small Items First: Take out all wall decorations, lamps, and small furniture pieces. Store these items in another room where they won’t get dusty or damaged. Large Furniture Strategy: Move heavy furniture to the center of the room if you can’t remove it completely. Cover everything with plastic sheeting or canvas drop cloths. Use furniture sliders under heavy pieces to protect floors and make moving easier. Electrical Components: Turn off power at the breaker box before removing outlet covers and switch plates. Use a screwdriver to carefully remove all covers. Place screws and covers in labeled plastic bags so you can find them later. Floor Protection: Lay drop cloths over the entire floor, even areas that seem far from walls. Paint splatters travel further than you think. Tape drop cloth edges to baseboards to prevent slipping. How to Clean Walls Before Painting Clean walls help paint stick better and prevent dirt from showing through your new finish. Wall cleaning removes dust, grease, and grime that can cause paint problems. Dust Removal: Start at the top of each wall and work down. Use a clean cloth or duster to remove cobwebs and loose dirt. Pay attention to corners where dust collects. Don’t forget baseboards and window sills. Washing Process: Mix warm water with a few drops of mild soap. Avoid harsh cleaners that can damage wall surfaces. Wring out your sponge well – too much water can damage drywall. Kitchen and Bathroom Walls: These rooms need extra attention because of grease and moisture. Use TSP (trisodium phosphate) cleaner for stubborn grease spots. Mix according to package directions and scrub gently with a sponge. Drying Time: Let walls dry completely before moving to the next step. Wet walls prevent proper sanding and filling. Good ventilation speeds up drying time. You can also learn about how to clean painted walls in our other helpful guides How to Prep Walls for Painting Wall surface preparation determines how your final paint job looks. Small holes and cracks become obvious under fresh paint, so fix them now. Hole and Crack Inspection: Walk around the room with good lighting and look for nail holes, small cracks, and dents. Mark problem spots with pencil so you don’t miss any during repairs. Small Hole Repair: Use spackling compound for holes smaller than a dime. Apply with a putty knife, pressing firmly to fill the hole completely. Scrape excess material flush with the wall surface. Larger Damage: Holes bigger than a quarter need mesh patches or self-adhesive repair patches. Follow package directions for proper application. Build up repair material in thin layers rather than one thick coat. Sanding Smooth: After repairs dry completely, sand lightly with fine-grit sandpaper. The goal is a smooth surface that blends with the surrounding wall. Dust off sanding residue with a clean cloth. Primer Application: Prime all repaired areas before painting. Primer helps paint stick better and prevents repairs from showing through your finish coat. Use a small brush to apply primer just to repair spots. You can also learn about how to paint a ceiling in our other helpful guides Surface Preparation for Different Wall Types Different wall surfaces need different preparation approaches for the best paint adhesion and coverage. New Drywall: Fresh drywall is very porous and soaks up paint unevenly. Apply a coat of primer or create a mist coat by mixing paint with 30% water. This seals the surface for even coverage. Previously Painted Walls: Lightly sand glossy or semi-gloss paint to help new paint stick better. Clean off all dust after sanding. Most latex paints can go directly over old latex paint without primer. Wallpaper Removal Areas: After removing wallpaper, some adhesive usually remains. Scrape off loose pieces and sand lightly. Prime these areas to prevent adhesive from affecting your new paint. Textured Surfaces: Textured walls need extra care during cleaning and repair. Use a soft brush to clean texture without damaging it. Fill holes carefully to maintain the texture pattern. Prepare Baseboards and Trim Trim work makes or breaks the professional appearance of your paint job. Take time to prep baseboards and trim properly for clean, sharp lines. Trim Inspection: Look for loose nails, gaps, and damage on all trim pieces. Push any raised nail heads below the surface with a nail set. Fill nail holes with wood filler and sand smooth when dry. Caulking Gaps: Apply paintable caulk between trim and walls, and between trim and floors. This creates smooth transitions and prevents paint from seeping into gaps. Run a wet finger along fresh caulk lines to smooth them. Trim Sanding: Lightly sand

September 5, 2025 Sdcustom No Comments

How to Paint Trim Like a Pro: Complete 2025 Guide

Home / Painting trim transforms any room from ordinary to stunning. Fresh paint on baseboards, door frames, and window casings creates clean lines that make your walls pop. Whether you’re updating old molding or finishing new construction, the right approach makes all the difference. Learning how to paint trim properly saves time and delivers professional results. This guide covers everything from choosing the best paint to applying the final coat. You’ll discover techniques that prevent common mistakes and create smooth, durable finishes. Supply List for Painting Trim Getting the right supplies upfront prevents mid-project trips to the store. Here’s what you need for painting trim molding: Preparation Supplies: Drop cloths or plastic sheeting Painter’s tape (1.5-inch and 2-inch widths) Putty knife for repairs Spackling compound for holes and cracks Sandpaper (120-grit and 220-grit) Sanding sponge for detailed areas Tack cloth for dust removal Caulk and caulk gun Paint and Primer: High-quality primer (oil-based or high-adhesion latex) Semi-gloss or satin paint for trim Benjamin Moore paint for trim offers excellent durability and coverage Tools: Angled brush (2-inch for most trim, 1-inch for detailed work) Mini roller and covers (4-inch) for wide baseboards Paint tray with liner Brush comb for cleaning Rags for cleanup Safety Equipment: Safety glasses Dust mask Rubber gloves Choose quality brushes for trim painting. Cheap brushes leave streaks and shed bristles into your paint. A good angled brush costs more but creates smoother finishes with fewer brush marks. How to Paint Trim The best way to paint trim follows a specific sequence. Each step builds on the previous one to create professional results. Rushing through preparation shows in the final finish. Prepare the Room Room preparation prevents paint splatters and makes cleanup easier. Start by removing furniture or covering it with plastic sheeting. Apply painter’s tape along walls where they meet the trim. Use a putty knife to press tape edges down firmly. This prevents paint from bleeding under the tape. For carpet, tuck tape between the baseboard and flooring using the putty knife blade. Lay drop cloths on floors, especially under areas you’ll be painting. Plastic works for temporary protection, but canvas drop cloths absorb spills better. They also stay in place without sliding around. Check your work area for adequate lighting. Poor lighting hides brush marks and uneven coverage until it’s too late to fix easily. Prepare the Trim Clean trim removes dirt and grease that prevent paint adhesion. Use a damp cloth with mild soap for most cleaning. Kitchen trim may need degreasing cleaner to remove cooking residue. Fill holes and cracks with spackling compounds. Push the compound into holes using a putty knife, then scrape excess flush with the surface. Let it dry completely before sanding. Sand all trim surfaces lightly with 120-grit sandpaper. This creates texture for better paint adhesion. For previously painted trim, focus on glossy areas that need dulling. Sand with the grain on wood trim to avoid cross-grain scratches. New trim needs special attention. Factory finishes often resist paint. Sand lightly with 220-grit paper to remove the sheen without creating deep scratches. Remove sanding dust with a tack cloth. Regular rags just push dust around. Tack cloths pick up fine particles that could create rough spots in your finish. Caulk gaps between trim and walls using paintable acrylic caulk. Apply steady pressure while moving the caulk gun along the joint. Smooth the bead with your finger dipped in water for clean lines. Prime the Trim Primer creates a uniform surface for paint adhesion. Skip primer and your paint may peel, especially on glossy surfaces or raw wood. Use oil-based primer for maximum adhesion on glossy surfaces. Water-based high-adhesion primers work well for most situations and clean up easier. Spot-prime knots and stains first, then prime the entire surface once dry. Apply primer with smooth, even strokes. Start with the detailed areas using an angled brush. Work primer into grooves and profiles completely. For wide, flat trim, use a mini roller for speed, then brush out roller marks. Don’t overload your brush. Dip only the bottom third of bristles into the primer. Tap excess off on the container rim rather than wiping on the edge, which removes too much primer. Allow the primer to dry according to manufacturer instructions. Most primers dry in 2-4 hours, but cure time affects paint adhesion. Wait the full recommended time before painting. Sand lightly between coats if the primer raises the wood grain. Use 220-grit paper with light pressure. Remove dust before applying paint. Paint the Trim Quality paint makes the biggest difference in your final results. Semi-gloss paint works best for most trim applications. It resists moisture and cleans easily without showing every fingerprint like high-gloss paint. Benjamin Moore Advance or similar high-quality paints level well and resist brush marks. These paints cost more but save time with better coverage and easier application. Load your brush properly for smooth application. Dip bristles about one-third into the paint. Gently tap the brush on the container sides to remove excess. Don’t wipe the brush on the rim, which removes too much paint. Start painting in less visible areas to warm up your technique. Apply paint in 2-3 foot sections using smooth strokes. Paint detailed areas first with the angled brush tip, then fill in flat surfaces. For wide baseboards, use a mini roller to apply paint quickly, then immediately brush out roller texture with light strokes. This technique combines speed with a smooth finish. Maintain a wet edge while painting. This means overlapping into wet paint as you work along the trim. Stopping and starting in the middle of a board creates lap marks that show in the final finish. Remove painter’s tape while the paint is still slightly wet. Pull tape at a 45-degree angle to prevent peeling. If paint has dried, score along the tape edge with a sharp knife before removing. Apply a second coat for full coverage and durability. Two thin coats look better and last longer than one thick coat.

September 4, 2025 Sdcustom No Comments

How to Paint a Brick Fireplace (Step-by-Step Guide)

Home / A brick fireplace can transform your living space from outdated to stunning with the right paint project. Many homeowners avoid this makeover because they think it’s too complex or permanent. The truth is that learning how to paint a brick fireplace is simpler than you might expect. Painting a brick fireplace gives you complete control over your room’s style. Whether you want a white painted brick fireplace for a modern look or bold colors for drama, this guide covers everything you need to know. We’ll walk through each step to ensure your painted brick fireplace ideas become reality. Should You Paint Your Fireplace? Painting your brick fireplace can completely change your room’s feel. A white brick fireplace creates a clean, timeless look that works with any decor style. Paint fireplace projects also cost much less than full renovations or stone replacements. However, painted brick requires more maintenance than natural brick. You’ll need to clean the brick surface regularly and touch up the paint every few years. Once you paint fireplace brick, removing the paint later requires significant effort and expense. Consider your long-term plans before starting. If you love the natural brick look, explore cleaning or staining options first. But if you’re ready for change, repainting brick fireplace surfaces offers endless design possibilities. What To Consider Before you paint a brick, examine your fireplace condition. Look for cracks, loose mortar, or damaged bricks that need repair. The face of the brick should be stable and clean for paint to adhere properly. Check your fireplace’s age and brick type. Older fireplaces may have lead paint that requires special removal procedures. Some brick types are more porous and need extra primer coats for even coverage. Consider your room’s lighting and size. Dark paint colors can make small rooms feel cramped, while light colors reflect more light. Think about how your fireplace paint choice will work with existing furniture and wall colors. Choosing the Right Paint Water based paints work best for brick fireplace projects. They allow the brick surface to breathe while providing excellent coverage and durability. Avoid oil-based paints on brick as they can trap moisture and cause problems. Look for high-quality acrylic latex paints designed for masonry surfaces. These paints resist heat better and maintain their color longer. Premium brands like Benjamin Moore’s Advance or Sherwin Williams ProClassic offer superior coverage and longevity. Consider the paint’s sheen level carefully. Flat or matte finishes hide imperfections in the brick but show dirt more easily. Eggshell or satin finishes clean easier but highlight surface texture. Semi-gloss works well in high-traffic areas but may look too shiny on large brick surfaces. Choosing a Color White brick remains the most popular choice for painted brick fireplaces. It brightens rooms, works with any decor style, and creates a classic look that won’t go out of style. Pure white, cream, and off-white shades all work well. Gray tones offer sophisticated alternatives to white painted brick fireplace designs. Light gray creates subtle elegance, while charcoal adds drama. Black paint creates bold focal points but works best in larger rooms with good lighting. Don’t overlook colorful options for your painted brick fireplace ideas. Deep blues, forest greens, or rich burgundy can create stunning focal points. Test color samples on a small brick section first to see how the porous surface affects the final color. Painted Fireplace Before and After A well-executed paint project transforms dated brick into a stunning focal point. Before photos typically show dark, outdated brick that makes rooms feel heavy and closed-in. After painting, the same fireplace becomes bright, fresh, and perfectly integrated with modern decor. White brick fireplaces particularly show dramatic transformations. The bright, clean surface reflects light throughout the room, making spaces feel larger and more open. Dark paint colors create equally impressive results by adding sophisticated drama to neutral rooms. Document your transformation with before and after photos. These images help you appreciate your hard work and can inspire future home improvement projects. Supplies You’ll Need Gather all materials before starting your paint fireplace project. You’ll need drop cloths, painter’s tape, plastic sheeting, and newspaper to protect surrounding areas. Invest in quality materials to ensure professional results. For surface preparation, get a stiff wire brush, vacuum cleaner, cleaning solution, and scrub brushes. TSP (trisodium phosphate) works well for deep cleaning, but test it on a hidden area first. Paint supplies include high-quality primer designed for masonry, your chosen paint, brushes, and rollers. Use angled brushes for detail work and roller to apply paint to larger areas. Get extension poles for high areas and small brushes for tight spaces around the face of the brick. How to Paint a Brick Fireplace Step 1: Prepare the Work Area Cover floors and furniture with drop cloths or plastic sheeting. Remove fireplace screens, tools, and decorations. Use painter’s tape to protect mantel edges, surrounding walls, and any areas you don’t want painted. Open windows for ventilation and turn off your HVAC system temporarily to prevent dust circulation. Good airflow helps paint dry properly and keeps fumes from building up. Step 2: Clean the Brick Surface Start with a wire brush to remove loose debris from mortar joints and brick surfaces. Pay special attention to corners and crevices where soot and dirt accumulate. Vacuum all loose material using a brush attachment. Mix cleaning solution according to package directions. Scrub the entire brick surface with a stiff brush, working the cleaner into all mortar lines. Rinse thoroughly with clean water and allow it to dry completely. This step is crucial for paint adhesion. Step 3: Make Necessary Repairs Fill cracks in mortar joints with appropriate filler. Smooth the surface and allow repairs to cure according to manufacturer instructions. Sand any rough spots smooth once dry. Check for loose or damaged bricks that need professional attention. Small chips can be filled and sanded, but major damage requires expert repair before painting. Step 4: Apply Primer Use a brush to apply primer to all mortar joints first.

September 3, 2025 Sdcustom No Comments

How to Paint a Ceiling Like a Pro – Complete Guide

Home / Painting a ceiling might seem scary, but it’s easier than you think. Many homeowners avoid this project because they worry about drips, neck pain, and uneven coverage. The truth is, learning how to paint a ceiling properly can transform any room and brighten your entire space. With the right tools and techniques, painting ceilings becomes a manageable weekend project. This guide covers everything from choosing the best tools for painting a ceiling to applying the final coat like a pro. What You Will Need to Paint a Ceiling Before you start painting ceilings, gather these essential supplies: Paint and Primers: Flat ceiling paint (white or your chosen color) High-quality primer for stained or dark surfaces Behr ceiling paint offers excellent coverage and durability Brushes and Rollers: 9-inch paint roller frame Roller covers with 1/2-inch nap for smooth ceilings 3/4-inch nap rollers for textured ceiling paint applications 2-inch angled brush for cutting corners Extension pole (4-8 feet adjustable) Preparation Materials: 2-inch painter’s tape (avoid 1-inch tape) Plastic or canvas drop cloths Paint tray with disposable liners Ladder or step stool Sandpaper (120-grit for minor imperfections) Safety Equipment: Safety glasses or goggles Hat or head covering Non-slip shoes Dust mask for sanding Cleaning Supplies: Vacuum with brush attachment Microfiber cloths Mild detergent Spackling compound for crack repairs Prep the Ceiling and Room for Painting Proper preparation determines your project’s success. Start by removing all furniture from the room or moving it to the center. Cover remaining items with drop cloths. Clean your ceiling thoroughly using a vacuum with a soft brush attachment. Pay special attention to corners where dust collects. For textured ceiling paint preparation, use gentle strokes to avoid damaging the texture. Check for cracks, holes, or water stains. Fill small cracks with spackling compounds and let dry completely. Sand any rough spots with 120-grit sandpaper. Water stains need primer before painting to prevent bleed-through. Turn off electricity to ceiling fixtures at the breaker box. Remove light fixtures and ceiling fans if possible. If removal isn’t practical, tape around them carefully with painter’s tape. Put Down Drop Cloths Quality drop cloths protect your floors and furniture from paint splatters. Canvas drop cloths work better than plastic because they absorb paint instead of spreading it around. Lay drop cloths with at least 12-inch overlaps. Tape them to baseboards so they stay in place while you work. Don’t skip this step – ceiling painting creates more drips than wall painting. For rooms with hardwood or tile floors, use canvas drop cloths. Plastic works fine over carpet but can be slippery. Consider using both: plastic under canvas for extra protection. Tape the Tops of the Walls Use 2-inch painter’s tape along the wall where it meets the ceiling. This width gives you enough protection when using a paint roller on ceiling surfaces. One-inch tape leaves walls vulnerable to roller marks. Press tape edges firmly to prevent paint seepage. Remove any air bubbles by running your finger along the edge. Quality tape costs more but saves time on touch-ups later. If you’re painting the entire room, paint the ceiling first or walls first? Always start with the ceiling. This prevents wall paint from getting on your fresh ceiling work. Prime the Ceiling and Cut the Corners Priming ensures even paint coverage and better adhesion. Use latex primer for most ceilings. Choose oil-based primer for water stains or smoke damage. Shellac-based primers work best for severe stains. Apply primer with the same technique you’ll use for paint. Start by cutting in corners and edges with your angled brush. Paint a 2-inch strip around the entire perimeter. Load your brush with primer but don’t overdo it. Too much primer creates drips. Work in sections and maintain a wet edge to avoid lap marks. For textured ceilings, use a brush with firm bristles that can work into the texture. Take your time with corners – these areas show imperfections most clearly. Paint in Sections With a Roller Now comes the main event: using a paint roller on ceiling surfaces. The easiest way to paint a ceiling is working in 4-foot by 4-foot sections. This keeps your edges wet and prevents lap marks. Start in a corner and work away from the main light source. Roll in a “W” pattern first, then fill in with parallel strokes. This technique distributes paint evenly and reduces roller marks. Keep consistent pressure on the roller. Too much pressure creates streaks. Too little leaves thin coverage. Roll slowly to minimize spattering. Here are key ceiling painting tips for roller technique: Don’t roll directly overhead – work at an angle Overlap each section by 6 inches while the edge is still wet Reload your roller frequently for consistent coverage Vary your final stroke direction slightly to hide seams Use your extension pole for most of the work. This saves your neck and gives you better control than stretching from a ladder. Adjust the pole length as needed for comfort and reach. Add a Second Coat as Needed and Clean Up Most ceilings need two coats for complete coverage. Check your work once the first coat dries completely. Look for thin spots, streaks, or areas where the old color shows through. Apply the second coat using the same technique. Work quickly and maintain wet edges. The second coat usually goes on easier and covers more smoothly than the first. While the final coat dries, clean your tools. Wash rollers and brushes in warm soapy water immediately. Clean paint trays and store unused paint properly. Remove painter’s tape while the paint is slightly damp but not wet. Pull tape at a 45-degree angle for clean lines. Touch up any areas where tape pulled away paint. Reinstall light fixtures once paint is completely dry. Turn power back on at the breaker box and test all fixtures before finishing up. Tips for Painting a Ceiling These professional tips on painting a ceiling will help you achieve better results: Color and Paint Selection: White ceiling paint

Translate »