Most paint jobs don’t fail because of the paint. They fail because of what happened or didn’t happen before the roller ever touched the wall.
If you’ve ever repainted a room only to watch it chip at the corners a few months later, or noticed brush marks bleeding under your tape line, the problem almost never traces back to the color you picked. It traces back to how to prep a room for painting, and specifically, whether that prep happened in the right order.
Table of Contents
ToggleThis guide walks through that order clearing, cleaning, repairing, taping, priming and explains why each step exists, not just what to do. By the end, you’ll know exactly what a proper room preparation looks like, what corners you can cut and which ones cost you later, and how to tell when a job is actually a job for a professional.
Why the Order Matters More Than the Steps
Here’s what a decades of walking into other people’s “finished” prep jobs teaches you: almost every callback we get traces back to sequence, not effort. Someone taped before they cleaned. Someone primed over spackle that wasn’t fully cured. Someone sanded after they’d already vacuumed the room. Each of those choices seems minor in the moment. On the wall, six weeks later, they’re the difference between a clean edge and a paint line that’s already lifting.
Preparing a room for painting is a dependency chain. Clean walls let patches bond. Cured patches and flush. Flush surfaces let tape seal properly. Sealed tape gives you a crisp line. Skip a link, and the chain doesn’t break where you skipped it — it breaks further down, usually right when you thought you were done.
Step 1: Clear and Protect the Room
Before anything touches a wall, the room itself needs to be empty enough to work in and protected everywhere it isn’t being painted.
- Move furniture to the center of the room or out entirely anything you can’t move, pull at least three feet from the walls.
- Remove switch plates, outlet covers, and any wall-mounted hardware. Bag the screws by fixture so you’re not hunting for them later.
- Lay canvas drop cloths, not plastic, across the floor. Plastic is slippery underfoot and doesn’t absorb drips; canvas does both jobs at once.
- Cover remaining furniture and light fixtures with plastic sheeting, taped at the top so it doesn’t slide.
- Kill the HVAC to that room while you work, or at least close the vents moving air pulls dust back onto anything you’ve just cleaned.
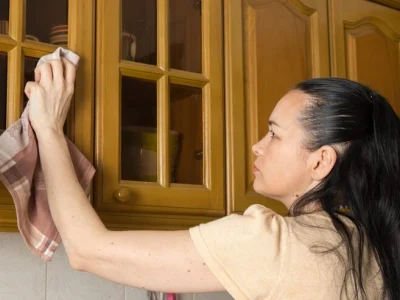
Step 2: Clean Every Surface You're Painting
This is the step almost everyone underestimates, and it’s the one that determines whether your paint actually bonds or just sits on top of the wall looking fine until it doesn’t.
Walls collect a layer of oil, dust, and in kitchens and bathrooms grease and moisture residue that’s invisible until paint hits it and beads or drags. A dry duster won’t touch that.
- Start high and work down: dust ceilings, corners, and crown molding first so debris falls onto areas you’ll clean next, not areas you already cleaned.
- For general dust and cobwebs, a microfiber cloth or vacuum brush attachment handles it.
- For kitchens, bathrooms, or any wall with visible grime, mix a TSP (trisodium phosphate) solution or a TSP-substitute cleaner and wipe walls with a sponge, rinsing as you go. TSP cuts through grease and oil in a way plain water and soap can’t.
- Let walls dry completely before moving to patching painting or patching a damp wall traps moisture under the new surface.
Step 3: Prep Walls for Paint — Patch, Sand, Repeat
This is the heart of prep walls for paint, and it’s where “best way to prep walls for painting” searches usually land, because it’s genuinely the step people get wrong most often.
- Fill nail holes, dents, and hairline cracks with a lightweight spackle, applied with a flexible putty knife just proud of the surface.
- For anything larger than a coin, a doorknob dent, a chunk of missing drywall use a setting-type joint compound or a drywall repair patch kit instead of spackle, which shrinks and cracks under its own weight in bigger repairs.
- Let each layer cure fully before sanding. Sanding wet compounds just smears it; you’ll be back at square one.
- Sand with a fine-grit sanding sponge (150–220 grit) until the patch is flush to the touch, not just flush to the eye run your palm flat across it with your eyes closed.
- Vacuum the dust, then wipe the wall down with a barely damp cloth. Sanding dust left behind will telegraph through your first coat as a slightly rough, dull patch.
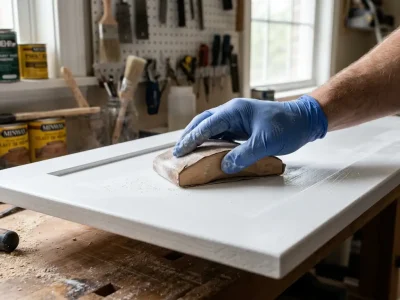
If the Walls Are Already Painted and Glossy
Preparing painted walls for painting has one extra requirement most guides skip entirely: new paint doesn’t grip a glossy old finish. If the existing wall is semi-gloss or high-gloss, scuff-sand the entire surface lightly with 220-grit sandpaper or use a liquid deglosser, then wipe clean. Skip this and you’ll get peeling at stress points, door frames, corners, anywhere the wall takes contact within the first year.
A Word on Lead Paint
If your home was built before 1978, treat any peeling, chipping, or sanded paint as a potential lead hazard until tested. Lead-safe practices wet sanding, HEPA vacuum cleanup, containment aren’t optional in older housing, and in some jurisdictions they’re legally required for contractors. This is one area where “I’ll just wing it” isn’t worth the risk to your family’s health. If you’re unsure, a certified lead inspector or an EPA RRP-certified painting contractor can test and handle it safely.
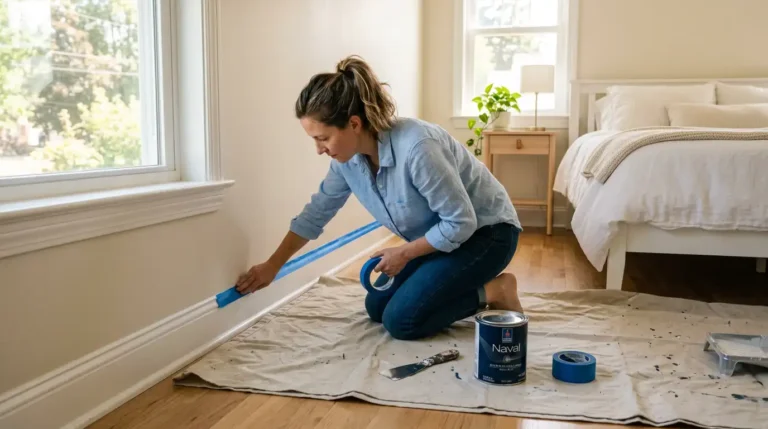
Step 4: How to Tape a Room for Painting
Taping happens last, right before paint not early in the process, which is a mistake we see constantly. Tape applied over dusty, unsanded, or unwiped surfaces doesn’t seal. Paint bleeds underneath it, and you end up with a fuzzy edge instead of a clean line.
Here’s how to tape a room for painting so the line actually holds:
- Use painter’s tape rated for the surface and time frame, a 14-day tape for a weekend project, a delicate-surface tape for wallpaper or fresh paint underneath.
- Apply in manageable strips (12–18 inches), pressing from the center outward to avoid trapping air bubbles.
- Run a flexible putty knife or credit card along the tape edge to seal it completely this single move prevents more bleed-through than any other technique.
- Tape trim, window and door frames, ceiling lines, outlet covers, and any fixture you didn’t remove.
- Pull tape at a 45-degree angle while the final coat is still slightly tacky, not fully dry this gives you the cleanest release and avoids peeling paint off with the tape.
Step 5: Prime — And Know When You Actually Need To
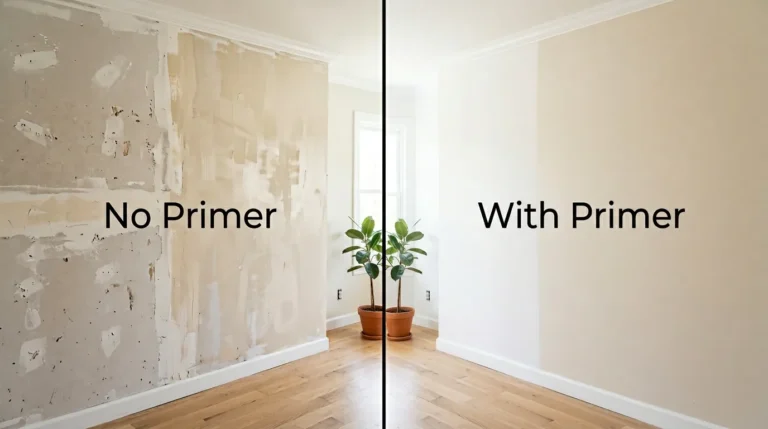
Priming isn’t always required, but skipping it in the wrong situation is one of the more expensive mistakes in room preparation.
You need primer when you’re:
- Painting over a dark or saturated color with a lighter one
- Covering bare or repaired drywall (patches absorb paint differently than the surrounding wall, and it shows without primer)
- Painting over stains, smoke damage, or water marks
- Switching from oil-based to latex paint
You can usually skip it when you’re repainting a similar color on a wall already in good condition with matching sheen.
You may also want to read these posts:
DIY vs. Professional Prep: A Real Comparison
Factor | DIY Prep | Professional Prep |
Time for an average 12×14 room | 4–8 hours, often spread over a weekend | 1–2 hours as part of a scheduled job |
Tools/materials cost | $80–$150 (tape, spackle, sanding supplies, drop cloths) | Included in service quote |
Lead paint safety (pre-1978 homes) | Requires separate testing and lead-safe practices | Handled to EPA RRP standards as part of the job |
Risk of surface issues (bleed-through, peeling, uneven texture) | Higher depends on experience with sequencing | Lower sequence and technique are second nature |
Best for | Small rooms, confident DIYers, flexible timelines | Cabinets, high-gloss trim, older homes, tight timelines |
Myth vs. Fact: Room Prep Edition
- Myth: “One coat of primer fixes any wall condition.”
- Fact: Primer helps with absorption and color coverage, but it doesn’t fix texture problems, doesn’t replace sanding, and won’t stop peeling if the underlying surface wasn’t cleaned or deglossed first.
- Myth: “You can tape right after patching, before sanding.”
- Fact: Tape applied over unsanded patches seals against a bump, not a flat wall paint will bleed at the raised edge every time.
What 26+ Years of Prep Work Actually Teaches You
Having handled hundreds of room preps across San Diego’s coastal climate, the single most common issue we walk into isn’t bad paint choices, it’s rushed sequencing. Marine layer humidity slows dry times more than most homeowners expect, which means a “cured” patch at hour two might still be soft at hour four.
We’ve built our process around testing patches by touch, not by the clock, because a schedule doesn’t know what your wall actually feels like. That’s the kind of detail a checklist can’t teach you, but it’s the difference between a paint job that looks good on day one and one that still looks good in year three.
Where This Leaves You
Room preparation isn’t the exciting part of a paint job, but it’s the part that determines whether the exciting part, the color, the finish, the transformation actually lasts. Clean, patch, sand, tape, prime, in that order, and you’re set up for a job that holds up. Skip the sequence and you’re setting up next year’s touch-up project today.
Paint technology keeps improving better adhesion primers, lower-VOC formulas, faster cure times but the fundamentals of room preparation haven’t changed much in decades, and they’re not likely to. Get the prep right and the paint does the rest.
If you’re staring down a room with glossy trim, cabinetry, or an older home that might need lead-safe handling, that’s exactly the kind of job where professional prep earns its keep. SD Custom Painting handles that groundwork daily across San Diego.
Frequently Asked Questions About How to prep a room for painting
How long does it take to prepare a room for painting?
For an average bedroom or living room, expect 4–8 hours of DIY prep, spread across cleaning, patching, drying time, sanding, and taping. Larger rooms, glossy surfaces, or extensive repairs push that toward a full weekend.
Do I need to wash walls before painting if they look clean?
Yes. Oils and fine dust build up invisibly and interfere with adhesion even on walls that look spotless. A quick wipe-down with a mild cleaner or TSP solution is worth the extra 20 minutes.
What’s the best tape for painting trim and edges?
A 14-day painter’s tape works for most residential jobs. For delicate surfaces like wallpaper or freshly painted walls, use a low-tack “delicate surface” tape to avoid pulling up the finish underneath.
Can I skip sanding if the walls look smooth?
Only if there’s been no patching or repair work. Any spackle, joint compound, or filler needs sanding to sit flush — otherwise it’ll show as a slightly raised or dull patch once painted.
How do I know if my home has lead paint?
Homes built before 1978 are the general risk window. A lead test kit from a hardware store gives a quick read, but for any renovation involving sanding or removal, a certified lead inspector is the safer call.
Is it worth hiring a professional just for room prep?
For small, simple rooms — often not. For older homes, glossy cabinetry, high-traffic trim, or anything involving lead paint, professional prep usually pays for itself in avoided rework and safety compliance.