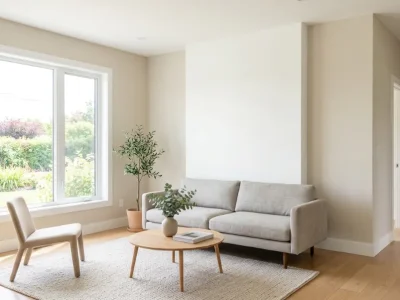
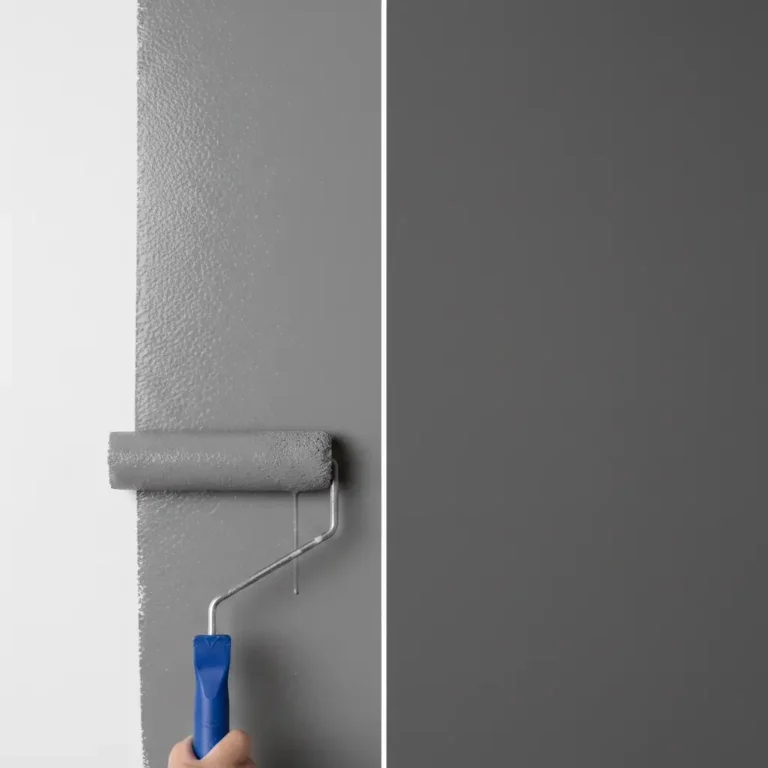
You spend hours at the paint store. You pick the right shade. The color sample looks great. After you come home and roll it on the wall, you start to worry. Will it match after it dries?
Here’s the truth: does paint dry darker or lighter depending on what type you’re using, but most paints darken as they dry. Wet paint contains solvents that make it look lighter. As these solvents evaporate, the true color appears. The good news? Once you understand how different paints behave, you can choose confidently and avoid expensive do-overs. This guide explains why colors shift, which factors matter most, and exactly how to test before committing to a full room.
Table of Contents
Toggle
Key Takeaways
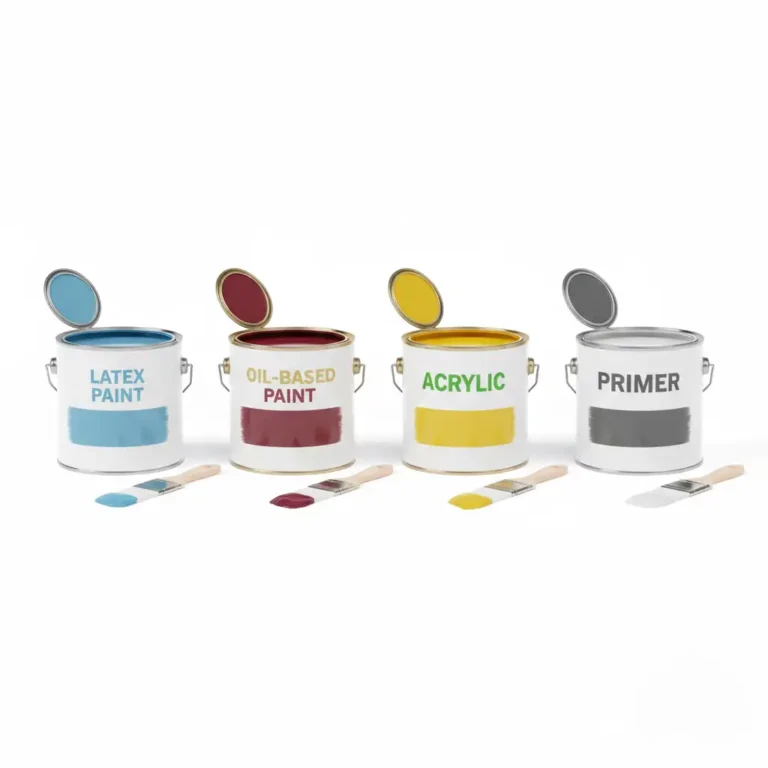
There are clear reasons why paint colors vary. Water-based paints like latex typically dry darker than they appear when wet. Oil-based paint goes through oxidation, which deepens the color over several days. Acrylic paint shows the least change between wet and dry stages.
Your paint finish affects perception too. Gloss finishes reflect more light, making colors appear richer and darker. Matte finishes absorb light, creating a softer, sometimes lighter look. The primer you choose matters just as much. White primer under dark colors requires extra coats and may lighten your final result.
How quickly liquids evaporate depends on the temperature and the humidity. When it’s hot, things dry more slowly, and the end result is often darker colors. Low humidity makes things go faster, but it can also damage the surface. There’s no need to guess when you test items in your own room, with your own lights.
Does Paint Dry Darker or Lighter?
The answer varies by paint type and chemical composition.
Latex paint is water-based and used in most homes. It appears lighter when wet because water makes the surface more reflective. As the paint dries over 1-2 hours, water evaporates and the pigment concentration increases. This makes the wall touch up paint look darker than when you first applied it. A gallon runs $25-$50 for standard grade.
Oil-based paint behaves differently. It contains more pigment density and dries through oxidation rather than evaporation. As oil molecules react with oxygen, the paint darkens and becomes more opaque. This process takes 6-8 hours for touch-dry and up to two weeks for full cure. Expect to pay $40-$70 per gallon for quality oil-based paint.
Acrylic paint dries fastest with minimal color shift. The quick drying time (20-30 minutes) means less opportunity for dramatic changes. What you see early on closely matches the final result. This water-soluble paint works well for cabinets, trim, and metal surfaces. Professional grade costs $30-60 per gallon.
Do paints dry darker or lighter as a general rule? Most darken slightly. A fully cured surface should match the manufacturer’s paint swatch. Any major differences usually stem from application errors, environmental conditions, or using the wrong primer.
4 Factors That Impact Paint Color as it Dries
Type of Paint
Each paint formula contains different solvents and pigments. These chemicals determine drying behavior and final appearance.
Latex paint dominates interior projects because it cleans up with water and has low odor. The drying process releases water vapor, which changes how light hits the surface. Fresh latex appears lighter and more reflective. After 24 hours, the water is gone and you see true color depth. Use it for ceilings, walls, and low-traffic areas.
Oil-based paint creates harder, more durable finishes. The high pigment concentration means colors appear richer from the start. The oxidation process continues for days, gradually deepening the shade. This paint works best in bathrooms, kitchens, and hallways where surfaces take abuse. The longer drying time requires patience but delivers superior results.
Acrylic paint combines fast drying with color stability. The paint film forms quickly as water evaporates, locking pigments in place. This stability makes it ideal when you need predictable results. Professional painters choose acrylic for trim work and details where precision matters.
Type of Finish
Paint sheen changes light reflection, which tricks your eyes about actual color.
Flat or matte finishes have rough surfaces at the microscopic level. They scatter light in multiple directions rather than reflecting it straight back. This diffusion makes colors appear softer and lighter. Flat paint hides wall imperfections well but shows scuff marks easily. Use it in bedrooms and low-traffic spaces.
Satin and eggshell finishes sit in the middle. They reflect some light while absorbing the rest. These finishes show true color most accurately. Most rooms benefit from satin because it balances durability with appearance. Eggshell works in living areas where you want subtle warmth.
Gloss finishes act like mirrors. They create specular reflection, bouncing light directly back to your eyes. This concentrated reflection makes colors look deeper and more saturated. Semi-gloss and high-gloss paints appear darker than the same color in flat finish. Use gloss in bathrooms and on trim where easy cleaning matters.
Primer Color
The base coat under your paint affects coverage and final appearance more than most people realize.
White primer works great under light colors. It provides a neutral foundation for pastels, creams, and soft yellows. The reflective white base helps these delicate shades maintain their brightness. Using white primer under dark colors creates problems. The contrast means you need 3-4 coats for full coverage, wasting time and money.
Gray primer serves dark and bold colors better. It reduces the number of topcoats needed from four to two. The neutral gray base prevents the paint from looking washed out. Professional painters often tint primer to match the topcoat for optimal results. This costs an extra $5-10 per gallon but saves on total paint needed.
Tinted primer blocks old colors from bleeding through. If you’re covering dark red with light beige, tinted primer prevents the red from showing. This ensures color accuracy and maintains the integrity of your new shade.
Surface Porosity
Different materials absorb paint solvents at different rates.
Porous surfaces like bare drywall or concrete soak up moisture quickly. This speeds surface drying but can cause uneven color development. Paint may dry darker in some spots and lighter in others. Always seal porous surfaces with primer before painting. A gallon of primer covers 350-400 square feet and costs $20-35.
Non-porous surfaces like previously painted walls allow even drying. The paint sits on top rather than soaking in. This produces consistent color across the entire surface. Lightly sand glossy surfaces before repainting to improve adhesion.
Wood surfaces fall somewhere between. Softwoods absorb more than hardwoods. Use a wood primer to seal the grain and prevent blotchy results.
How Temperature and Humidity Affect Paint Shade
Environmental conditions control how solvents evaporate from wet paint.
The ideal painting temperature ranges from 50-85°F. Within this zone, paint dries at the expected rate and reaches true color. Cold temperatures below 50°F slow solvent evaporation dramatically. Paint takes longer to dry and may appear darker because pigments settle during the extended drying time. Worse yet, paint may never cure properly in very cold conditions, leading to peeling or cracking months later.
Hot temperatures above 85°F create different problems. The surface layer dries too fast while inner layers stay wet. This causes an uneven appearance and can lead to cracking or blistering. The color may look lighter initially but develops issues as it cures. Professional painters avoid working in extreme heat.
Humidity between 40-70% provides optimal conditions. High humidity slows down solvent evaporation because moisture in the air prevents paint solvents from escaping. This extended drying time often results in darker final colors. Paint may stay tacky for hours longer than expected, increasing the risk of streaks or dust contamination.
Low humidity speeds drying, sometimes too much. Rapid evaporation can cause surface defects. The top layer may dry before the paint levels out, leaving visible brush marks or an uneven texture. Run a humidifier in very dry conditions to slow things down.
San Diego’s mild climate (average 65-75°F with 60% humidity) creates near-perfect painting conditions year-round. This local advantage means fewer environmental variables to worry about.
5 Tips for Ensuring You Choose the Right Shade
Test Paint Samples Properly
Buy a sample size of your chosen color. Most stores sell 8-ounce samples for $5-8. Paint a 2×2 foot section on the actual wall, not just a small corner or piece of cardboard.
Apply the same number of coats you plan for the full room. Use the same application method (brush, roller, or sprayer). This gives the most accurate preview. Many people skip this step and regret it after painting an entire room.
Does white paint dry darker or lighter than you expect? Test it to know for sure. White paints can shift toward cream or blue depending on artificial lighting in your space.
Wait 24 hours for latex paint and 48-72 hours for oil-based paint before judging. The wet paint color means nothing. Only the fully dried sample shows what you’ll get.
View Samples in Multiple Lighting Conditions
Paint looks different throughout the day. Check your sample in morning natural light, afternoon sun, and evening artificial light.
Natural daylight reveals the truest color. North-facing rooms get cooler light that can shift colors toward blue. South-facing rooms receive warm afternoon sun that brings out yellow and red tones. East and west-facing rooms change dramatically between morning and evening.
Artificial lighting matters just as much. LED bulbs with different color temperatures (measured in Kelvin) alter paint appearance. Warm white bulbs (2700-3000K) make colors look more yellow. Cool white bulbs (4000-5000K) add blue tones. Test your sample with the actual bulbs you’ll use in that room.
Mix Paint Thoroughly
Paint pigments settle to the bottom during storage. Without proper mixing, early applications look lighter while later sections appear darker.
Use a mixing stick or drill attachment to stir paint for 3-5 minutes. If using multiple gallons of the same color, box them together. Pour all cans into a large bucket, mix thoroughly, then pour back. This ensures color consistency across all walls.
Old paint doesn’t perform like fresh paint. Check the manufacture date on the can. Paint sitting for over a year may have separated or developed problems that affect final color.
Use Quality Tools
Cheap brushes and rollers leave marks that affect how paint looks when dry. Low-quality tools don’t distribute paint evenly.
Invest in synthetic brushes for water-based paint ($10-20) and natural bristle brushes for oil-based paint ($15-30). Use 3/8-inch nap rollers for smooth walls and 1/2-inch nap for textured surfaces.
Quality tools cost more but deliver better results. They also last through multiple projects, saving money over time.
You may also want to read this: best paint brush for trim
Apply Thin, Even Coats
Thick paint increases drying time and creates color inconsistencies. Heavy areas dry slower and darker than thin spots.
Load your brush or roller properly without overloading. Apply paint in smooth, overlapping strokes. Maintain a wet edge by working in manageable sections. This prevents visible lap marks where wet paint meets dry.
Does paint get darker as it dries between coats? Yes, which is why proper technique matters. Wait for the first coat to dry completely before adding the second. Rushing between coats causes poor adhesion and uneven color.
A second coat usually makes the color look stronger and more saturated. The first coat covers most of the surface but some primer still shows through. Light passes through this thin layer and bounces off the base. A second coat blocks this light penetration, making colors appear truer and deeper.
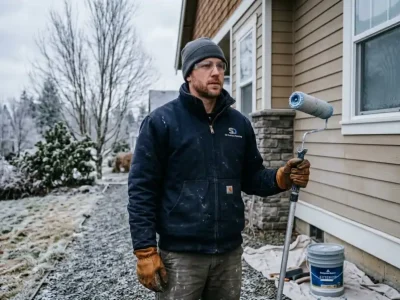
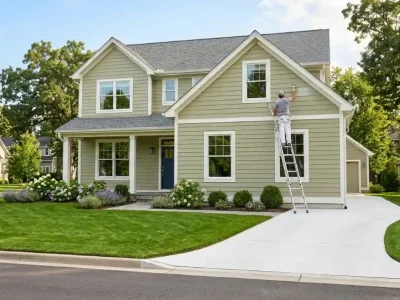
Hire a Professional Painter to Refresh Your Home
Some projects need expert hands. Complex color matching, large-scale work, or time constraints make professional help worth the investment.
San Diego Custom Painting offers interior and exterior painting services in San Diego with color consultation to eliminate guesswork. Our team has 27+ years of experience helping homeowners achieve exactly the look they want. We understand how different paints behave in San Diego’s climate and can recommend the best products for your specific project.
Professional painters bring proper equipment, quality materials, and proven techniques. We prep surfaces correctly, apply primer when needed, and ensure even coverage. This attention to detail prevents the common problems that cause color disappointment.
The average cost for professional interior painting in San Diego runs $2-6 per square foot, depending on room size and complexity. A standard 12×12 bedroom costs $400-800 for two coats. This includes labor, materials, and surface preparation. While DIY might save money, mistakes can cost more to fix than hiring professionals from the start.
Summary
Paint color changes during drying happen for specific chemical reasons. Water-based paints typically dry darker as solvents evaporate. Oil-based paints darken through oxidation. Acrylic paints show minimal change.
The finish you choose affects color perception. Gloss finishes reflect light and appear darker. Matte finishes absorb light and look lighter. Temperature and humidity control drying speed, which impacts final appearance.
Testing samples in your actual space, under your actual lighting, removes uncertainty. Use proper primer, quality tools, and correct application techniques. These steps help ensure your walls match your vision.
For guaranteed results on larger projects, professional painters bring expertise that prevents costly mistakes. Whether tackling a single room or whole-house refresh, understanding how paint behaves helps you make confident color decisions.
FAQs About Does Paint Dry Darker or Lighter
Does paint change color as it dries?
Yes, most paints show some color shift during drying. Water-based paints typically darken slightly as water evaporates. The change is usually subtle with quality paint applied properly.
Why does wet paint look different from dried paint?
Wet paint contains solvents that make the surface more reflective. This extra reflection tricks your eyes into seeing lighter colors. As the paint dries and loses moisture, it becomes less reflective and appears darker.
How long should I wait to judge the final paint color?
Wait at least 24 hours for latex paint and 48-72 hours for oil-based paint. Some paints need several days to fully cure and reach their final appearance. Judging color too early leads to wrong conclusions.
Will adding a third coat make my paint even darker?
Usually no. After two coats, you’ve achieved full opacity. Additional coats rarely change color significantly. They may alter surface texture or sheen slightly but not the actual shade.
Can I fix paint that dried the wrong color?
Yes, light sanding and repainting usually solves the problem. First identify why it dried wrong (bad primer, poor conditions, old paint). Fix the underlying issue before applying new paint.
Does expensive paint dry truer to color than cheap paint?
Higher-quality paint contains better pigments and more consistent formulas. Premium brands ($50-70 per gallon) typically show less color variation than budget options ($20-30 per gallon). The extra cost often prevents frustration.
How does lighting affect paint color?
Lighting dramatically impacts color perception. Natural light shows the truest color. LED bulbs with different color temperatures can make the same paint look warmer or cooler. Always test samples under your actual room lighting.
Should I always use primer before painting?
Yes, primer improves adhesion, coverage, and color accuracy. Skipping primer usually requires extra topcoats and may result in inconsistent final color. The small primer cost ($20-35 per gallon) prevents bigger problems.