
Kitchen cabinets are a wonderful thing in any kitchen, but replacing them can be a project that is both time-consuming and expensive. The best thing about these cabinets is that you can change their appearance and feel without having to strip old paint, no fuss.
Can You Paint Over Old Painted Kitchen Cabinets Without Sanding?
Yes, this is a standard method if the cabinets have quality paint. They should not have significant peeling paint, bubbles, or other defects.
Table of Contents
ToggleThe main rule when preparing the cabinet for painting is to ensure the surface is up to standard. It should be clean and free of any grease or oil from the kitchen. Not removing the mentioned substances will cause the new paint to peel and bubble.
Another thing to consider is that a good bonding primer may allow the new paint to adhere to the old one without sanding.
All the same, the phrase “without sanding” does not mean “without any preparation.” In order to achieve a professional result, cabinets need to be cleaned, repaired, and primed.
What Supplies Are Required to Paint Kitchen Cabinets Without Sanding?
To start with, let us tell you about a few things you may need to have available before you get started on the job. You may want to keep several items within reach.
List of materials includes:
- paint for cabinets or furniture
- premium bonding primer
- degreaser
- warm water
- microfiber cloths
- screwdriver
- painter’s tape
- paint brush
- foam roller
- paint tray
- drop cloth or plastic sheeting
- wood filler for cabinet repairs
- caulk for cabinet repairs
- sanding sponge or fine-grit sandpaper for filling or sanding damaged areas
- new cabinet hardware, if you wish to replace the old hardware
Open a can of paint designed for cabinets, doors, or furniture, as it will give you a much more durable finish than most interior wall paints.
Step 1: Remove Cabinet Doors and Hardware
Before you can begin to paint cabinets without sanding, the first thing you have to do is ensure that you have all of your supplies ready and your workspace prepared.
Take off all cabinet doors, drawer fronts, knobs, pulls, and hinges. Removed hardware can be placed in labeled bags or containers to remember which pieces belong to which areas. Cabinet doors should be placed on a drop cloth or other protected surface. It will be easier to paint the cabinet doors separately rather than trying to paint them while attached to the cabinet.
Painter’s tape can be used to mark the cabinet doors and indicate their location on the respective cabinet.
Step 2: Clean the Cabinets Thoroughly
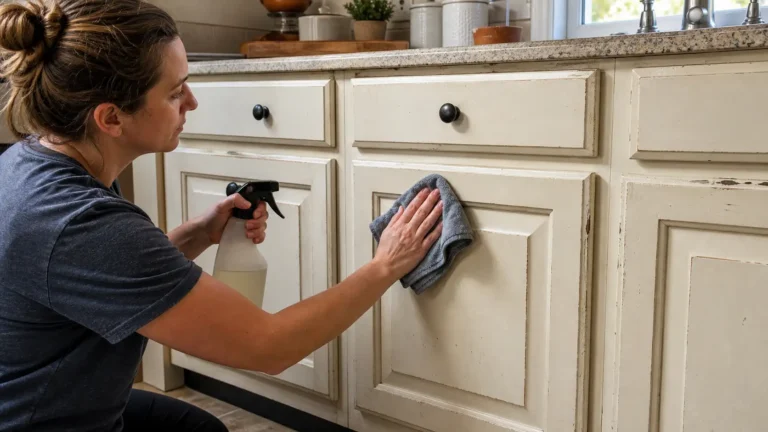
Cleaning the cabinets is the second most critical step in preparing to paint kitchen cabinets without sanding.
There may be more grease and residue on the cabinet surface than meets the eye. Not removing the grease results in the newly applied paint peeling.
Apply a suitable degreasing agent, and allow it to work its way into the cabinet’s crevices and gaps. Be sure to treat the cabinet doors, drawer fronts, frames, and edges.
Rinse the cabinets with clean water if the selected degreasing agent requires it. After that, dry the cabinets completely.
Step 3: Inspect and Repair the Existing Finish
Now, carefully examine the cabinets. You are looking for any imperfections such as:
- Peeling paint
- Cracks
- Chips
- Dents
- Loose areas
- Deep scratches
- Damaged corners
If the old paint is in good condition, meaning most of it is well-adhered to the surface, you can leave it alone. Paint that is coming off on its own or is not sticking to the wood should be removed before you proceed to other steps of your project. Fill all of the cabinet dents and holes with good-quality filler. When the filler has dried, you may want to sand the fixed areas. Do not sand the whole cabinet; only sand the damaged spots until you get the desired smoothness.
Step 4: Apply a Bonding Primer
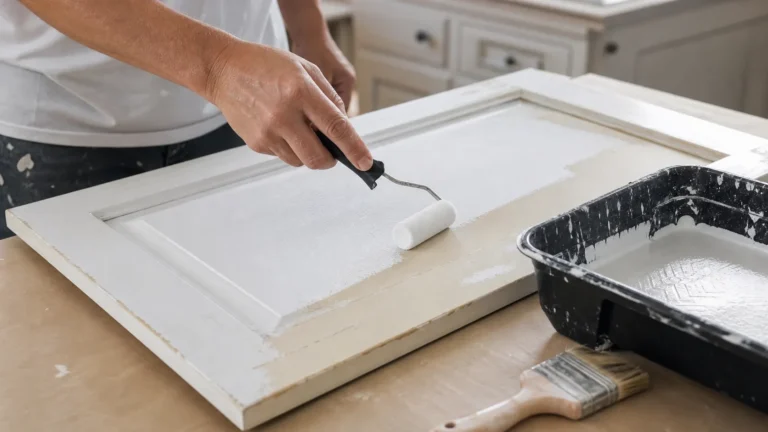
If you are wondering how to repaint kitchen cabinets without sanding, then a bonding primer is one of the best products you can choose for your project. It is made to stick to the toughest surfaces and prepare them for a new layer of paint. Use a good brush or a foam roller to apply primer. Make sure not to apply thick layers of primer since they will drip and ruin the final result. Pay special attention to all the corners, edges, and grooves, as well as the hardware parts. Let the primer dry. The manufacturer will indicate how much time you should wait before you apply the next coat of primer or paint.
Step 5: Paint the Cabinets
After the primer is dry to the touch, it’s time to apply the topcoat.
Make sure to stir the cabinet paint well before use. Always use a quality brush for edging and detail work and a foam roller on large flat areas.
Apply thin, even coats rather than trying to apply an excessively thick coat.
Most cabinet painting projects require two or more thin coats of paint rather than one thick coat. Be sure to let each coat dry before applying the next one.
Don’t over-brush wet paint. If you continue to brush or roll an area after the paint has started to dry, you will see brush marks in the finish.
Step 6: Painting the Cabinet Frames
Don’t forget to paint the cabinet frames. After painting the doors and drawer fronts, turn your attention to the cabinet frames.
Apply painter’s tape to walls, countertops, appliances, and any other surfaces you don’t want to paint.
Always work from big items to small items. Apply thin, even coats of paint and allow ample drying time between coats.
Step 7: Let the Paint Cure
One mistake that people tend to make when painting cabinets without sanding is using them before the paint cures.
While the paint might feel dry, it takes time for it to cure and harden enough to be used regularly. The curing process makes the coating resistant to regular use.
Be sure to let the paint cure according to the manufacturer’s instructions before putting hardware back on or using them regularly.
Avoid slamming doors or putting pressure on the cabinets during the curing process.
Tips for Getting Better Results Without Sanding
To get an ultra-professional paint finish on your project, follow these tips:
1. Don’t forget to clean the surface
Before you start, make sure that you properly clean the surfaces to be painted. Dirt, grease, or oil will keep the paint from sticking to the surface.
2. Invest in some cabinet paint products
You can’t paint cabinets the same way that you would paint interior walls. Cabinet paint is generally more durable than regular interior paint because it has to stand up to the daily wear and tear of being used.
3. Paint in thin coats
Painting in thin coats will reduce brush strokes, drips, and overall unevenness.
4. Get the right tools for the job
A high-quality brush and foam roller can make a world of difference.
5. Don’t paint over damaged paint
If there are any bare spots, old paint that’s coming off in flakes, or other signs of surface damage, stop and repair the damaged area before proceeding. Priming a chipped or pitted surface will never give you the durability or adhesion of a properly prepared surface.
6. Take your time
Even more importantly, allow the paint to cure fully before testing it by reinstalling doors or hardware.
You may also want to read these articles:
What Are the Benefits of Painting Cabinets Without Sanding?
The benefit of skipping the cabinet sanding process is that you’ll save both time and effort.
Painting your kitchen cabinets without sanding is easier on your back and reduces the mess and dust that you’ll typically get when sanding.
It’s also a good way to refresh your kitchen if you’re not up for the effort of sanding your cabinets or if your cabinets are in decent condition to begin with.
When Should You Still Sand Kitchen Cabinets?
While this method requires no sanding, there are a few instances where sanding may still be required.
If the existing paint is peeling, bubbling, cracked, or extremely glossy, you may need to perform additional steps. In addition, any rough patches, gouges, or hardened drips of paint should also be sanded down as well.
For the most part, you should not have to sand your kitchen cabinets extensively for this method. However, bear in mind that you will still need to sand down any rough edges or bumps on the cabinets as well. For best results, focus on sanding only the spots that you noticed during your inspection of the cabinets. This will allow for a much smoother surface to paint on.
Common Mistakes to Avoid
When trying to learn how to paint kitchen cabinets without sanding, do not make the following mistakes.
- Skip the cleaning process: Paint will not stick to greasy surfaces.
- Use the wrong type of paint: Use only cabinet paints since they are formulated to resist more wear and tear than wall paints.
- Do not apply thin coats of paint: Thick layers of paint will run and take longer to dry.
- Do not use a primer: Primer helps paint to stick, especially if there was paint on the surface.
- Do not replace doors right away: Give the paint some time to cure before using the cabinet doors.
- Do not paint over chipped surfaces: New layers of paint will not adhere to the chipped and broken old paint.
Final Thoughts
You might be wondering how to paint old kitchen cabinets that have been painted before without sanding them. Well, sanding can be avoided in most cases with a few critical steps, and this guide should help.
First, remove all the hardware and the doors, then clean and repair the cabinets. Apply a bonding primer coat, followed by multiple thin layers of quality cabinet paint. Let it dry and cure for the recommended amount of time, and then reinstall the doors and hardware.
It may not work on all cabinets, but there is a good chance that you will be able to refresh the cabinets with new paint without spending hours sanding. If you are looking for a professional finish in San Diego, San Diego Custom Painting provides expert cabinet painting services.
Frequently Asked Questions
Is it possible to paint old painted kitchen cabinets without sanding?
Yes, it is possible to paint over old painted cabinets without sanding if they are in good condition. Make sure that the surface is properly cleaned and degreased, all defects are repaired, and a bonding primer is applied before you start painting.
What is the best paint for kitchen cabinets without sanding?
A cabinet or furniture paint usually provides the best results. Be sure to read and follow all of the manufacturer’s instructions related to priming, painting, drying, and curing.
Do I need primer when painting cabinets without sanding?
Ideally, you want to apply a bonding primer to prepare the cabinets for the new paint, as it will help the paint stick to the cabinets and last longer.
How many coats of paint do I need for kitchen cabinets?
For most cases, two or more thin coats are better than one thick coat. Also, make sure to let the coating dry completely (the instructions on the paint can will indicate how long to wait) before applying the second coat.
How long do I need to cure painted kitchen cabinets?
Depending on the paint, it could take up to several weeks for the cabinets to cure. As a general rule, always follow the manufacturer’s recommendation. Drying time is different for various kinds of paint.