Most cabinet paint jobs don’t fail because of the paint. They fail because of what happened or didn’t happen before the paint ever touched wood.
If you’ve ever seen painted cabinets chip around the handles within a year, that’s not bad luck. That’s a skipped step. Knowing how to paint kitchen cabinets properly means treating prep, primer, and cure time as seriously as the color you pick and that’s exactly what we’ll walk through below, from stripping the old sheen to choosing between a sprayer and a brush.
Table of Contents
Toggle
Why This Is the Highest-Value Weekend Project in Your Kitchen
Cabinetry eats up roughly 30 to 40% of a typical kitchen remodel budget, and it’s usually the single biggest line item in the whole project since cabinetry is the largest single expense in a kitchen remodel, typically consuming 30-35% of the total budget. Full replacement means new boxes, new doors, and a contractor tearing your kitchen apart for weeks. Painting the cabinets you already have skips almost all of that cost while delivering nearly the same visual reset.
That math shows up in the resale data too. Industry cost-versus-value tracking has repeatedly found that minor kitchen refreshes the category cabinet painting falls into return more of their cost than full remodels, with recent reporting putting minor kitchen updates among the highest-recouping interior projects homeowners can take on minor kitchen remodels return around 113% of their cost, the highest of any interior project tracked.
A full gut renovation, by contrast, tends to recoup roughly a third to a little over half of what’s spent; major upscale kitchen remodels typically return only about 40-55% of the investment at resale. You don’t need to be selling your house for this math to matter; it just tells you that cabinet paint is one of the few home projects where the effort-to-payoff ratio is genuinely lopsided in your favor.
Do You Actually Need to Sand Your Cabinets First?
It depends on the finish you’re starting with, not on shortcuts you’ve seen online.
- Factory-finished wood, laminate, or thermofoil cabinets have a slick, non-porous surface. Paint won’t grip it without either light scuff-sanding or a chemical deglosser breaking down that sheen first.
- Bare or previously painted wood with a dull, worn finish may only need a thorough cleaning and a bonding primer no sanding required.
- Cabinets with wax, silicone polish, or heavy grease buildup (common above the stove) need degreasing before anything else, or the primer will fail regardless of sanding.
A liquid deglosser sometimes called a liquid sander can replace hand-sanding on smooth factory finishes. It chemically etches the surface so a bonding primer has something to hold onto. It’s not magic, though: it doesn’t fix gouges, doesn’t level out old brush marks, and won’t help on textured or heavily worn wood, where hand-sanding with 120- to 220-grit paper still gives the most reliable bite.
How to Paint Kitchen Cabinets: The Full Step-By-Step Process
1. Clear the Space and Remove the Doors
Take off every door and drawer front. Number each one with painter’s tape (and a matching number on the cabinet frame) so you’re not guessing where anything goes back. Remove hinges, knobs, and pulls painting around hardware is where amateur jobs reveal themselves fastest.
Important:
Skipping prep is the main reason painted cabinets peel, chip, or feel sticky. Even “no-sand” products work best on a clean, dull, stable surface.
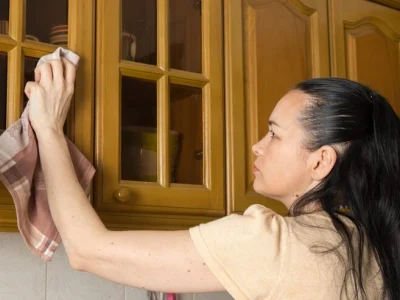
2. Degrease, Then Clean
Wipe every surface with a degreaser or TSP (trisodium phosphate) substitute before you do anything else, especially near the stove and sink. Skipping this step is the single most common reason paint peels in the first six months, because grease sits invisibly under the primer and never lets it bond.
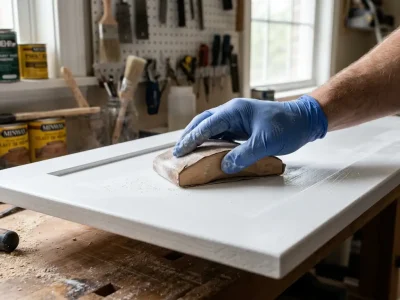
3. Sand or Deglos
Scuff-sand glossy or factory-finished surfaces with 120- to 220-grit sandpaper, or apply a liquid deglosser if you’re avoiding dust. Either way, wipe down with a tack cloth afterward leftover dust under the primer creates a gritty, unprofessional texture.
4. Fill and Repair
Use wood filler on dents, old hardware holes, or deep scratches. Let it cure fully, then sand it flush. This step is easy to rush and impossible to fix later without stripping the whole finish back down.
5. Prime
This is the step that determines whether your paint job lasts two years or ten. Use a bonding primer designed for glossy or non-porous surfaces — shellac-based primers dry fastest and block stains and odors best, while water-based bonding primers are lower-odor and easier to clean up. One coat is usually enough; two is safer on dark-to-light color changes or heavily stained wood.
6. Paint — In Thin, Even Coats
Two to three thin coats beat one thick one every time. Thick coats look fine going on and then sag, drip, or stay soft for weeks. Let each coat dry to the touch before the next (check your can most cabinet enamels need 1 to 4 hours between coats), and always paint doors flat, not standing up, to avoid drips pooling at the bottom edge.
7. Cure Before You Reassemble
Dry time and cure time are not the same thing, and this is where most DIY cabinet jobs go wrong. Paint can feel dry to the touch in a few hours but still be soft underneath for two to three weeks. Reattaching doors, closing them against the frame, or setting a heavy pot on a painted surface before it’s fully cured is how you get chip marks and permanent tackiness. Give cabinet doors at least 24 hours before rehanging and avoid heavy use for the full cure window listed on your paint can often 14 to 30 days.
You may also want to read these articles:
Choosing the Right Paint, Sheen, and Applicator
Factor | Best Choice | Why |
Paint type | Waterborne alkyd or urethane-modified acrylic enamel (e.g., cabinet-specific lines from major paint brands) | Levels out like oil paint, dries harder than standard wall paint, lower odor than true oil-based enamel |
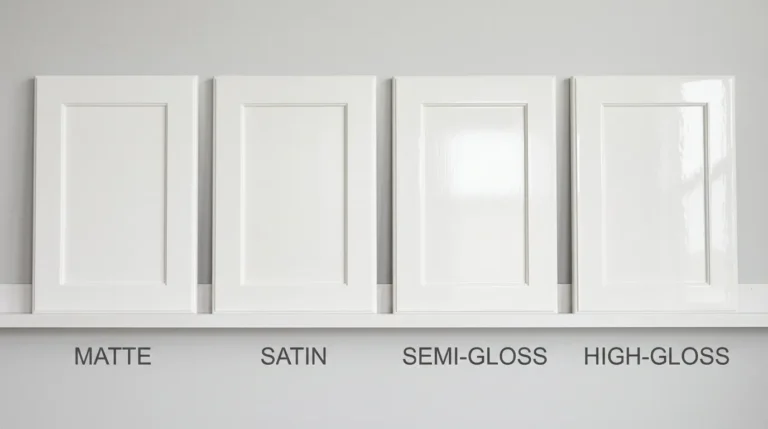
Sheen | Satin or semi-gloss | Wipeable and durable; high-gloss shows every imperfection in the substrate, flat/matte shows every fingerprint |
Applicator | Sprayer for doors, angled brush + foam mini-roller for boxes in place | A sprayer gives the smoothest, most factory-like finish but requires taping off the entire kitchen; brush-and-roller is more forgiving for beginners |
Cabinet material | Bonding primer required on laminate, thermofoil, and melamine | These surfaces are essentially plastic-faced — standard primer won’t adhere without one |
Myth vs. Fact
- Myth: “Paint-and-primer-in-one” products mean you can skip a separate primer coat on cabinets.
- Fact: Combination products are formulated for walls, not glossy cabinet surfaces. On cabinets, a dedicated bonding primer still outperforms an all-in-one every time — the adhesion problem a primer solves is different from the coverage problem a paint-and-primer product is built for.
What This Actually Costs: DIY vs. Professional
DIY materials for an average kitchen primer, cabinet-grade paint, sandpaper, tape, and applicators typically run $150 to $400, depending on kitchen size and paint brand. Add your own labor: a full weekend, sometimes two, plus the learning curve of your first coat looking noticeably worse than your third.
Professional cabinet painting costs more upfront but includes spray-quality finishes, correct cure scheduling, and a warranty most DIY jobs can’t offer themselves. If your cabinets have heavy wear, oil-based existing finishes, or you simply don’t have a place to store doors for two to three weeks while they cure, that’s usually the point where hiring out starts to pencil better than DIY both in time and in how long the finish holds up.
What 26+ Years of Cabinet Painting Actually Teaches You
The mistake we see most often isn’t a bad color choice, it’s homeowners rushing the cure window. A cabinet door can look completely finished four hours after the last coat and still be soft enough to dent with a fingernail. We’ve been called out to “fix peeling paint” more than once where the real issue was a door getting slammed shut on day three instead of day twenty-one.
The other pattern: skipping deglossing on thermofoil or laminate fronts because “the primer says no sanding needed.” Bonding primers are good, but they’re not a substitute for breaking the surface tension of a slick factory finish first. Every callback we’ve done for adhesion failure traces back to one of these two shortcuts.
The Bottom Line
Painting kitchen cabinets well comes down to three things: degreasing and prepping the surface properly, using a bonding primer suited to your cabinet material, and the step almost everyone underestimates respecting the full cure time before the doors go back into daily use. Get those three right and a $200-$400 weekend project can outlast cabinets that cost ten times as much to replace.
Paint trends and product formulas will keep shifting; waterborne alkyds are already replacing true oil-based enamels in most pro toolkits but the fundamentals of prep, primer, and patience aren’t going anywhere.
If your cabinets have heavy wear, oil-based finishes, or you’d rather skip the two-week cure-time waiting game altogether, SD Custom Painting offers professional cabinet painting services in San Diego with spray-quality finishes and a workmanship warranty. Reach out for a free estimate before you commit to a DIY weekend.
Frequently Asked Questions
Do I really need to sand my cabinets before painting?
Not always. Glossy or factory-finished surfaces need either light sanding or a liquid deglosser so paint has something to grip. Bare or already-dull painted wood can often skip sanding if it’s cleaned well and primed with a bonding primer.
What’s the best paint for kitchen cabinets?
Cabinet-specific enamels waterborne alkyd or urethane-modified acrylic formulas are the standard choice. They dry harder and level smoother than regular wall paint, which matters because cabinets get handled and wiped down far more than walls do.
How long before painted cabinets are fully cured?
Most cabinet enamels are dry to the touch within hours but need 14 to 30 days to fully cure. Rehang doors after 24 hours, but avoid heavy use, closing them tightly, or setting anything on them until the full cure window has passed.
Can I paint laminate or thermofoil cabinets?
Yes, but only with a bonding primer made for slick, non-porous surfaces. These materials are essentially plastic-faced, so standard primer and paint will peel without that extra adhesion step.
Is it cheaper to paint cabinets or replace them?
Painting is almost always cheaper. Cabinetry typically eats up 30-40% of a full kitchen remodel budget; painting the boxes and doors you already own captures most of the visual change at a fraction of that cost.
Should I spray or brush my cabinet doors?
Spraying gives the smoothest, most factory-like finish but requires taping off your entire kitchen and a real learning curve. Brushing with an angled sash brush and foam mini-roller is slower but far more forgiving for a first attempt.