Melamine cabinets look easy to paint. They’re smooth, flat, and clean. But if you grab a brush and go, the paint will peel within weeks. That’s the reality most guides skip. Learning how to paint melamine cabinets the right way means understanding why it fails first, and then doing the exact opposite.
Here’s the good news: you don’t need professional experience. You need the right prep, the right primer, and a bit of patience. This guide gives you all three. By the end, you’ll know exactly what to buy, what to skip, and how to get a finish that actually holds up.
Table of Contents
Toggle
Key Takeaways
- Melamine is plastic-coated. Standard paint won’t bond to it without proper prep.
- Bonding primer is non-negotiable. It’s the one step you cannot skip.
- Paint drying and paint curing are different. Full cure takes 2 to 3 weeks.
- Two thin coats always beat one thick coat.
- Sanding too hard breaks through the melamine layer. Light scuffing is all you need.
What Is Melamine?
Melamine, or Melamine Faced Chipboard (MFC), is a thin plastic resin layer fused onto a particleboard or MDF under high heat and pressure. The result is a smooth, non-porous surface that resists moisture, scratches, and stains. That’s why it’s the material of choice in budget kitchen cabinets, bathroom vanities, and flat-pack furniture.
The surface looks glossy and clean. It feels hard and cold, unlike wood grain. And because it’s non-porous, it doesn’t absorb paint the way wood or MDF does. That’s the core problem you’re solving with every step in this guide.
Melamine vs. Thermofoil: Which Do You Have?
Many cabinet doors are thermofoil, not melamine. Thermofoil is a flexible vinyl film heat-sealed over MDF. If your cabinet surface is peeling or lifting at the edges, that’s thermofoil. Melamine doesn’t peel. It chips.
Both can be painted using similar methods. The difference between melamine vs. thermofoil painting matters mostly at the edges. Thermofoil edges can lift near heat sources like dishwashers or ovens, so they need extra primer attention and careful prep.
Can You Paint Melamine Cabinets?
Yes, but be realistic about it. Painted melamine will never match the durability of the original factory finish. Melamine is plastic. Paint is paint. You’re improving the look, not fully restoring the surface.
That said, with the right products and process, repainting melamine cabinets can give you a clean, fresh result that lasts 5 to 8 years. For homeowners who want a DIY kitchen update without the cost of replacement, it’s a genuinely practical option.
How to Fix Chipped or Peeling Melamine Before Painting
If your cabinet door painting project involves peeling thermofoil, you must remove the loose plastic completely before painting the bare MDF underneath. If you have true melamine that has small nicks or missing edges, do not apply paint directly. The underlying particleboard core will absorb water from the paint, swelling like a sponge.
Instead, fill chips with a heavy-duty polyester wood filler or epoxy putty. Sand the patch flat with 180-grit sandpaper so it sits level with the surrounding plastic wear layer before you apply your primer.
Safety Considerations
Sanding melamine creates fine plastic dust. It’s dangerous to breathe. Before you start:
- Wear a proper dust mask or respirator, not a paper face covering
- Put on eye protection
- Open windows and run a box fan facing outward to pull air out
- Tape plastic sheeting around the work area to contain dust
- Keep children and pets out during sanding
Paint fumes also build up fast in enclosed kitchens. Keep the area ventilated throughout the whole project. This is a step most guides skip, and it matters for both health and paint quality.
What You'll Need
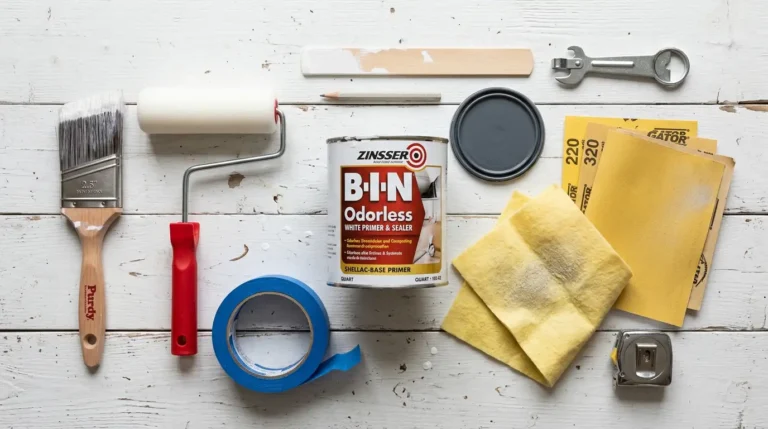
Tools:
- 150-grit or 180-grit sandpaper (for initial surface prep)
- 220-grit sandpaper (for between coats)
- High-density foam roller, 4 to 6 inches
- Synthetic bristle brush, 2 to 2.5 inches angled
- Tack cloth
- Lint-free cloths
- Painter’s tape and drop cloths
- Dust mask or respirator
- Work light (to check your sanding progress)
Materials:
- TSP substitute or strong kitchen degreaser
- Liquid deglosser (optional alternative to sanding)
- Bonding primer: Zinsser Bulls Eye 1-2-3 or Kilz Adhesion Primer
- Cabinet-grade paint (details below)
- Mineral spirits for oil-based cleanup if needed
How to Paint Melamine Cabinets: Step-by-Step Instructions
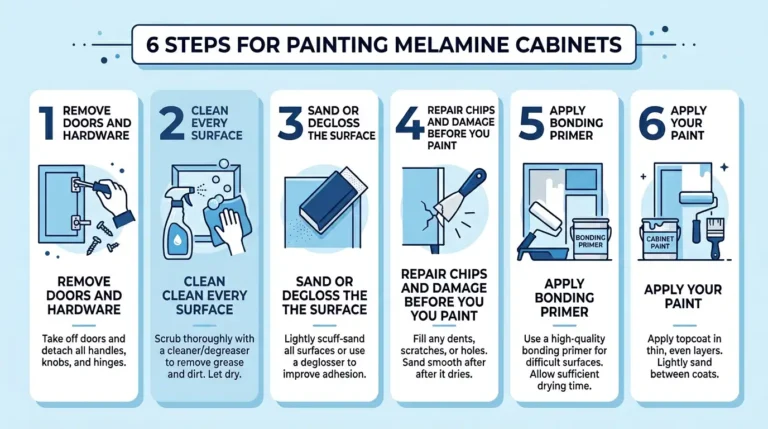
Step 1: Remove Doors and Hardware
Take off every cabinet door, drawer front, and piece of hardware. Label each door with masking tape so you know exactly where it goes back. Lay doors flat on a clean work surface. Painting them flat prevents drips and provides better coverage along all edges.
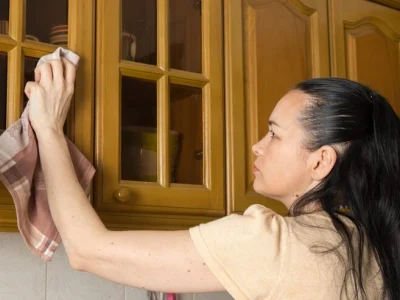
Step 2: Clean Every Surface
Melamine cabinets collect grease, cooking oil, and fingerprints. Paint won’t stick over any of it. Wipe down all surfaces with a TSP substitute or kitchen degreaser. Rinse with a damp cloth, then let everything dry for at least 1 hour before moving on. This step is cabinet surface preparation done right.
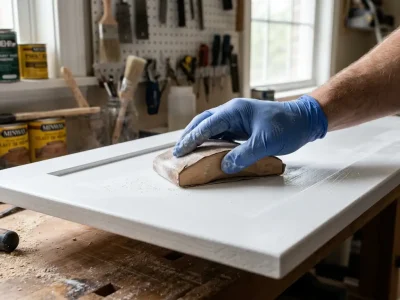
Step 3: Sand or Degloss the Surface
This is how to prep cabinets for painting on a non-porous surface. Use 150-grit or 180-grit sandpaper to lightly scuff every surface. You’re not trying to remove the melamine layer. You want to knock off the gloss and give the primer something to grip.
After sanding, wipe the entire surface with a tack cloth. Any dust left behind will show in the finished coat.
If you prefer a chemical method, apply a liquid deglosser with a lint-free cloth. It dulls the surface without abrasion. Sanding melamine before painting gives more reliable adhesion over time, but deglossing is a solid alternative if you’re careful.
Don’t sand too hard. Sanding too aggressively can break through the thin melamine layer, exposing the raw particleboard beneath. Once that happens, you have a much harder surface to deal with.
Step 4: Repair Chips and Damage Before You Paint
Check for chips, cracks, or dents on the edges. Fill them with lightweight wood filler or vinyl spackle. Let it dry completely, then sand smooth with 220-grit sandpaper. Skipping this step means those imperfections show through every coat you apply.
Step 5: Apply Bonding Primer
What happens if you skip primer on melamine? The paint has nothing to bond to. It will look fine for a week, then start lifting at the edges and corners. This is the number one reason melamine paint peeling happens in DIY projects.
Use a bonding primer specifically rated for glossy, non-porous, or laminate surfaces. Zinsser Bulls Eye 1-2-3 and Kilz Adhesion Primer are both proven options widely available at hardware stores.
Apply one thin, even coat. Use your synthetic bristle brush for edges and corners, and your high-density foam roller for flat panels. Let it dry fully (6 to 8 hours), lightly sand with 220-grit sandpaper, wipe clean, then apply a second thin coat.
Two thin primer coats give better coverage than one thick one. Thick primer gets uneven and takes far longer to dry.
Step 6: Apply Your Paint
Once the primer is fully dry, you’re ready to paint. Use long, even strokes. Don’t load your brush or roller too heavily. Thin coats dry faster and give a smoother result.
Let the first coat dry completely. Apply 2 to 3 coats total, sanding lightly with 220-grit sandpaper between each coat. This is how to avoid brush marks on melamine: apply thin coats, lightly sand, and use a high-density foam roller to level the surface.
Step 7: Cure Time Matters More Than Drying Time
The difference between paint drying and curing time is something most guides gloss over. Water-based enamel paint feels dry to the touch within hours. But the cure time for melamine paint is 2 to 3 weeks to reach full hardness.
During the cure period:
- Clean only with a damp cloth
- Don’t place heavy items on painted shelves
- Avoid any scrubbing or pressure on the surface
If you use your cabinets hard before they’re fully cured, the finish will scuff, scratch, and fail early. This single mistake causes more paint failures than anything else.
You may also want to read this: How to paint kitchen cabinets?
What Paint Should I Use on Melamine?
You cannot use ordinary acrylic latex paint meant for drywall. It is too soft and will scuff easily. You need a specialized coating designed for high-traffic cabinet surface preparation.
- Hybrid enamel paint: Formulations like Benjamin Moore Advance or Sherwin-Williams ProClassic flow out smoothly like oil paint but clean up with water. They offer excellent block resistance, which keeps cabinet doors from sticking to frames when closed.
- Urethane-reinforced paint: Products like INSL-X Cabinet Coat add extra toughness. The urethane resin cures to a rock-hard finish that resists chipping, scratching, and grease.
- Imported Specialties: If you are in the UK or importing materials, products like Johnstone’s Revive Cupboard Paint or Dulux Trade Quick Dry Satinwood are popular for direct-to-laminate projects, though a dedicated primer is still safer.
Application Tools: Brush or Roller?
For the best DIY kitchen update, use both a brush and a roller. Use a high-quality synthetic bristle brush for recessed panel details and edges. For flat door faces, a high-density foam roller cover or a microfiber mini-roller is best.
How to Avoid Brush Marks on Melamine
To keep your finish perfectly smooth, avoid overworking the paint. When using a foam roller, apply the paint evenly over a section, wait about 30 seconds for it to settle, then gently roll it back over with a dry, unladen roller. This is called laying off the paint. It pops tiny air bubbles and levels out the texture.
Can You Spray Paint Melamine Cabinets?
Yes, you can spray paint melamine cabinets if you own or rent an HVLP (High-Volume Low-Pressure) spray system. Spraying delivers an immaculate, smooth finish by eliminating brush and roller marks. However, spraying requires extensive masking with plastic sheeting and painter’s tape to protect the rest of your home from overspray.
How Humidity and Temperature Affect Paint Adhesion
Paint adhesion on smooth surfaces, such as melamine, is sensitive to room conditions.
Ideal range: 50 to 85°F, with humidity below 70%. High humidity slows drying and can cause paint to sag or wrinkle. Cold temperatures below 50°F prevent the paint from curing properly.
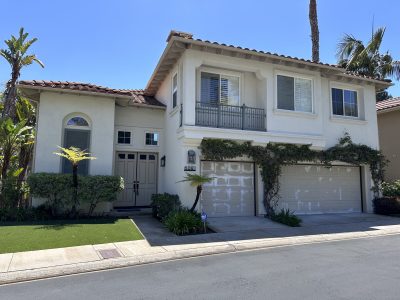
In San Diego, the climate is generally favorable for painting year-round. But on humid days, or if your kitchen steams up from cooking, ventilate well and wait for a drier window before applying coats.
Mistakes to Avoid When Painting Melamine Cabinets
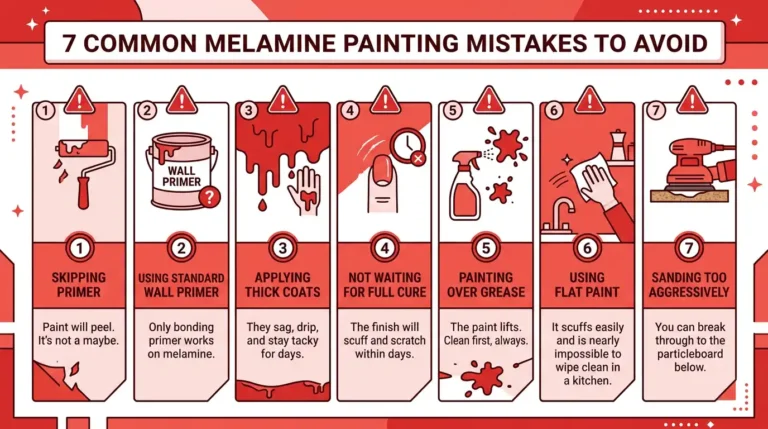
- Skipping primer: Paint will peel. It’s not a maybe.
- Using standard wall primer: Only bonding primer works on melamine.
- Applying thick coats: They sag, drip, and stay tacky for days.
- Not waiting for full cure: The finish will scuff and scratch within days.
- Painting over grease: The paint lifts. Clean first, always.
- Using flat paint: It scuffs easily and is nearly impossible to wipe clean in a kitchen.
- Sanding too aggressively: You can break through to the particleboard below.
Professional Alternatives: When to Paint vs. Replace
While repainting melamine is highly cost-effective, it is not always the best choice if the underlying cabinets are water-damaged, structurally sagging, or have a crumbling particleboard core.
If your cabinet boxes are structurally sound but you want a different door style, you might look into countertop resurfacing kits for nearby counters, or replace the doors entirely while painting the frames. Don’t forget that a simple cabinet hardware upgrade alongside repainting can make twenty-year-old cabinets look modern. For color choices, classic white, modern grey, and deep navy are excellent options for melamine cabinets, boosting home resale value.
If your kitchen cabinets have complex damage, structural sagging, or if you want a flawless, factory-grade finish without spending your weekends sanding plastic, hiring a local crew is the safest route to protect your investment.
When you want a perfect, long-lasting transformation without the DIY stress, turn to the pros at San Diego Custom Painting. We offer expert cabinet painting services in San Diego using industrial tools and commercial-grade finishes that stand up to years of heavy daily use. Contact San Diego Custom Painting today to schedule your professional design consultation and get a beautiful kitchen refresh done right.
FAQs About Painting Melamine Cabinets
Will paint stick to melamine without sanding?
It can withstand a strong bonding primer and liquid deglosser. But sanding melamine before painting gives more reliable adhesion over time. Try not to skip both.
What is the best primer for melamine cabinets?
Zinsser Bulls Eye 1-2-3 and Kilz Adhesion Primer are the most consistently reliable options for DIYers. Both bond well to glossy, non-porous surfaces.
How many coats of paint on melamine are needed?
Two to three coats of paint over one to two primer coats. Sand lightly with 220-grit sandpaper between each coat.
How long does melamine paint take to cure?
Water-based enamel feels dry within hours but takes 2 to 3 weeks to fully cure. Use the surface gently during that window.
Can you spray paint melamine cabinets?
Yes. Spraying gives the smoothest finish on flat melamine panels. Use an HVLP sprayer with a primer rated for smooth surfaces. Always practice on scrap material before working on your actual cabinets.
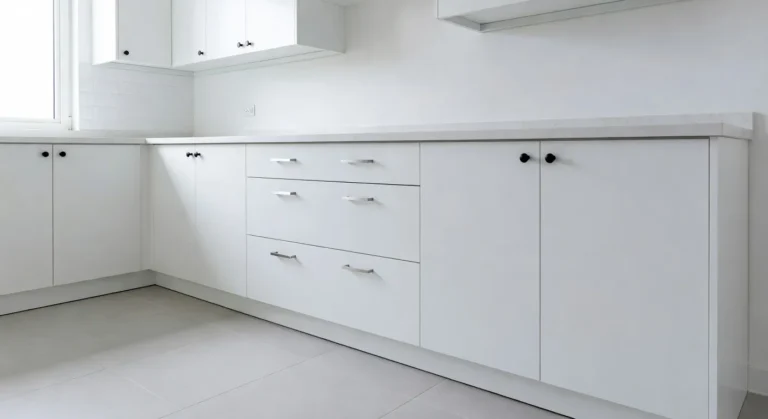
What color works well on melamine cabinets?
White and off-white are the most forgiving and timeless. Grey melamine cabinets suit modern and transitional kitchens well. Navy and deep blue work for bold, high-contrast looks. All of these pair well with satin or semi-gloss finishes for easier cleaning.