Project Overview
- Working Time: 4 to 6 hours
- Total Time: 1 to 3 days
- Skill Level: Beginner to Intermediate
- Estimated Cost: $50 to $120
- Coverage: Up to 15 sq ft
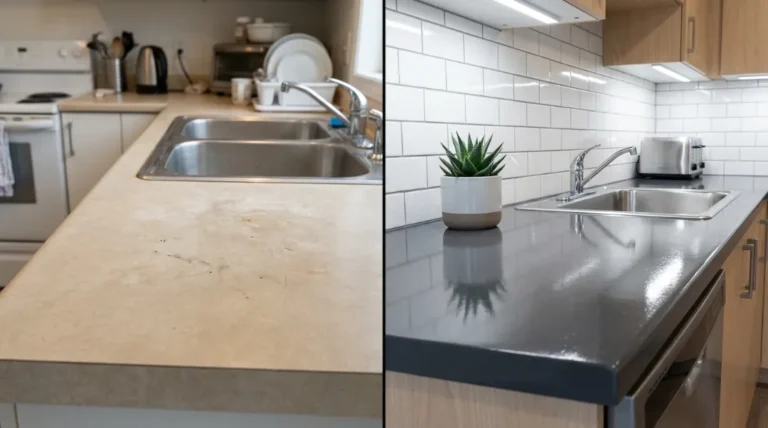
Your Formica countertops look dated. You know replacing them costs $1,500 to $3,000 or more. That feels like too much when the counters are still structurally solid.
Here is the good news. Learning how to paint Formica countertops is a real, manufacturer-approved solution. It costs under $120, takes a weekend, and delivers results that last 5 to 7 years with proper care. This guide covers every step, including what most other guides skip, so you get a finish that holds up.
Table of Contents
ToggleWhat Is Formica?
Formica is a brand name, not a material type. It is one of the most well-known brands of laminate countertops in the world.
Laminate is made from layers of kraft paper bonded together with synthetic resins under high heat and pressure. A decorative layer sits on top, followed by a hard protective coat. This makes Formica durable and affordable, but also creates a non-porous, smooth surface that resists paint adhesion by default.
This is important to understand before you start. The slick surface is your main challenge. Proper prep work solves it.
Is There a Difference Between Laminate and Formica?
All Formica countertops are laminate, but not all laminate countertops are Formica. Formica is simply a brand name for laminate. Both are built from layers of paper and resin. They are functionally the same product and are painted the same way.
Can You Paint Formica Countertops?
Yes. Painting Formica countertops is approved by the manufacturer as a valid way to update outdated, worn, or discolored surfaces. Since laminate cannot be re-laminated once installed, painting is the primary refurbishment option short of full replacement.
The result depends almost entirely on preparation and product selection. Skipping steps or using the wrong primer are the two most common reasons for painting Formica peels within months.
Materials to Use for Painting Formica
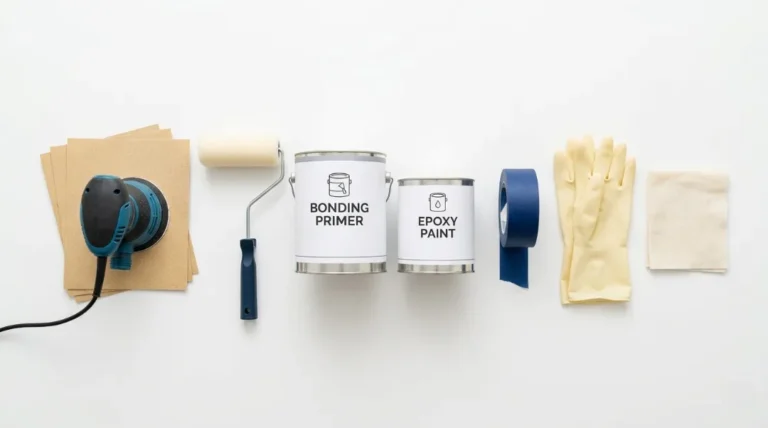
Choosing the right materials makes or breaks this project. Here is exactly what you need.
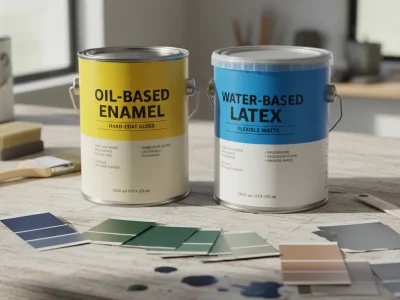
Best Paint for Formica Countertops
Epoxy-based paint is the top choice. It bonds well to non-porous surfaces and resists heat, moisture, and chipping better than any other option. Polyurethane paint is a solid second choice.
Avoid latex and lacquer paints. They do not adhere reliably to laminate surfaces and will chip or peel faster. For a stone-look finish, countertop kits like Giani Granite or Rust-Oleum Countertop Transformations include everything needed in one box.
Bonding Primer
You must use a bonding primer or shellac-based primer. Regular wall primers are made for porous surfaces like drywall. Formica is non-porous. A regular primer will not chemically bond to the surface and the topcoat will eventually fail.
Deep Cleaner
Formica recommends their own non-flammable contact adhesive solvent. Acceptable alternatives are acetone, rubbing alcohol (isopropyl), or ethanol. These remove embedded wax and grease that dish soap cannot reach.
Light Cleaner
Use liquid dish soap or an all-purpose cleaner for the initial surface clean. Avoid abrasive or scouring cleaners. They leave fine powder residue that interferes with adhesion.
Sealer
A food-safe polyurethane or epoxy clear coat is required as the final protective layer. Apply at least two to three thin coats. Without a sealer, the paint will not withstand daily kitchen or bathroom use.
Full Materials List
- Epoxy-based paint or countertop kit
- Bonding primer (shellac-based or bonding formula)
- Deep cleaner: acetone, isopropyl alcohol, or ethanol
- Light cleaner: dish soap or all-purpose cleaner
- 220 to 240 grit sandpaper
- Orbital sander
- High-density foam roller cover (designed for smooth surfaces)
- Small paintbrush for corners and edges
- Tack cloth
- Shop vacuum with brush attachment
- Painter’s tape
- Plastic sheeting and drop cloths
- Dust mask or respirator
- Gloves and eye protection
- Food-safe clear coat sealer
Estimated Cost Breakdown
Item | Estimated Cost |
Epoxy paint or kit | $30 to $60 |
Bonding primer | $10 to $20 |
Sandpaper and sander (if renting) | $5 to $15 |
Sealer | $10 to $20 |
Tape, cloths, supplies | $5 to $10 |
Total | $60 to $125 |
Safety Considerations
Wear a dust mask or respirator when sanding. Formica sanding dust is fine and irritating to the lungs. Open windows and point a box fan toward the outside to ventilate the room when using acetone, alcohol, or solvent-based cleaners. Wear gloves when handling deep cleaning chemicals.
How to Prep for Painting Formica Countertops
Prep is where 80 percent of the work happens. Do not rush this phase.
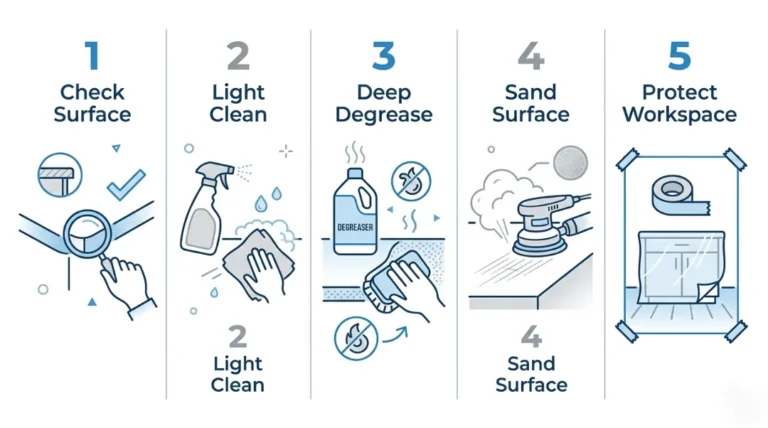
Step 1: Check the Surface
Inspect every inch of the Formica. Pay close attention to edges, seams, and the area around the sink. Press on the surface gently. If you feel any lifting, bubbling, or soft spots, those areas may not hold paint long-term. Small peeling sections can sometimes be re-glued with contact cement before proceeding.
If large sections are delaminating, painting may not give you a lasting result. In that case, replacement is the more practical choice.
Step 2: Light Surface Clean
Wipe the countertop with a damp cloth and mild dish soap. Clean in a circular motion. Rinse thoroughly with fresh water. Do not flood the surface, especially near seams and edges where water can penetrate and cause swelling.
Step 3: Deep Degrease
This step is critical and is often skipped. Kitchen countertops absorb cooking oils and wax over years of use. These are invisible but will prevent paint from adhering.
Apply acetone, isopropyl alcohol, or ethanol to a clean cotton cloth. Wipe the entire surface in a circular motion. Use a nylon-bristle brush on any stubborn stained areas. Rinse the surface again with clean water. Let it dry completely, at least 30 to 60 minutes.
Step 4: Sand the Surface
Attach 220 or 240 grit sandpaper to an orbital sander. Sand the entire Formica surface using light, even pressure. Let the weight of the sander do the work. You are not trying to remove the decorative layer. The goal is to dull the glossy finish so the primer has a surface to grip.
After sanding, use the brush attachment on a shop vacuum to remove the bulk of the sanding dust. Then wipe the entire surface gently with a tack cloth. Use light pressure only. Pressing hard with a tack cloth deposits beeswax on the surface, which creates the exact adhesion problem you are trying to avoid.
Can You Skip Sanding?
You can use a liquid deglosser instead of sanding. Products like Wilbond or similar liquid sandpaper chemically etch the surface to improve adhesion. This option works for Formica but is generally less reliable than physical sanding. If you use a deglosser, be thorough with cleaning and use a high-quality bonding primer. Note that liquid deglosser does not work on tile surfaces.
Step 5: Protect the Workspace
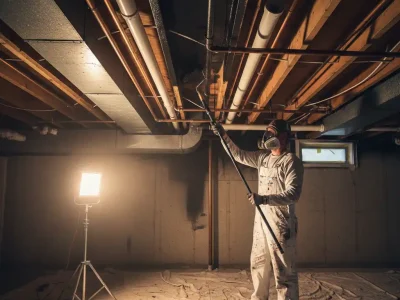
Apply painter’s tape around the backsplash, sink edges, and adjacent cabinets. Cover walls and cabinetry with plastic sheeting. Lay drop cloths on the floor. This step matters even more if you plan to use a paint sprayer.
How to Paint Formica Countertops: Step-by-Step Guide
With prep complete, you are ready to paint.
Step 1: Apply Bonding Primer
Pour your bonding primer into a tray. Use a high-density foam roller for flat sections and a small paintbrush for edges and corners. Apply a thin, even coat. Thin coats dry properly and bond better than thick ones.
Let the primer dry fully according to the manufacturer’s label. Do not guess on dry times. If the original Formica is dark, you may need two coats of primer to prevent the original color from bleeding through.
Step 2: Apply the Base Coat
Once the primer is completely dry, apply your first coat of epoxy paint or countertop kit paint. Use a clean foam roller and work in sections. Keep a wet edge as you go. This means always rolling into the section you just finished, not away from it. Keeping a wet edge prevents lap marks and roller lines.
Let the first coat dry to the manufacturer’s recommended recoat time. Even if the surface feels dry to the touch earlier, wait the full recommended time.
Apply a second coat. For painted Formica countertops in high-use kitchens, a third coat is worth the extra time.
Step 3: Add a Faux Finish (Optional)
If you want painted Formica countertops that look like granite or marble, this is where you add it. Countertop kits like Giani include accent color flecks or sponge techniques to mimic natural stone.
For a faux granite look, dab two to three accent colors using a sea sponge over the dry base coat. For a faux marble look, use a fine brush to paint irregular vein lines. Practice both techniques on a scrap board before touching the actual surface.
For a modern concrete finish, apply a trowel technique with a concrete-effect paint and seal with a matte clear coat.
Step 4: Apply the Protective Sealer
Once all paint layers are fully dry, apply a food-safe polyurethane or epoxy clear coat. This sealer is what makes painted formica kitchen countertops hold up to daily use.
Apply at least two to three thin coats of sealer. Let each coat dry to the recoat time on the label before applying the next. Pay extra attention around the sink area where water exposure is highest.
A high-gloss sealer mimics polished stone. A semi-gloss gives a more muted, modern look. Both work equally well for protection.
Step 5: Allow Full Cure Time
This is the most skipped step and the most important one. The paint and sealer may feel hard after 24 to 48 hours. But the chemical curing process takes 7 to 14 days to complete.
During the curing period, wipe only with a dry cloth. Do not place heavy objects on the surface. Do not use cleaning products. Do not cut directly on the surface. Rushing the cure is the single biggest reason DIY paint jobs fail within weeks.
You may also want to read this: How to Paint Kitchen Cabinets?
How to Care for Painted Formica Countertops
With good care, painting formica countertops can last 5 to 7 years. With lighter use or in bathrooms, it can last even longer.
- Wipe daily with a soft, damp cloth and mild dish soap.
- Never use abrasive cleaners, steel wool, or scouring pads.
- Always use a cutting board. Never cut directly on the painted surface.
- Always use trivets or heat pads under hot pans.
- Avoid leaving standing water near seams or the sink edge.
- Expect to touch up small areas every 2 to 3 years in high-use kitchens.
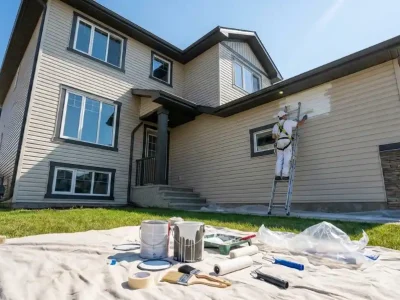
DIY vs. Hiring a Pro
Painting Formica countertops is a manageable DIY project for anyone with basic home improvement skills. The steps are straightforward. The tools are easy to find. The cost is under $125.
That said, there are situations where hiring a professional makes sense. If you have a large kitchen with complex countertop shapes, deep damage near the sink, or if sanding in an enclosed space is not practical, a professional will get better results faster.
Companies that specialize in reglazing and resurfacing, like Miracle Method, often offer countertop painting and refinishing as a service. For homeowners in Southern California, the team at San Diego Custom Painting provides professional interior painting services in San Diego including specialty surface refinishing for kitchens and bathrooms. A professional job typically costs $200 to $500 depending on countertop size and surface condition, compared to your $60 to $125 DIY cost.
The tradeoff is time and skill. If you follow every step in this guide, the DIY result can look just as good.
Final Words
Painting Formica countertops is one of the most cost-effective home upgrades available. For under $125 and a weekend of work, you can transform dated laminate into a surface that looks fresh, modern, and well-maintained. The key is preparation, the right materials, and patience during the curing phase. Get those three things right and your painted countertops will hold up for years.
FAQs About Painting Formica Countertops
What kind of paint do you use on Formica?
Epoxy-based paint is the best paint for Formica countertops. It bonds reliably to the non-porous laminate surface and resists heat, moisture, and chipping. Polyurethane paint is a solid second option. Avoid latex or lacquer paints as they do not adhere well to laminate long-term.
Does painting Formica last?
Yes. A properly painted Formica countertop lasts 5 to 7 years with regular use and proper care. The two most critical factors are using a bonding primer and applying a durable clear coat sealer over the finished paint.
Can you use regular primers on Formica?
No. Regular wall primers are made for porous surfaces like drywall. Formica is non-porous and requires a bonding primer or shellac-based primer that chemically grips the slick surface. Using a regular primer will result in the topcoat peeling within months.
How long does the kitchen need to be out of use?
Active painting takes about 4 to 6 hours. You need 2 to 3 days for all coats to dry before light use. For full curing, allow 7 to 14 days before heavy use, cutting, or cleaning with products.
Can you paint countertops without sanding?
Yes, using a liquid deglosser or liquid sandpaper as an alternative. These products chemically etch the surface to improve primer adhesion. However, physical sanding with 220 to 240 grit sandpaper is more reliable and gives the primer a better mechanical grip. If you skip sanding, be extra thorough with degreasing and use the highest-quality bonding primer available.
How much does it cost to paint Formica countertops?
A complete DIY paint job costs between $60 and $125 depending on the products you choose. A countertop kit like Giani runs $50 to $75 and includes most materials. Hiring a professional typically costs $200 to $500.
What is the difference between Formica and laminate?
Formica is a brand name for laminate. All Formica countertops are laminate, but not all laminate is Formica. They are made the same way and painted the same way.