SD Custom Painting

September 3, 2025 Sdcustom No Comments

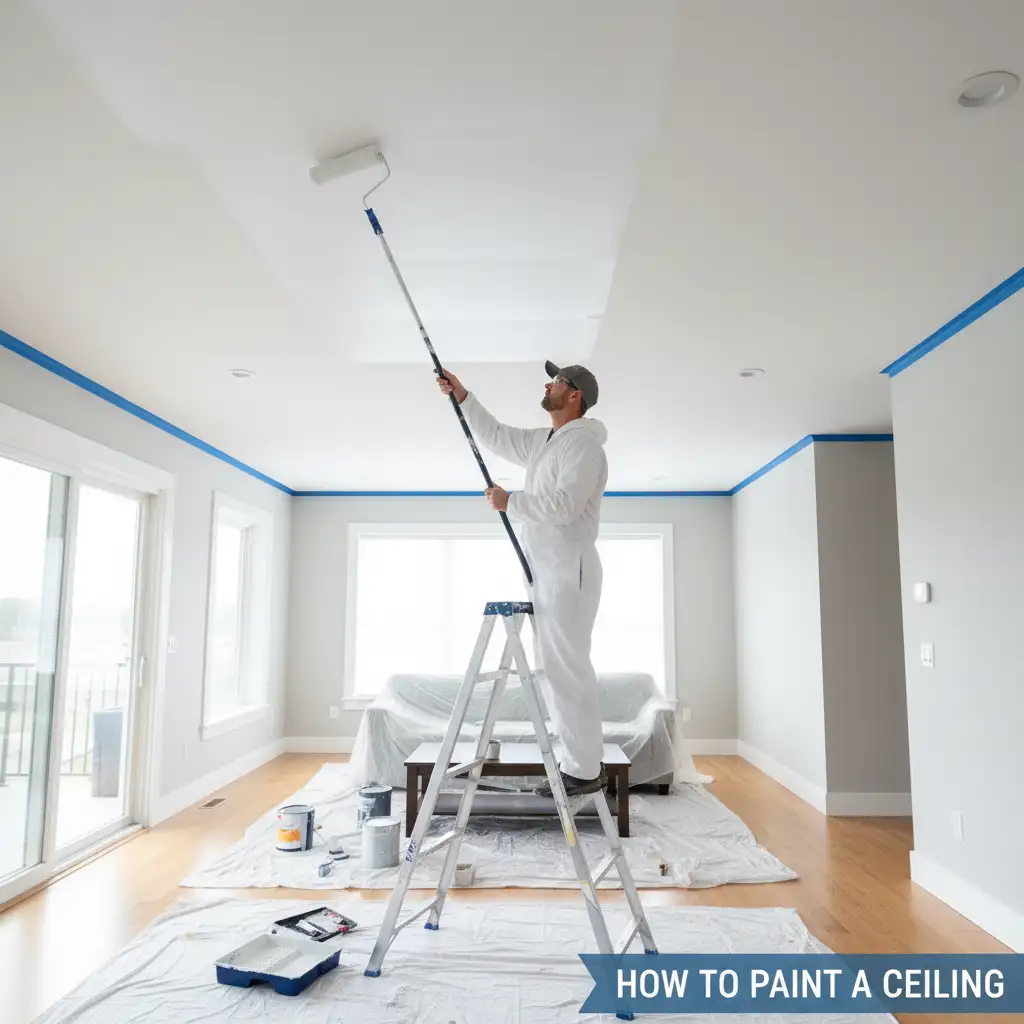
How to Paint a Ceiling Like a Pro – Complete Guide

Home / Painting a ceiling might seem scary, but it’s easier than you think. Many homeowners avoid this project because they worry about drips, neck pain, and uneven coverage. The truth is, learning how to paint a ceiling properly can transform any room and brighten your entire space. With the right tools and techniques, painting ceilings becomes a manageable weekend project. This guide covers everything from choosing the best tools for painting a ceiling to applying the final coat like a pro. What You Will Need to Paint a Ceiling Before you start painting ceilings, gather these essential supplies: Paint and Primers: Flat ceiling paint (white or your chosen color) High-quality primer for stained or dark surfaces Behr ceiling paint offers excellent coverage and durability Brushes and Rollers: 9-inch paint roller frame Roller covers with 1/2-inch nap for smooth ceilings 3/4-inch nap rollers for textured ceiling paint applications 2-inch angled brush for cutting corners Extension pole (4-8 feet adjustable) Preparation Materials: 2-inch painter’s tape (avoid 1-inch tape) Plastic or canvas drop cloths Paint tray with disposable liners Ladder or step stool Sandpaper (120-grit for minor imperfections) Safety Equipment: Safety glasses or goggles Hat or head covering Non-slip shoes Dust mask for sanding Cleaning Supplies: Vacuum with brush attachment Microfiber cloths Mild detergent Spackling compound for crack repairs Prep the Ceiling and Room for Painting Proper preparation determines your project’s success. Start by removing all furniture from the room or moving it to the center. Cover remaining items with drop cloths. Clean your ceiling thoroughly using a vacuum with a soft brush attachment. Pay special attention to corners where dust collects. For textured ceiling paint preparation, use gentle strokes to avoid damaging the texture. Check for cracks, holes, or water stains. Fill small cracks with spackling compounds and let dry completely. Sand any rough spots with 120-grit sandpaper. Water stains need primer before painting to prevent bleed-through. Turn off electricity to ceiling fixtures at the breaker box. Remove light fixtures and ceiling fans if possible. If removal isn’t practical, tape around them carefully with painter’s tape. Put Down Drop Cloths Quality drop cloths protect your floors and furniture from paint splatters. Canvas drop cloths work better than plastic because they absorb paint instead of spreading it around. Lay drop cloths with at least 12-inch overlaps. Tape them to baseboards so they stay in place while you work. Don’t skip this step – ceiling painting creates more drips than wall painting. For rooms with hardwood or tile floors, use canvas drop cloths. Plastic works fine over carpet but can be slippery. Consider using both: plastic under canvas for extra protection. Tape the Tops of the Walls Use 2-inch painter’s tape along the wall where it meets the ceiling. This width gives you enough protection when using a paint roller on ceiling surfaces. One-inch tape leaves walls vulnerable to roller marks. Press tape edges firmly to prevent paint seepage. Remove any air bubbles by running your finger along the edge. Quality tape costs more but saves time on touch-ups later. If you’re painting the entire room, paint the ceiling first or walls first? Always start with the ceiling. This prevents wall paint from getting on your fresh ceiling work. Prime the Ceiling and Cut the Corners Priming ensures even paint coverage and better adhesion. Use latex primer for most ceilings. Choose oil-based primer for water stains or smoke damage. Shellac-based primers work best for severe stains. Apply primer with the same technique you’ll use for paint. Start by cutting in corners and edges with your angled brush. Paint a 2-inch strip around the entire perimeter. Load your brush with primer but don’t overdo it. Too much primer creates drips. Work in sections and maintain a wet edge to avoid lap marks. For textured ceilings, use a brush with firm bristles that can work into the texture. Take your time with corners – these areas show imperfections most clearly. Paint in Sections With a Roller Now comes the main event: using a paint roller on ceiling surfaces. The easiest way to paint a ceiling is working in 4-foot by 4-foot sections. This keeps your edges wet and prevents lap marks. Start in a corner and work away from the main light source. Roll in a “W” pattern first, then fill in with parallel strokes. This technique distributes paint evenly and reduces roller marks. Keep consistent pressure on the roller. Too much pressure creates streaks. Too little leaves thin coverage. Roll slowly to minimize spattering. Here are key ceiling painting tips for roller technique: Don’t roll directly overhead – work at an angle Overlap each section by 6 inches while the edge is still wet Reload your roller frequently for consistent coverage Vary your final stroke direction slightly to hide seams Use your extension pole for most of the work. This saves your neck and gives you better control than stretching from a ladder. Adjust the pole length as needed for comfort and reach. Add a Second Coat as Needed and Clean Up Most ceilings need two coats for complete coverage. Check your work once the first coat dries completely. Look for thin spots, streaks, or areas where the old color shows through. Apply the second coat using the same technique. Work quickly and maintain wet edges. The second coat usually goes on easier and covers more smoothly than the first. While the final coat dries, clean your tools. Wash rollers and brushes in warm soapy water immediately. Clean paint trays and store unused paint properly. Remove painter’s tape while the paint is slightly damp but not wet. Pull tape at a 45-degree angle for clean lines. Touch up any areas where tape pulled away paint. Reinstall light fixtures once paint is completely dry. Turn power back on at the breaker box and test all fixtures before finishing up. Tips for Painting a Ceiling These professional tips on painting a ceiling will help you achieve better results: Color and Paint Selection: White ceiling paint

August 29, 2025 Sdcustom No Comments

What’s the Difference Between Stain and Paint? 2025 Guide

Home / Choosing between stain and paint for your next home project could save you thousands in maintenance costs and years of regret. The main difference between paint and stain lies in how they interact with surfaces: paint creates a protective coating on top of materials, while stain penetrates deeply into porous surfaces like wood. Paint offers superior protection and unlimited color options, while stain preserves natural textures and requires less maintenance when properly applied. Understanding what’s the difference between stain and paint helps homeowners make smart decisions for their specific needs. This guide covers everything from scientific composition to real-world applications and cost analysis. The Fundamental Differences: How Paint and Stain Actually Work Paint – The Surface Protector Paint works by forming a protective film barrier on surfaces. Think of it like putting a raincoat on your wood or siding. The paint sits on top and creates a shield against weather, dirt, and damage. The composition of paint includes 40-50% binder content, which helps it stick firmly to surfaces. This high binder content is what makes paint so durable and protective. When you apply paint, it uses adhesion to bond with the surface rather than soaking in. The visual impact of paint is complete coverage and color transformation. You can change a dark wood surface to bright white or any color you want. Paint completely hides the original surface underneath. stain – The Deep Penetrator Stain works through molecular penetration into the substrate. Instead of sitting on top like paint, stain soaks deep into the wood fibers. This happens through capillary action and fiber saturation. The composition of stain includes 60-80% solvent content, much higher than paint’s 20-40%. This high solvent content allows stain to penetrate deep into wood pores and grain patterns. The visual impact of stain enhances while preserving natural characteristics. You still see the wood grain and texture, but with better color and protection. Stain comes in transparent to semi transparent options. Aspect Paint Stain Application Method Surface coating Deep penetration Coverage Opaque/complete Transparent to semi-transparent Durability 7-10 years 3-6 years Maintenance Touch-ups difficult Easy reapplication Color Options Unlimited Limited to wood-compatible tones When to Choose Paint: 5 Critical Scenarios Maximum Protection Requirements Paint excels in weather resistance with superior UV protection and moisture barriers. For high-traffic areas, paint provides better impact resistance and cleanability than stain. When you need to hide imperfections or previous damage, paint is your best choice. It covers problem surfaces completely. Paint also offers specific performance features like anti-microbial or fire-resistant coatings when needed. For exterior painting services in San Diego, paint handles the intense UV exposure better than stain. The coastal climate requires maximum protection from salt air and temperature changes. Aesthetic Transformation Goals Paint meets exact color specifications and matching requirements. When you need uniform appearance across all surfaces, paint delivers consistent results every time. For modern and contemporary design preferences, paint offers unlimited style options. Property value considerations often favor paint for curb appeal maximization, especially for home sales. Kitchen cabinets benefit from paint’s durability advantage over stain. The hard surface resists grease, moisture, and daily wear better than stained wood surfaces. Real-World Cost Analysis Exterior siding projects typically cost $2,500-4,000 for painting versus $1,500-2,500 for staining. While paint costs more upfront, it lasts longer and protects better. Trim and molding work showcases paint’s precision finish benefits. The smooth, even coverage looks more professional than stain on detailed woodwork. When to Choose Stain: 4 Strategic Advantages Natural Beauty Preservation Stain enhances wood grain patterns instead of hiding them. This authentic material showcase maintains the organic appearance that many homeowners prefer. Texture preservation is a key advantage of stain versus paint. You can still feel the natural wood surface after staining. This protects your investment in premium materials like hardwood floors or custom millwork. San Diego Custom Painting often recommends stain for clients who want to showcase quality wood features in their homes. Maintenance and Longevity Benefits The easy reapplication process makes stain maintenance simple. No stripping or extensive prep work is needed for touch-ups. Stain shows gradual wear patterns with even fading, unlike paint which can peel and chip. This means lower material and labor costs for upkeep. The DIY-friendly application makes stain forgiving for homeowners. Brush marks and overlap areas blend naturally. Specialized Applications Deck restoration benefits from stain’s penetrating protection advantages. The stain soaks deep into the wood without creating a surface film that can trap moisture. For fence staining, you get weather resistance without film buildup that paint creates. Log homes need stain’s breathing compatibility to prevent moisture problems. Interior furniture looks better with natural wood showcase through quality stains. Oil based and water based options both provide excellent results. Advanced Decision Matrix: Paint vs Stain Selection Guide Surface-Specific Recommendations Different wood types require different approaches in the stain vs paint decision. Hardwoods like oak, maple, and cherry show beautiful grain patterns that stain enhances perfectly. Softwoods like pine, cedar, and fir often benefit from paint’s protection due to their softer nature. Engineered materials typically require paint for proper adhesion and durability. It’s important to note that previously finished surfaces need special preparation. You cannot stain over a painted surface without complete removal of previous paint layers. Environmental and Performance Factors High UV exposure areas need paint’s superior protection. However, high moisture areas might benefit from stain’s breathability advantages. Temperature extremes affect expansion and contraction. Stain handles these changes better than rigid paint films. Pollution exposure requires paint’s cleanability for urban environments. Climate considerations play a major role in the painting and staining decision. Coastal areas like San Diego need different solutions than desert or mountain regions. Project-Specific Decision Framework Start with surface analysis of your specific project. Check the wood type, current condition, and exposure factors. Rank your performance priorities. Do you need maximum protection, natural beauty, or easy maintenance? This ranking guides your choice between stain or paint. Budget considerations include both initial costs and long-term maintenance. Calculate the total 10-year ownership

August 28, 2025 Sdcustom No Comments

What Is Paintable Caulk? Complete Guide 2025

Home / When you paint your home, even the most minute detail can make a big difference. One of those details is caulk. Caulk fills gaps, seals seams, and provides you with clean lines that help you make your painted surfaces look professional. There is some variation in caulk, however, since not all caulk works with paint. That is where a paintable caulk comes into play. It allows you to seal gaps and cover them in your choice of paint for a clean, seamless finish. So what is paintable caulk, and why should homeowners care? Paintable caulk is designed for the paint to bond securely. Standard silicone caulk has additives to repel paint (professor ex-silicone caulk), and by understanding the difference, your time, peeling paint, and overall looks and durability of your projects will be improved. What Is Paintable Caulk? Paintable caulk is an acrylic latex-based sealant that accepts paint adhesion after it has been cured. The difference is in the porous surface structure, which allows paint molecules to penetrate and bond. This results in a seamless appearance between the caulked area and the surrounding painted surfaces. The chemical structure is based on acrylic polymers, mixed with latex polymers. Both acrylic and latex are flexible materials that bond well with most surfaces commonly found in building materials. Paintable caulk surfaces are better suited for use with water-based paints. Most paintable caulk formulations offer moderate water-resistant properties, making them appropriate for interior use applications, with limited outdoor usage. The flexibility reduces the chance of cracking, since buildings will shift and settle naturally over time. Types of Paintable Caulk Acrylic Latex Caulk represents the most common paintable option. It costs between $3-8 per tube and works well for basic interior trim work. This type dries quickly and cleans up easily with water during application. Siliconized Acrylic Latex combines the paintability of acrylic with enhanced durability from silicone additives. These formulations cost $5-12 per tube but offer superior adhesion and weather resistance. They work better for applications requiring joint movement accommodation. Painter’s Caulk (also called decorator’s caulk) provides the fastest drying times, often becoming paint-ready in just 30 minutes. Professional painters prefer this type for quick turnaround projects. It typically costs $4-10 per tube.   Paintable vs Non-Paintable Caulk: The Science The different chemistry of the surface will determine paint compatibility; therefore, paintable types are those that contain microscopic pores and allow paint to penetrate the surface. Non-paintable types of caulk, such as 100 percent silicone caulk, create non-porous surfaces, and as a result, the caulk is smooth, and the paint will not adhere. Adhesion of the paint depends on mechanical bonding. Based paints penetrate the finite openings of the surface, and as they cure, they bond in those finite openings, creating interlocking bonds. This means that they are bonding to the caulk, creating a bond that will last and not peel and/or flake.  For long-term performance, it would be beneficial to use Paintable Options for interior applications where looks matter. However, silicone caulk will provide water resistance and flexibility in areas of high moisture exposure. How to Use Paintable Caulk Pre-Application Preparations Preparation of surfaces is the first step towards successful application. Thoroughly clean the entire surface with cleaning and degreasing agents to remove dirt, oils, and any residual paint. Use a putty knife or caulk removal tool to remove any old caulk completely. Test the moisture level of the surface, especially for basements and surfaces just cleaned. For a paintable caulk to adhere properly, surfaces need to be dry. Typically, the surface will dry in approximately 24 hours after completing cleaning. Notably, temperature and humidity will significantly affect the curing times in the same way they affect dry times. The ideal temperature for application is between 50°F and 85°F, with a relative humidity below 80%. Tools and Materials Select a good-quality caulk gun with a smooth trigger action and a pressure release feature. A 10:1 thrust ratio is advisable for most applications because it will provide manageable thrust for control. Continuously working with smooth-flow caulk guns will yield better results than ratcheting caulk guns because of better control of a consistent bead. Cut the cartridge tip at a 45-degree angle, starting with a small opening (about 1/8 inch) so that you can enlarge it if desired. The angle you cut should match the direction of your application so that the caulk flows smoothly. Be sure to have clean rags, a bucket of water, and smoothing tools on hand. Professional results will require the use of tools like plastic spoons or caulk-smoothing tools, rather than your fingers. Step-by-Step Application Process Loading and Cutting: Pierce the inner seal completely and load the cartridge firmly. Cut the tip slightly smaller than your gap width initially. Application Technique: Hold the gun at a 45-degree angle and move steadily along the joint. Apply consistent pressure to create uniform bead thickness. Don’t stop mid-joint to avoid visible seams. Tooling Process: Smooth the bead within 5-10 minutes of application. Use steady pressure and single passes rather than multiple touch-ups. Remove excess material immediately. Timing Considerations: Touch-dry time ranges from 10-30 minutes depending on temperature and humidity. Wait 24 hours minimum before painting. Full cure takes 7-14 days for maximum strength.  Common Application Mistakes and Solutions Oversized beads waste material and take longer to cure. Cut smaller tip openings and apply multiple thin layers if needed for wide gaps. Premature painting causes poor adhesion and finish problems. Always test a small area first and verify the caulk surface accepts paint properly. Temperature-related failures occur when working outside recommended ranges. Cold conditions slow curing while excessive heat can cause surface skinning before proper adhesion develops. Best Uses for Paintable Caulk Interior Uses Baseboards and other trim are the main function of the paintable caulk. If you want to put a thin line between the wood trim and the wall, caulk works great to fill in those edges. Painters usually do this when painting the trim and the walls to

August 26, 2025 Sdcustom No Comments

How Long Does Interior Paint Last: Expert Guide 2025

Home / How Long Does Interior Paint Last? The average lifespan of most interior paints lies somewhere between 5-10 years, but how often you may want to repaint can vary from room to room for various reasons. The main contributing factors that determine your paint’s lifespan include the type of paint, the room’s function, surface preparation, environmental conditions, and quality of application. This guide supplies information to help you understand how long interior paint lasts, as well as when to repaint rooms, and the lifespan of various painting methods. You will also learn practical ways to preserve the life of your application, as well as cost-effective options to assist you in making informed decisions. When Should I Repaint the Interior? Knowing when to repaint requires understanding the warning signs your walls display. Paint deterioration happens gradually, making it easy to miss early indicators that signal it’s time for a refresh. Visual Signs Your Paint Needs Replacement Fading and Color Loss UV damage from sunlight causes paint colors to fade unevenly. You’ll notice this most near the windows where direct sunlight hits the walls. The paint may appear washed out or show noticeable color variations across the same wall. This fading process typically begins after 3-4 years in sun-exposed areas. Physical Deterioration Cracking appears as small hairline fractures that gradually expand. Peeling happens when paint loses adhesion to the wall surface, creating loose flakes or strips. Chalking occurs when paint breaks down, leaving a powdery residue when touched. These issues indicate the paint film has reached the end of its useful life. Wear and Damage High-traffic areas develop scuff marks, scratches, and stains that cleaning cannot remove. Touch-up paint often looks different from the existing paint due to fading and age differences. When touch-ups become noticeable or frequent, complete repainting becomes more cost-effective. Room-by-Room Repaint Timeline Different rooms experience varying levels of wear based on usage patterns and environmental conditions. Understanding these differences helps you plan and budget for painting projects. High-Traffic Areas (3-5 years) Hallways and entryways see constant foot traffic and frequently opened doors. Children’s rooms and playrooms endure more physical contact, spills, and creative expressions. Kitchens face cooking vapors, grease, and frequent cleaning that breaks down paint faster. Medium-Traffic Areas (5-7 years) Living rooms and family rooms have moderate usage but benefit from regular maintenance. Home offices typically have controlled environments with less physical wear. These spaces often can go bad due to gradual fading rather than physical damage. Low-Traffic Areas (7-12+ years) Master bedrooms have minimal traffic and controlled conditions. Guest rooms see occasional use, allowing paint to maintain its appearance longer. Formal dining rooms often have the longest paint life due to limited daily activity. Professional Assessment Checklist Evaluate your current paint condition systematically. Check surface adhesion by pressing tape against the wall and pulling it off quickly. Examine corners and edges where paint typically fails first. Consider the previous paint job quality and whether proper preparation was done initially. Paint Types The type of paint greatly affects how long the paint on the interior walls last. Being understanding of and familiar with the different formulations will help you purchase the specific product you may need and how long you can expect it to last. Water-Based (Latex) Paints Water-based paint is typically painted to last 7-10 years with application and maintenance. They dry quickly, usually within 2-4 hours, and can be convenient for most homeowners. They are low-odor and require little for cleanup, typically soap and water. Latex paint retains its color well, holds up to flexibility (walls expand and contract), and helps prevent cracking. Many manufacturers today have eco-friendly versions of paints available, including zero-VOC products. Latex is the typical type and provides good durability and a desirable experience for use on most interior surface areas. Oil (Alkyd) Based Paints Oil-based paints really do offer the longest life expectancy; 10-15 years is typical. They do provide a harder, more durable surface that can stand up to heavy-duty use and repeated cleaning, and they have a super glossy finish that has a professional quality that many homeowners prefer. The downside is that they take 6-8 hours to fully dry and emit very strong odors while painting. Cleanup will require mineral spirits (or paint thinner), too. Oil-based paints work very well in high-wear surfaces such as trim work, doors and cabinets where durability is fundamentally important. Specialty Formulations Some paints are engineered as premium paint and primer combinations, which will eliminate the need for a step to prime the surface, and often give the paint an extended life. Some are stain-blocking formulas that help prevent marks left from surfaces being painted from bleeding through. There are even anti-microbial properties added that help resist mold and mildew from growing in humid environments. There are also paints based on natural and mineral-based materials, which provide distinct advantages to owners concerned about health. These paints are usually more expensive; however, they typically offer permanent adhesion like traditional formulations and do not contain synthetic chemicals. The Effects of Paint Quality Ratings on Lifespan In general, most budget paints last between 3-5 years and require more frequent painting as a result. Mid-grade paints provide a better value to the homeowner, with lifespan ratings from around 5-8 years and reasonable durability capabilities for that price point. Premium paints offer the most value, typically allowing for a lifespan of 8-15 years, depending on the price of the paint. Professional-grade paints may last the longest, for around 10-20 years, depending on how it was applied. Overall, San Diego Custom Painting recommends that a homeowner invest in a higher-quality, more durable coating for long-term value and reduced maintenance frequency. Different Paint Finishes Paint finish selection directly affects durability and maintenance requirements. Each finish type offers different benefits and lifespans based on its formulation and intended use. Finish Types and Durability Ranking Flat/Matte Finish lasts 5-7 years and offers low durability. These finishes hide wall imperfections well but show wear quickly. They’re difficult to clean and

August 25, 2025 Sdcustom No Comments

How to Paint Kitchen Cabinets Like a Pro in 9 Simple Steps

Kitchen renovations can cost $25,000 or more, but painting kitchen cabinets costs only $200-500 in materials. This single upgrade delivers an 80% return on investment while transforming your space completely. Learning how to paint kitchen cabinets properly saves thousands compared to replacement while achieving professional results. Most cabinet painting projects fail due to poor preparation, not application technique. This guide covers professional methods that ensure 10+ year durability. You’ll master the same techniques used by San Diego Custom Painting experts to create factory-quality finishes. The complete process takes 5-7 days for most kitchens. Rushing leads to failures like chipping paint and poor adhesion. Follow these 9 steps exactly for results that rival expensive replacements. Essential Tools & Supplies Success starts with quality tools. Cheap brushes and rollers create brush marks and uneven coverage that ruins your painting job. Must-Have Core Tools High-quality angled brushes in 2.5″ and 1.5″ sizes handle precision work. Choose brushes with synthetic bristles for latex paint or natural bristles for oil based paint. Foam rollers, specifically 4″ mini rollers, create smooth finishes on flat surfaces. They hold less paint than traditional rollers but eliminate texture issues. An orbital sander with 120, 220, and 320-grit sandpaper handles all surface preparation. Hand sanding takes too long for full kitchen projects. A drill with screwdriver bits speeds up hardware removal and installation. Label each screw location to avoid confusion during reassembly. Drop cloths protect surfaces during painting. Canvas cloths stay in place better than plastic versions and absorb paint drips. Professional Upgrade Equipment Paint conditioner or extender eliminates brush marks by extending working time. Add it to your paint for a smoother application. Tack cloth removes fine dust between coats. This step separates amateur from professional results. LED work lights reveal defects that regular lighting misses. Proper lighting prevents costly mistakes. Paint sprayers create the smoothest finish but require practice. Airless sprayers work best for cabinet painting versus HVLP models. Supply Selection Guide Benjamin moore cabinet primer offers superior adhesion for challenging surfaces. Their bonding primer works on previously painted cabinets without extensive sanding. Benjamin moore cabinet paint provides durability needed for kitchen use. Choose semi-gloss or satin sheen for easy cleaning. Sandpaper progression matters. Start with 120-grit for heavy work, move to 220-grit for smoothing, finish with 320-grit between coats of paint. TSP substitute cleans grease without harsh chemicals. Microfiber cloths work better than paper towels for cleaning tasks. Cost Breakdown Budget setup costs $150-250 and handles basic projects. Professional-grade tools run $300-500 but deliver superior results. Time-saving upgrades add another $200-300 but cut project time significantly. Step 1: Create Flat Surfaces and Set Up a Work Area Proper workspace setup determines project success. Professional painters never skip this foundation step. Workspace Selection Garages offer good ventilation and space but lack climate control. Basements provide controlled conditions but need extra ventilation. Spare rooms work well with proper protection and air circulation. Temperature should stay between 65-75°F throughout the project. Humidity below 50% prevents drying issues. High humidity causes paint to dry slowly and attract dust. Lighting affects color accuracy and defect spotting. Natural light works best, but LED bulbs provide consistent illumination for evening work. Work Surface Creation Sawhorses with plywood create stable painting surfaces. Position them at comfortable working height to prevent back strain. Cabinet doors and drawers need horizontal surfaces for smooth paint application. Vertical painting causes runs and uneven coverage. Organize your paint station with all supplies within reach. This prevents walking across wet surfaces or leaving projects unattended. Door and Drawer Removal Number each door and drawer on the inside using painter’s tape. This simple step prevents confusion during reinstallation. Remove all hardware including hinges, handles, and drawer slides. Store screws in labeled bags or containers to avoid mixing. Take photos of complex configurations before disassembly. Your phone becomes a valuable reference tool during reassembly. Mark hinge locations on cabinet frames with light pencil marks. Exact positioning ensures proper door alignment later. Step 2: Prep Your Kitchen Cabinets for Painting Preparation determines 70% of your final results. Professional Cabinet Painting San Diego Services spend most project time on this critical step. Deep Cleaning Protocol Kitchen cabinets accumulate years of cooking grease and grime. Regular household cleaners won’t remove this buildup effectively. TSP substitute cuts through grease without harsh chemicals. Mix according to directions and work in small sections. Rinse thoroughly with clean water after degreasing. Soap residue interferes with paint adhesion and causes failures. Dry completely before proceeding. Trapped moisture causes paint defects and poor adhesion. Surface Assessment Examine each surface for damage requiring repair. Water damage appears as dark stains or swollen wood areas. Previous paint failures show as chips, cracks, or peeling areas. These spots need special attention during preparation. Fill holes and dents with wood filler. Sand smooth after drying for invisible repairs. Check for loose joints or damaged molding. Make repairs before painting begins. Strategic Sanding Approach What grit to sand cabinets before painting depends on the existing finish condition. Start with 120-grit for glossy surfaces or heavy buildup. Progress to 220-grit for smoothing. This grit removes scratches from coarser paper while creating proper tooth for primer. Finish with 320-grit between coats. This fine grit removes imperfections without damaging previous layers. Power sanders speed the process on flat surfaces. Hand sand detailed areas and inside corners for control. Follow wood grain direction when sanding. Cross-grain scratches show through paint and ruin the finish. Hardware Decisions Evaluate existing hardware conditions. Clean, functioning hardware can be restored and reused. Upgrade hardware during painting for maximum impact. New handles and hinges complement freshly painted surfaces. Modern trends favor matte black or brushed brass finishes. Choose hardware that complements your paint color selection. Remove all hardware before painting. Paint buildup around hardware looks unprofessional and affects function. Step 3: Protect Your Surroundings Paint damage to surrounding areas ranks as the top homeowner regret. Professional protection prevents costly mistakes. Comprehensive Coverage Plan Remove or cover all appliances within the work area. Paint mist travels

August 22, 2025 Sdcustom No Comments

Satin vs Matte vs Gloss: Complete Paint Finish Guide

With over 2,700 paint colors available from major manufacturers and 6 different sheen levels, choosing the right paint finish can make or break your $3,000+ painting project. The difference between satin vs matte vs gloss paint finishes goes far beyond simple appearance. Your choice impacts durability, maintenance costs, and even your home’s resale value. What’s the Importance of Paint Finish? Paint finish selection affects more than just how your walls look. The type of finish you choose determines how light bounces off surfaces, how easy cleaning becomes, and how long your paint job lasts. Light Reflection Physics Different paint finishes interact with light in distinct ways. Matte finish absorbs 90-95% of light, creating a flat, non-reflective surface. Satin paint reflects 25-35% of light with subtle directional properties. High gloss finishes reflect 70-85% of light, creating dramatic mirror-like effects that can transform room brightness. Hidden Cost Implications The finish reflects directly on your wallet over time. Matte paint typically needs refreshing every 7-10 years, while satin finish lasts 10-15 years. Gloss finishes can go 15-20 years before requiring major touch-ups. Touch-up difficulty varies significantly too. Matte paint blends easily with existing coverage, but gloss finishes often require repainting entire walls to avoid noticeable patches. Energy efficiency changes with your finish choice. Rooms with reflective surface finishes need fewer light fixtures to achieve adequate brightness. This translates to lower electricity bills in spaces painted with satin or gloss finishes compared to matte alternatives. Performance Characteristics On a durability scale of 1-10, matte finish scores 4/10 but excels at hiding wall imperfections. Satin finish earns 7/10 for balanced performance across multiple factors. Gloss paint achieves 9/10 for maximum washability and longevity. Real estate professionals report that appropriate finish selection impacts buyer perception. Homes with well-chosen paint finishes in kitchen and bathrooms, high traffic areas, and living spaces typically show 3-5% higher market values than homes with mismatched finish choices. Common Paint Finish Misconceptions Many homeowners believe flat finishes always cost less long-term. However, frequent repainting often makes matte more expensive than semi gloss or satin alternatives over 15-year periods. Another myth suggests high gloss makes rooms appear larger. While gloss finishes do reflect light, they can create harsh glare that actually makes spaces feel smaller and less comfortable. What’s the Difference Between Matte, Satin, and Gloss Paint? Understanding the specific characteristics of each finish helps you make informed decisions for your interior painting project. Matte Paint Finish (0-5% Sheen) Matte paint creates a chalky, soft texture that absorbs light completely. This flat finish provides maximum color depth and richest pigment visibility. The paper-like quality feels warm and sophisticated to the touch. Performance-wise, matte finish rates 4/10 for durability with typical 2-3 year touch-up cycles needed in active areas. Washability remains limited to light cleaning only, as scrubbing can damage the surface. However, application ease scores 9/10 because matte paint forgives brush strokes and covers imperfections beautifully. Professional painters choose matte paint for 85% of ceiling applications. The finish works perfectly in adult bedrooms, formal dining rooms, and other low-traffic areas. New construction projects often use matte paint to cover drywall imperfections effectively. Pros include superior hide quality, exceptional color depth, and budget-friendly pricing. Cons involve difficult cleaning, shorter lifespan, and visible touch-up marks. Satin Paint Finish (25-35% Sheen) Satin paint offers subtle pearl-like luminosity with soft light reflection. The smooth, silky surface provides slight warmth while maintaining balanced color saturation with gentle depth enhancement. With a durability rating of 7/10, satin finish maintains appearance for 5-7 year cycles before needing refresh. The surface tolerates moderate scrubbing with mild detergents. Application requires quality surface preparation as minor imperfections become visible. This type of finish excels in medium-traffic zones like living rooms, hallways, and children’s bedrooms. Satin paint handles humidity well in bathrooms with proper ventilation. Multi-purpose spaces including home offices and family rooms benefit from satin’s versatility. Satin finish provides 60% better stain resistance than matte for common household spills. The light diffusion creates ambient lighting without harsh glare. Color flexibility allows satin to work with 95% of available color palettes. Benefits include balanced durability, easier maintenance, and versatile application. Drawbacks involve showing application flaws and moderate cost increases over matte options. Gloss Paint Finish (70-85% Sheen) Gloss paint creates mirror-like reflection with dramatic light play. The hard, smooth surface feels almost glass-like to touch. Color intensity appears vibrant with jewel-like depth and high visual impact. Durability ratings reach 9/10 with 10-15 year lifecycles common. The surface tolerates heavy scrubbing and many bleach-safe cleaning options. However, application demands professional-level surface preparation for optimal results. Strategic applications include high-moisture areas like kitchen and bathrooms, laundry rooms. High traffic areas benefit from gloss durability on trim, doors, cabinets, and furniture. Statement elements like accent walls and architectural features showcase gloss finishes effectively. Surface preparation requires 3x more time than matte alternatives. Environmental factors like humidity and temperature affect application success. Long-term cost-per-year analysis shows 40% savings compared to frequent matte repainting. Advantages include maximum durability, easy cleaning, and premium appearance. Disadvantages involve showing every surface flaw, higher upfront costs, and need for skilled application. Selecting the Paint Finish to Use in Your Home Room function should drive your finish selection. Different spaces have varying moisture levels, traffic patterns, and lighting conditions that influence optimal choices. Kitchen Paint Finish Strategy Kitchen and bathrooms require moisture resistance and easy cleaning. Semi gloss to high gloss finishes provide necessary durability for grease cleanup and humidity exposure. Cost-benefit analysis shows 3x longer lifespan justifies 50% higher initial investment. Lighter colors in high gloss show fewer fingerprints than darker options. Consider two-tone approaches with gloss on lower walls and satin paint on upper areas for balanced functionality and aesthetics. Bathroom Finish Selection High-humidity bathrooms need gloss finish mandatory below 6-foot lines where moisture exposure peaks. Powder rooms can use satin finish with proper ventilation. Shower areas require semi gloss minimum, with specialty moisture barriers in extreme conditions. Living Room Optimization High traffic areas near doorways and seating benefit from satin

August 20, 2025 Sdcustom No Comments

Limewash vs Whitewash: Complete 2025 Comparison

Today, we are seeing choices in natural wall surfaces besides painted drywall and wood. While there is some confusion when homeowners try to choose between limewash and whitewash, the more relevant debate revolving around the topic of limewash vs whitewash is which finish gives you the weathered, authentic look, along with the practical needs a person may have for a particular project.  This guide will break down everything you need to know about each of the finishes, including a breakdown of its composition, how to apply it, its costs and the durability of each option. After reading this, you’ll be in a better position to decide which is the best option for your space.  What Is Whitewashing? The practice of whitewashing has a long history in American history. Colonial settlers whitewashed frequently and routinely to protect wood, brick, and stone surfaces. It was, and still is, a simple recipe of lime, water, and salt to develop an affordable protective coating.  Composition of Modern Whitewash In modern contexts, for example, whitewash paint is produced by using hydrated lime and water to create a thin slurry. When a mixed stain is used, a few small binding agents are sometimes added, especially to help adhesion. Many people who like an easy DIY project will use paint and water in a 1:1 or 1:2 ratio to make an easy wash. There are also premixed cans for whitewashing brick if you prefer to go that route. These premixed paints are typically water-based and easy to use on a test piece. Application Characteristics For the best results with the application of whitewash, start with clean, dry, and porous surfaces. If working with a rough surface, make sure to vacuum out any dust and fill gaps first. Tackle one small section at a time to ensure you have enough time to adjust coverage. Use a broad masonry paint brush to apply the paint with thin layers. The process of whitewashing is to brush either stain or paint onto the surface thoroughly, then, depending on the look you desire, you can wipe back or thinly cover the paint. Sprayers can work to apply a whitewash, but using a brush will allow for more control in painting on brick joints and wood grain. Typical Coverage and Material Content Coverage varies by blend and surface texture. Many DIY paint and water whitewashes cover 150 to 250 square feet per gallon on smooth wood. Very rough bricks might go down to 100 square feet. Always buy a little more in case you want to test or make touch-ups later. Visual Properties & Aesthetic Outcomes A whitewash dries flat and chalky looking, with the wood grain showing through. On the brick, it softens the colour and blends visually the harsh contrast. You can always mix with water to adjust how opaque it looks. If you want it brighter, add more coats. A common question is, ‘How do you whitewash a brick fireplace?’ It is actually a simple process. It is about knowing how to follow the steps: typically, clean the face, test on a corner, apply a thin wash, and then wipe with a damp rag until the tone feels just right to you. The process of whitewashing would be the same on a brick fireplace surround as it would be on a brick fireplace mantel or shelves. Durability & Maintenance Profile A whitewash finish will not be as durable as paint. Outside, the sun and the elements will cause it to fade more quickly than a painted surface. For example, if whitewash is used over brick in an outside setting, it would wear more rapidly than whitewash applied to inside brick. If applied indoors, it will hold longer but will show wear in high-touch sheen, such as a crisp white shelf or top rail. Maintenance or re-coat of whitewash is easy as well. Clean it, mix up a new batch of whitewash, and then reapply thin coats until you get to the desired finish and opaqueness. What Is Limewash? Scientific Background & Composition The term “limewash” derives from the limestone used to produce quicklime by heating. This quicklime is generally then mixed with water to create either slaked lime water or lime putty. Limewash is made up primarily of calcium hydroxide. The application of limewash to a surface is a process that occurs over time, which is initiated by the introduction of air. The process is called carbonation, and it ultimately converts the coating mentioned above back into calcite. This is why limewash has greater adhesion to mineral walls than many paint products.   Manufacturing & Preparation Methods The best limewash products are manufactured from aged lime putty and require extensive quality checks. High-quality limewash products will contain fine particles, enabling the product to achieve a soft, even coat over a surface. You can make it yourself, but keep safety in mind. Always add lime to water, never water to lime. You should wear gloves, goggles, and a mask when mixing. Mix until smooth, allowing the product to rest for a time. You should strain the limewash before using it to create a smoother finish. Unique Characteristics in Application Limewash requires porous surfaces, such as bricks, stones, and older stucco, to function effectively. Limewash allows a wall to breathe and enables moisture to escape. This moisture escaping the wall assists in drying out after a stain, a significant event in wet climates. The high pH level in lime makes it less hospitable to mould species, as well. In addition, as limewash carbonates, it tends to heal self-healing hairline marks. This is a salty part about using limewash on historic walls. Distinctive Visual Characteristics The look is matte and mineral. Brush marks and soft movement show in the finish. Colour has depth because of light bounce in the mineral layer. The tone shifts slightly as it cures. Over time, it forms a gentle patina. Performance & Longevity Factors On the right substrate, limewash can last for years with light care. It handles

August 19, 2025 Sdcustom No Comments

How Much Do Painters Charge? 2025 Pricing Guide

Home / Did you know that painting costs can vary by 300% from area to area and project type to project type? Many homeowners experience sticker shock when they discover how much painters charge for their services. Understanding painter pricing can help you budget accurately and not pay too much for a painting project. This guide includes exact pricing ranges, the big cost factors, and cost-saving tips based on current market data from around the United States. How Much Do Painters Charge per Square Foot? Costs for Exterior Paint per Square Foot For exterior paint work, the costs typically run from $3 to $7 per square foot. The higher cost arises due to preparation for weather, surface, and challenges in accessing the structure. The weather handicap affects material and other costs. Exterior painting materials fail sooner than interior-grade interfaces. The materials must withstand UV rays, moisture, rubbing, and heating up and cooling down, on top of reasonably priced railings. Quality exterior painting materials typically cost 20-30% more than interior painting materials. Exterior projects take longer because surface prep takes a lot of time and labor. For example, power washing, scraping off old paint and caulk, and filling cracks and gaps all add time and labor costs. Additionally, some homes may require substantial amounts of preparation work before painting the building with its new paint. When Square Foot Pricing is Appropriate Square foot pricing works best in larger, open spaces that are free from barriers and obstructions. Great rooms, master bedrooms, and open floor plans are excellent examples of spaces that are well-suited to square-foot pricing. Complex rooms that have lots of trim, doors, and windows are not good spaces for square foot pricing to be used. Kitchens and bathrooms frequently are spaces that will require pricing based on the room, as opposed to pricing based on square footage. To measure square footage accurately, you will need to measure the height and width of the walls separately. Be sure to subtract the area of doors and windows from calculations for more accurate pricing. How Much Do Painters Charge per Hour? Breakdown of Hourly Rates by Skill Level Apprentice painters range from $25 to $35 per hour, and as such are generally inexperienced and entry-level workers performing basic tasks under supervision. They are appropriate for very straightforward projects with little prep work. Experienced painters will charge between $35 and $50 per hour and are workers who have been painting for 3 to 10 years and can perform nearly all residential painting independently. Master painters and specialists will charge between $50 and $75 per hour and are experts engaged in complex work such as kitchen cabinet painting or decorative finishes, as well as high-end residential work. Hourly Rates are Particularly Affected by Geographical Location Hourly rates vary widely in part due to geographical location, as well as living costs and demand. Urban locations typically pay 20-40% more than rural locations, as living costs are generally higher in urban environments. When Hourly Pricing Applies to a Task Hourly pricing is more commonly associated with small tasks that require a ‘touch-up’ job. Simple fixes, such as touch-ups, minor repairs, or maintenance charges, can sometimes be priced on an hourly basis. Hourly pricing can also be applied to detailed work such as decorative finishes, intricate and detailed trim painting, and refining and refinishing cabinets. Many of these projects are difficult to estimate on a square footage basis, primarily because they require specialized industry knowledge and skills (not simply a lot of paint). Hourly pricing also benefits those doing a considerable amount of repairs is required, especially since many maintenance tasks necessitate extensive preparation work; consider homes with damaged walls, numerous holes, and extensive surface repairs. Time-based pricing often applies. How Much Do Painters Charge Per Room? Standard Pricing Structure for Room Sizes Small rooms have a price range of $300 to $600, which typically include small bathrooms and closets, or small bedrooms. Basic prep work and standard paint are assumed. Medium rooms have a price range of $600 to $1,200. This can include standard bedrooms or home offices. Most pricing will consist of preparation for the walls, ceilings, and some basic trim work.  Large rooms have a price range of $1,200 to $2,000 per month. Living rooms, master bedrooms, and kitchens are typically larger rooms due to requiring more time and paint, as well as more material. A more complex layout will also incur higher costs.  Extra-large spaces have a price range of $2,000 to $3,500 or more. Great rooms or Open concept areas will always take more time to prep due to their overall paint coverage and need for labor. Considerations at Room Level Bathrooms require extra care when painting compared to other areas. Because they experience a higher level of humidity, they require special paint, proper ventilation, as well as grout sealing and moisture protection, which comes with increased costs.  Kitchens typically require a lot of time to prep for painting, as they often need to remove grease and any other materials associated with the cabinets. Usually, the backsplash will require more preparation time, as many kitchens will need degreasing for optimal painting.  Bedrooms will typically have wall and ceiling prep work included. Most painters will assume a basic trim in their room pricing, as it is generally included in their pricing. If a color change is required as a part of the estimate, the overall price will likely go up as well. Living areas are more often than not higher in ceilings and have special details in the architecture. Crown molding, chair rails, and other decorative features will take that much more time and skill to deal with the existing installation. What Comes with Per-Room Pricing A standard package will consist of painting the walls, ceiling, and trim. Most painters apply a coat of primer and generally two coats of paint, which is also considered standard. Add-on services include, but are not limited to, painting the doors, any work on the baseboard,

August 18, 2025 Sdcustom No Comments

How Long Does It Take an Oil Painting to Dry? [2025 Guide]

Home / Generally, oil paintings take 6-24 hours to be handled dry, 3-7 Days to be handled safely, and 6 months to 2 years to cure completely. The drying time can vary based on the paint thickness, the pigments used, the environmental conditions, and the oils used in the oil paint mixture. Understanding the drying stages of oil paint can help you better plan your projects while avoiding potentially costly mistakes. This guide will explain all the basic drying phases, right through to professional oil paint drying acceleration methods that actually work. The Complex Nature of Oil Paints Oil paint does not dry by evaporation. A slow chemical change cures it. Oxygen reacts with the oil. This is the drying process called oxidation and polymerization. The paint turns from a soft film into a firm, crosslinked film. Different drying oils behave in various ways. Linseed oil is the fastest of the common choices. Walnut oil is mid-speed. Safflower and poppy are slow drying. Add these to pigment traits, and you get big swings in drying times. How Long Does Oil Paint Take to Dry? Oil paint drying times may vary based on a few factors, but here’s the drying schedule you can expect for classic usage: Touch Dry Stage: 6-24 Hours. The paint surface will have formed a protective skin, but will still be soft to the touch underneath. Thin applications of oil paint may feel dry to the light scope of a touch within 6-8 hours, while thicker applications may require 12-24 hours. Room temperature makes a huge difference here – a warm room at temperatures around 70-75 degrees F will help this stage to speed up considerably. Workable Dry: 3-7 Days. The paint will have become firm enough to be lightly handled and potentially painted over. Most standard oil paintings will naturally reach this stage within a week’s time frame, under normal conditions. This is when many artists will begin to add glazes or detail work over existing base layers.  Set Dry: 2-4 Weeks The paint will be felt as completely dry to the touch, and won’t smear given normal pressure. Furthermore, the paint is still properly curing beneath the surface: while you may wrongly assume your painting is ‘dry,’ at each stage the paint is still curing chemically. At this set dry stage, the artist may also feel free to do some light cleaning and nominal handling.  Full Cure: 6 Months to 2 Years. The paint has completed a full polymerization throughout all the paint layers. Only at this full curing stage can the painting sustain aggressive cleaning, varnishing, or long-term painting storage without risk. Interestingly, thick applications of paint, often thought of as impasto, may take up to 2 years for complete curing based on a few variables. By scenario: Thin alla prima, lean mixes, earth colors: touch dry in 1 to 3 days. Average layers on primed canvas: touch dry in 5 to 10 days, handle in 3 to 5 weeks. Heavy impasto with lots of titanium white or black: surface can stay soft for weeks, full cure can pass one year. With alkyd painting mediums: many layers reach touch dry overnight to 2 days. Water‑mixable oils: often touch dry in 3 to 7 days, brand dependent. Oil paint, how long to dry, depends on your room. Warm, dry air with gentle flow speeds the set. Cold and damp air slows it down. Drying time by surface Drying time for oil paint also changes with the support: Canvas with acrylic gesso: average set, reliable touch drying. Oil‑primed panel: often slightly faster to lose surface tack. Paper: can be faster at first due to absorbency. How long does oil paint take to dry on wood: thin layers on sealed wood panels often reach touch dry in 3 to 7 days. Thick knife work will still take weeks. What Factors Affect the Drying Time of Oil Paint? Environmental Conditions Temperature Control Optimal drying is experienced between 65-75°F (18 to 24°C). Cold temperatures below 50°F will have drying times that are 3 times longer than normal drying time, while excessive heat above 85°F will cause uneven curing and cracking. Consistent temperatures will achieve better outcomes than fluctuating conditions. Humidity Control: The best relative humidity for oil paint to dry is 40-60%. Humidity above 70% significantly slows the drying through oxidation process of oil paint, and extremely dry conditions below 30% can crack the surface, especially the thick applications. Airflow Gentle air circulation exchanges fresh oxygen on painted surfaces, thereby speeding the oxidation process. Do not use direct airflow fans, as the uneven airflow pattern will cause uneven drying. Adequate ventilation will also reduce moisture and paint fumes while supporting a consistent curing rate. Paint-Specific Variables Pigment Chemistry Fast-drying pigments are raw umber, burnt umber, and Prussian blue, which will typically cure in 2 to 4 days. Medium features would be ultramarine blue and yellow ochre, which would cure in 4 to 7 days. Slow drying pigments are titanium white, zinc white, and alizarin crimson, which would be in the range of 1 to 2 weeks of workable drying. Thickness of Application: Thin glazes dry quickly because the oxygen can penetrate deeply and fast. Normal brush applications will dry at normal drying rates. Impasto applications that use a thick layer of paint will take longer to dry because oxygen cannot reach the deeper layers effectively. Oil Type Variations: Different painting mediums create varying drying schedules. Cold-pressed linseed oil dries more slowly than refined versions. Stand oil creates enamel-like finishes but extends curing time considerably. Walnut oil provides slower drying with less yellowing, making it ideal for whites and pale colors. Paint Quality Differences Student-grade paints often contain less pigment and more fillers, affecting consistency in drying rates. Professional-grade paints provide more predictable timing because of higher pigment concentration and quality oil binders. When comparing acrylic vs latex paint options, oil paints require significantly more patience. What Are the Drying Stages of Oil Paint? Understanding each drying phase helps

August 12, 2025 Sdcustom No Comments

Can You Paint Over Lead Paint? Complete Safety Guide

Home Over 24 million homes in the US contain lead-based paint hazards that pose serious health risks. If you’re wondering “can you paint over lead paint” during your home renovation project, you’re not alone. The good news is yes, you can safely paint over lead paint using proper encapsulation methods. This guide covers everything you need to know about painting over lead based paint safely and legally. Can You Paint Over Lead Paint? Yes, you can paint over lead paint, but only under specific conditions and with proper safety measures. The key is using EPA-approved encapsulation methods when the existing lead paint surface is stable and in good condition. Legal Framework and Requirements The EPA’s RRP (Renovation, Repair, Painting) Rule governs all work on homes built before 1978. This regulation requires specific protocols when painting a house with lead paint. Commercial properties need certified contractors for any lead paint remediation work. State and local regulations vary significantly. Some areas require permits for major renovations, while others have strict disclosure obligations for rental properties. Check your local requirements before starting any project. When Painting Over Lead Paint is Safe You can safely paint over lead based paint when these conditions are met: Paint surface is intact and adhering well No visible peeling, chipping, or flaking Surfaces are not high-friction areas like windows or doors No impact areas such as stairs or railings Surfaces can be cleaned and maintained easily The science behind encapsulating lead paint involves creating a molecular barrier that prevents lead dust from becoming airborne. Modern encapsulant paint products use advanced polymer and cement formulations that bond directly to the lead paint surface. When You Should NOT Paint Over Lead Paint Never attempt painting over lead based paint in these situations: Deteriorating or damaged lead paint High-friction areas like window sills and door frames Children’s play areas requiring frequent cleaning Surfaces subject to heavy wear and tear Exterior surfaces with weather damage These red flag situations require professional lead paint abatement rather than simple encapsulation. What Paint Should You Use to Cover Lead Paint? Regular paint will not safely cover lead paint. You need EPA-approved encapsulating products specifically designed for lead containment. Top EPA-Approved Encapsulation Products Fiberlock Lag-Kote is a penetrating encapsulant suitable for interior and exterior use. It costs $45-60 per gallon and provides excellent adhesion to lead paint surfaces. Ecobond Lead Defender offers a water-based formula that’s VOC compliant. Each gallon covers 300-400 square feet and works well for DIY projects. SEM Lead Encapsulator is professional-grade with fast-curing properties. It’s ideal for metal surfaces and provides superior durability. Understanding Paint Types Encapsulating primers create a barrier layer that prevents lead dust release. Standard primers are never sufficient for lead paint coverage. You need specialized sealers designed for specific surface types. Interior formulations require low or zero VOC content, high washability ratings, and durability specifications. Exterior products need weather resistance, UV protection, and flexibility for thermal expansion. Cost Analysis Most projects require 2-3 coats of encapsulant paint. Calculate your square footage carefully to determine product needs. Lead paint remediation cost through encapsulation typically runs $2-4 per square foot, while complete removal can cost $8-15 per square foot. Should You Strip or Sand Lead Paint? The definitive answer is NO. The EPA strongly advises against stripping or sanding lead paint because these methods create dangerous lead dust that poses serious health risks through inhalation and ingestion. Dangerous Methods to Avoid Never use these prohibited techniques: Dry sanding creates maximum lead dust Heat guns above 1100°F can vaporize lead Open-flame burning produces extremely toxic fumes Pressure washing spreads contamination These methods violate RRP rules and can result in significant fines and health hazards. When Professional Removal is Necessary Professional lead paint abatement becomes necessary for: Structural renovations affecting large areas Severely deteriorated paint conditions Converting spaces to child-occupied facilities Historical restoration projects Safe alternative methods include wet scraping to minimize dust generation, chemical stripping with proper containment, and HEPA vacuum systems operated by certified professionals. How to Test for Lead Paint Age-based risk assessment provides the first clue. Homes built before 1950 have an 87% chance of containing lead paint. Properties from 1950-1978 have a 24% risk. Post-1978 homes have minimal risk since lead paint was banned for residential use. Professional Testing Options 3M LeadCheck Swabs cost $8-12 for a 2-pack and offer 95% accuracy for positive results. However, they may miss low lead levels. D-Lead test kits provide more sensitive detection with professional-grade accuracy. They cost more but offer better reliability for lead based paint test purposes. Laboratory analysis using XRF testing provides the most accurate results. Paint chip analysis is considered the gold standard, costing $25-50 per sample with 3-5 business day turnaround. DIY Testing Process Start with thorough preparation by cleaning the test area. Follow kit instructions precisely for sample collection. Understanding color changes is crucial for proper interpretation. Document all results and locations for future reference. Common Lead Paint Locations Interior hotspots include window frames and sills, door frames and trim, stairway railings and spindles, plus kitchen and bathroom cabinets. Exterior priority areas cover siding and trim, porch railings and floors, window exteriors, and foundation elements. 5 Essential Tips for Painting Over Lead Paint Tip 1: Prepare the Work Area Properly Proper containment setup requires 6-mil plastic sheeting minimum. Seal all openings with tape and establish HEPA air filtration with negative pressure systems. Use entry and exit protocols including shoe covers and clothing changes. Essential tools include N100 respirators (never use simple dust masks), disposable coveralls with hoods, double-layer nitrile gloves, HEPA vacuums with certified filters, and wet cleaning supplies with misting bottles. Tip 2: Follow Wet Methods Approach Always mist surfaces to prevent dust generation. If you must sand lead paint, only use wet methods. Clean as you go and never allow dust accumulation. Complete final cleaning with HEPA vacuum plus wet wipe sequence. Use brushes rather than rollers for better penetration of encapsulant paint. Don’t rush the application rate and ensure full coverage.

Translate »