Kitchen renovations can run $20,000 to $50,000, but painting melamine cabinets provides the same aesthetic for less than $500. Many homeowners are stuck with dated melamine surfaces that are still serviceable but may be chipped or just worn out.
If you are interested in learning how to paint melamine cabinets, you can change your kitchen decor without a hefty budget. The following tutorial will illustrate the steps for preparation and final finish to achieve long-lasting results.
Table of Contents
ToggleWhy Paint Melamine Cabinets Instead of Replacing Them?
Replacing kitchen cabinets themselves can be very costly, and this further increases the overall renovation expenses. Painting them surely provides the same visual change at a much lower cost. And this method is not very expensive compared to other options. According to your choice, a different and suitable color choice gives your cabinets a more beautiful and modernized look.
The melamine surface is strong, but it may indicate wear and staining with time. Painting such surfaces is also an effective restoration method for their appearance. And the appropriate colors impart your cabinets with a new and modern appearance. These procedures are definitely environmentally friendly because we recycle used items and do not dispose of them in landfills. Moreover, it reduces the pollution of the environment by keeping beneficial commodities away from landfills
However, melamine isn’t like regular wood; it’s a synthetic resin surface applied over a particleboard. This means regular wall paint won’t bond properly. You’ll need to prepare the surface correctly and use paint made for slick surfaces to ensure lasting results.
Measure Accurately

Accurate measurements determine how much paint you will need, how long the project will take, and the overall project costs. Proper measurements will also save you a trip to the store if you need to purchase more supplies.
To begin, measure the height, width, and thickness of every cabinet door. For the drawers, measure the front of the drawer independently, as the fronts are often different sizes compared to the cabinet door. Also, remember to take measurements of the cabinet frames around the openings. If you are painting the cabinets’ interior, be sure to measure the interior surface as well.
The amount of square footage covered with paint will vary on melamine surfaces, as the finish is so smooth and non-porous. You should plan about 350-400 square feet per gallon of paint, which is still less than how much standard wood surfaces will cover in paint. This estimated area of coverage accounts for the primer coat and the two finish coats of paint that will adhere to your surfaces.
Be sure to have measuring tools, including a tape measure, notepad, and calculator. You may also use a laser measure if your kitchen is larger and you are looking to cut down on your measuring time. It always helps to take photos of your measurements so you have something to reference when you are shopping.
Keep in mind the common mistakes that can happen when taking your measures. You will want to be careful not to forget to measure the edges of the doors, measure the interior surfaces, and consider that you may need multiple coats of paint. Along with this, it also always helps to add on at least 10% of paint for touch-ups later down the road, or for the next maintenance paint job.
What is Melamine?
Melamine is a type of synthetic resin surface that is applied over a core of particleboard or MDF. Melamine is durable and easy to clean with a smooth surface that is resistant to scratches and moisture. Melamine can be found in inexpensive kitchen cabinetry, office furniture, and bathroom vanities, for example.
Melamine consists of melamine formaldehyde resin that is compressed onto substrate materials, typically particleboard, in a high-pressure, high-temperature process. The manufacturing creates a durable, glossy thickness that emulates painted wood but is less expensive to produce.
Melamine surfaces appear perfectly smooth and have a slight sheen when viewed. Melamine feels hard and non-porous, unlike the grainy texture of wood. The melamine cabinetry typically has clean and straight edges and does not have the natural variation that solid wood has.
Melamine surfaces can be challenging to paint because paints struggle to adhere to the smooth, non-porous surface of melamine. Melamine is also water-resistant, and it is essential to choose an appropriate primer so that the paint will stick; otherwise, your paint may wipe off.
What About Thermofoil Cabinet Doors?
Thermofoil uses vinyl film heat-sealed to MDF substrates. Unlike melamine’s resin coating, thermofoil applies flexible vinyl sheets that wrap around detailed door profiles and raised panels.
The key differences affect your painting approach. Thermofoil has a slightly more textured surface than melamine’s glass-smooth surface. Heat sensitivity makes thermofoil prone to lifting at edges, especially around dishwashers and ovens.
When painting melamine, light sanding and quality primer ensure adhesion. Thermofoil requires extra attention to edge preparation, where the vinyl might lift. Use lower heat settings when force-drying thermofoil surfaces.
Both materials paint successfully with proper preparation. Thermofoil edges need more careful inspection and potentially more primer application. Melamine offers more predictable results due to its uniform surface.
Why Paint Melamine or Thermofoil?
Replacing cabinets in an average kitchen costs between $8,000- $25,000. If you paint melamine cabinets, you can expect to pay between $300 and $800 for materials, plus the cost of your time. Painting is comparable to a new installation except that the money spent yields a return on investment in weeks, if not months, instead of a new installation that returns an investment in years.
New cabinet installation entails demolition, disposal, plumbing modifications, and an electrical mod. There are hidden costs, such as replacing the counter material and repairs to the wall, which can easily cause the estimate to be twice what was initially stated.
Colour options are more robust and extend beyond the manufacturer’s usual capacity of colours. You can paint cabinets any colour to execute a design vision with huge flips from oversized fun colours to very subtle upgrades. Finish options extend to matte, satin, and semi-gloss sheens to accommodate aesthetics.
Once painted, they are easier to clean than the original melamine finish. You can purchase quality paint that offers resistance to stains, scratch resistance, and everyday wear, which outlasts laminate in its old age.
If you paint cabinets, it can provide a $2,000 to $5,000 increase in value to your home.
There are environmental benefits. Painting keeps waste to a minimum. Every time you repaint melamine or thermofoil cabinets, you extend their life by 10-15 years as opposed to replacing the cabinets and eliminating the disposal of old cabinets in a landfill.
Best Paint to Use For Melamine

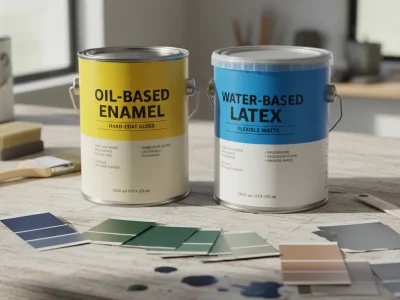
When it comes to melamine (or any cabinet paint), creating a barrier is essential. Hybrid enamel paints are your best choice for painting melamine cabinets because they bond/dry harder than standard latex paints, while allowing for easy clean up and decreased odour. Example top choices include Benjamin Moore Advance, Sherwin-Williams ProClassic, or Behr Alkyd Enamel. They’ll be priced around $45-65 per gallon. You’ll get the look and durability of a professional painting job by making this investment.
Don’t get stuck painting with standard wall paints. They won’t dry as hard as you’d like for cabinet use, even if the colour looks good. Oil-based paint is an option; however, cleanup requires a solvent and a long drying time. So balanced are the two that the best is to go with a water-based hybrid enamel paint.
The primer is to the top coat as the base coat is to a top coat. Primers specifically for glossy surfaces are trusted. Examples include Zinsser Bulls Eye 1-2-3 or Kilz Adhesion Primer. Your paint and primer are critical for long-lasting products.
You’ll want to choose between satin finishes or semi-gloss finishes. Satin finishes display fewer imperfections but tend to wear quickly. Although semi-gloss paints are slightly more durable, they can display imperfections in their finish. It is best to match the sheen between your primer and top coat to ensure the finish and performance of the paint is optimal.
How Do You Paint Melamine Cabinets?
Step 1: Clean and Prepare the Surface
Preparation surely forms the base of any excellent painting work. Moreover, proper groundwork ensures the final paint job will look professional and last longer. Basically, you need to take off all the cabinet doors, handles, and hinges – it’s the same first step for any cabinet work. Also, surely label each door properly to make the reassembly process easier later. Moreover, this simple step will save considerable time during reconstruction.
Basically, you need to clean the surfaces properly, the same way you would clean anything thoroughly. We are seeing that melamine cabinets get grease, dirt, and finger marks that stop paint from sticking properly. These things only make it hard for new paint to stay on the surface. Add a small quantity of dish soap and warm water to eliminate all the marks, and definitely the degreasing cleaner will do just fine as well.
After cleaning, you just wash the surface with clean water and let it dry completely. Dirt will actually make the paint bubble up or peel off. You definitely need to clean everything properly first.
Cleaning the surface is surely essential before applying any finish. Moreover, even invisible oils and residues can completely damage the final result.
Step 2: Sand the Cabinets
Melamine actually has a shiny surface that definitely makes it hard for paint to stick properly. Moreover, light sanding will surely create a rough surface for the primer to stick properly. Moreover, this texture helps the primer bond well with the material.
Use fine sandpaper with 180-220 grit and sand the surface itself gently. This will further smooth the entire area. Basically, you don’t need to remove the melamine layer – just make it the same as less shiny. As per the sanding work completion, wipe off the dust regarding surface cleaning using a tack cloth or damp rag.
If the cabinets are chipped or cracked, you should definitely fill them with putty or wood filler and sand them off once it sets. This step provides an even surface also for the following treatment., This step also provides an even area for the succeeding treatment.
Basically, don’t use rough sandpaper because it will scratch the melamine coating and show the particleboard underneath the same way.
Step 3: Apply a High-Quality Primer
Primers also prove essential in the process of painting melamine cabinets. They create an adhesion between the shiny melamine coating and paint that avoids peeling off and chipping in the days to follow.
Melamine’s preferred primer is one that’s specially marked appropriate for gloss or laminate finishes. There are quite a few experts who advise bonding primers or adhesion primers, specifically designed to bond smooth finishes like melamine, plastic, and laminate.
Apply with thin, even coverage with a high-quality synthetic brush or foam roller. Always paint all the edges and the corners. Allow the primer to dry entirely following the directions (between 6 and 8 hours). Lightly sand the primer coating with super fine sandpaper for extra durability prior to painting.
Tip: Do not go with thick applications of primer. Two thin ones are preferable and give smoother finishes.
Step 4: Choose the Best Paint for Melamine
After your primer has dried, you can then choose your paint. The paint you choose is the determining element in the outcome of having a durable finish that won’t peel or be scratched.
The ideal paint used to paint melamine is normally melamine paint or any type of acrylic latex paint used for cabinets. The paints have been particularly formulated such that they bond with shiny finishes and leave a hard-wearing, washable finish.
When you ask the question “Does melamine stain with acrylic paint?”, the answer solely lies with how you primed the surface. The melamine won’t stain the paint once you’ve primed the surface with the appropriate primer in the right manner. The paint peels off or creates blotchiness on unprimed surfaces.
Melamine paint specifically for melaminated surfaces is available and forms an impenetrable shiny surface which is wipe-clean and watertight, the perfect option in kitchens and bathrooms.
Recommended finishes:
- Semi-gloss paint may be removed with a cloth.
- High-gloss: Very shiny and high-gloss, fashionable but easily showing imperfections.
- Matte: Latest look but relatively shorter life in highly trafficked areas.
Tip:Roll out big sheets with the brush and the foam roller along the grooves or edges in order to get professional-grade finishes.
Step 5: Paint the Cabinets
Now we get to the good stuff: painting! Continue long, even strokes in one section with the first coat of paint.Make long even strokes in one area with the paint coating at the beginning. Don’t use too much paint on the brush or the roller; it’s quicker to dry with thin paint coats and fewer drips.
Allow the first coating to dry off entirely prior to the start of the second coating.Two to three coatings may be used in an effort to achieve full coverage, depending on the color and the type of paint.
It’s essential that you allow each to dry before beginning the next one. By rushing this process, you will develop unevenness or tackiness in the finish.
Pro Tip: Sand lightly between coats with the ultimate professional’s finish in ultra-fine (approximately 320-grit) sandpaper.
After your finish coat is set off, look for spot work. When it’s all sorted out, replace hardware and doors.
Step 6: Reassemble and Add Finishing Touches
Usually 24 to 48 hours, the paint is completely dry. When the paint dries, carefully rehang doors and hardware. Handle carefully in the first days; new finishes need cure all the way through.
It’s particularly excellent in the kitchen or bathroom, where traffic is constant and moisture and hygiene become the priority. Melamine paint for the tough professional finish that’s mold-resistant and won’t scrape off easily
You can also replace your cabinet handles or knobs. A new set of contemporary handles can totally transform the look of the face of your room. Fitting small felt pads at the rear of the doors can prevent paint from peeling off once the door is closed.
Tip: Display extra coverage by spreading out. Particularly helpful in kitchens or bathrooms because the high traffic makes ease of cleanliness and moisture the determining factor. Paint with melamine paint for the professional, rugged-wearing finish which resists moisture and scratches.It’s also self-leveling, so brush marks fade once it’s dried to give you an even finish.
What Brushes and Rollers Should I Use?
High-grade synthetic brushes work best when painting melamine surfaces. Natural bristles absorb water-based paints quickly, losing their shape. Choose 2-2.5-inch angled brushes for doors, while selecting 1-1.5-inch brushes for precise detailing work.
Foam rollers create smooth finishes on flat surfaces but may leave behind subtle textures. High-density foam helps mitigate this effect, with 4-6 inch rollers being the optimal size for efficient use on large door panels.
Microfiber rollers produce the smoothest surface finish with minimal stipple texture. Their 3/16-inch nap provides effective paint pickup without extraneous textures – these rollers may cost more, but they deliver superior results.
Clean brushes and rollers thoroughly between coats to ensure a smooth finish. Water-based paints can be easily washed out with soapy, warm water. For short breaks, cover tools with plastic bags to prevent drying out.
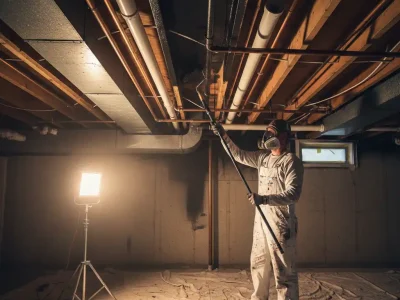
Can You Spray Paint Melamine?
Spray application results in the smoothest finish when used to decorate surfaces made of melamine. However, professional results require specific equipment and technique, making this technique challenging for DIY projects.
Airless sprayers make short work of cabinet painting but require significant set-up time, while overspray protection becomes critical in homes occupied by family and guests. Instead of purchasing equipment for one-time use, consider renting professional equipment instead for future reference.
HVLP (High Volume Low Pressure) systems allow more control with minimal overspray, costing between $200 and $500 for quality models. Practice on test pieces before commencing any real projects.
Spray painting requires extra preparation work, such as masking and overspray protection, as well as rental costs for equipment and a learning curve, when compared with brush and roller methods.
Final Thoughts
Painting melamine cabinets delivers remarkable kitchen transformations at a fraction of replacement costs. Success depends on proper preparation, quality materials, and patience throughout the multi-day process. The key elements include thorough cleaning, appropriate primer selection, and systematic application techniques.
Expect your painted cabinets to last 5-8 years with proper care and maintenance. Touch up high-wear areas as needed to maintain appearance. Regular cleaning with mild soap extends the life of your painted finish.
Common pitfalls include rushing the drying process, skipping primer, or using inadequate paint quality. Take time to do each step properly for results that rival professional kitchen renovations.
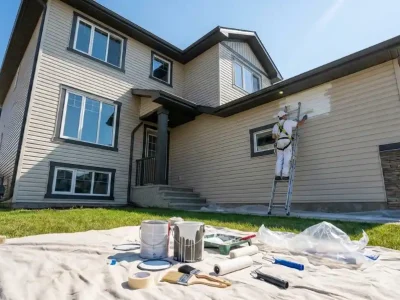
For homeowners seeking professional results without the DIY commitment, San Diego Custom Painting offers expert interior painting services and exterior painting services in san diego. Professional painters bring experience, proper equipment, and warranties that ensure lasting satisfaction.
Consider related projects like painting trim work, updating light fixtures, or refreshing wall colors to complement your newly painted cabinets. These additional improvements maximize the impact of your kitchen makeover investment.
FAQs
Can you paint over melamine cabinets?
Yes, melamine cabinets paint successfully with proper surface preparation and quality primers. The key is creating adhesion between the smooth melamine surface and your chosen paint system.
What type of paint will stick to melamine?
Hybrid enamel paints with bonding primers provide the best adhesion on melamine surfaces. These water-based formulas cure hard and resist daily kitchen wear while maintaining easy application properties.
Do I need to sand melamine before painting?
Light sanding with 220 grit sandpaper improves paint adhesion significantly. This creates surface texture that helps primer and paint bond properly to the smooth melamine finish.
Can you paint melamine cabinets without sanding?
While possible using deglosser products and high-quality bonding primers, sanding provides more reliable long-term results. Skip sanding only if time constraints make it absolutely necessary.
What degreaser to use before painting cabinets?
TSP substitute or commercial kitchen degreasers remove grease and residue effectively. Proper cleaning ensures maximum paint adhesion and prevents premature failure of your painted finish.