Do you have beautiful wooden cabinets, trim, or furniture that is hidden by a dark, shiny, and clearly old coat of varnish? You want to give your room a new, modern look, but don’t want to go through the hard, time-consuming work of completely sanding and stripping. The thought of working on that smooth, non-porous surface can be intimidating, so many people live with a finish they dislike. But before you give up and accept the past, you need to know one important thing: can you paint over varnished wood?
Without a doubt, the answer is “Yes,” and the process is much simpler than you might think, as long as you follow a few professional steps. You do not have to be an experienced painter to give your project a finish that is strong, perfect, and long-lasting. This comprehensive guide will show you the exact steps to prepare any varnished surface, use the primers recommended by experts, and apply the top coat. Get ready to give your furniture a new lease on life and give those special pieces the bright new look they deserve.
Table of Contents
ToggleWhat is Varnished Wood?
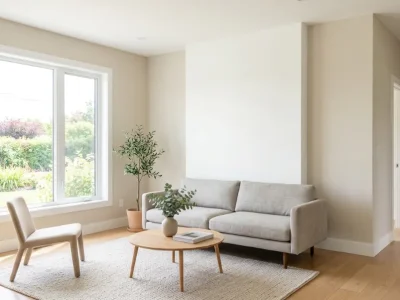
A clear, protective layer is put on the surface of varnished wood. This finish makes a tough, shiny layer that protects the wood from water and normal wear and tear. It’s like a clear coat that protects your furniture and keeps it looking good for years.
A simple test can tell you if the wood is finished. Use acetone on a cotton swab and gently rub it on the spot you want to conceal. You have oil if the finish gets sticky or soft. If it doesn’t happen, it could be due to a polyurethane or a different type of finish.
Varnish is not like paint because it is see-through. It keeps the surface safe while letting you see the wood grain. Many old pieces of furniture and homes have this finish, which is why many of the items people have received have a glossy look.
Can You Paint Over Varnished Wood?
If you do it right, painting over polished wood does work well. The finish makes the surface so smooth that paint has a hard time sticking to it. Paint will peel and chip in a few weeks if you don’t do the right prep work.
Clean, sand, and prime are the three most important steps. These make a surface that paint can stick to well. If you don’t do any of these, your job will fail and cost you time and money.
It’s possible to paint over varnish with both water-based and oil-based paint. What you do will depend on the job and how comfortable you are with it. Oil-based choices last longer, but they need to be well ventilated. You can clean up water-based paints better and they don’t smell as bad.
Testing Your Varnished Surface
Ensure you understand the task at hand before commencing any work. Put a little diluted alcohol on a rag. In a secret spot, rub it on your furniture. Polyurethane stays hard, but varnish gets softer when it’s mixed with alcohol.
It’s essential to conduct this test because different ends require different methods. It saves time and prevents mistakes on your project to know exactly what the finish is.
How to Paint Over Varnished Wood

Painting on finished wood requires patience and the right sequence. Follow these steps for professional results that last for years.
Step 1: Make Repairs and Clean the Surface
Start by fixing any damage to your wood. Fill cracks and holes with wood filler. Let it dry completely according to the manufacturer’s instructions. Sand these spots smooth once dry.
Clean the entire surface with TSP (trisodium phosphate) mixed with water. This powerful cleaner removes grease, dirt, and grime that blocks paint adhesion. Wear gloves when using TSP as it can irritate skin.
Wipe down everything with a damp cloth after using TSP. Let the wood dry for at least two hours. Any moisture left behind will cause problems when you apply primer.
Step 2: Sand the Varnished Surface
Light sanding gives paint something to grip. Use 120-150 grit sandpaper for this job. Sand in the direction of the wood grain to avoid ugly scratches.
You don’t need to remove all the varnish. Just rough up the surface enough so it’s no longer glossy. This takes about 10-15 minutes for a small furniture piece.
Clean off all dust with a vacuum after sanding. Follow up with a slightly damp cloth to catch any remaining particles. Dust under your paint creates a bumpy, unprofessional finish.
Step 3: Apply Caulk Where Needed
Check for gaps where wood pieces join together. Caulk these spots with a paintable acrylic caulk. This step often gets skipped but makes a huge difference in the final look.
Run a thin bead of caulk along any seams or joints. Smooth it with your finger or a damp cloth. Let it dry according to package directions before moving forward.
Step 4: Prime the Surface
Primer is your insurance policy for this project. It creates a bridge between the varnish and your new paint. Choose a high-quality bonding primer made for slick surfaces.
If using oil based paint, pick an oil-based primer. For water-based or latex paint, use a latex primer instead. This matching prevents adhesion problems down the road.
Apply primer in thin, even coats using a brush or roller. Don’t overload your brush or you’ll get drips. Let the primer dry for 24 hours minimum before painting. Some primers need even longer in humid weather.
Step 5: Sand the Primer (Optional)
Check your primed surface after it dries. If you see brush marks or rough spots, give it a light sanding with fine-grit sandpaper. This creates a glass-smooth base for paint.
Wipe away sanding dust with a clean cloth. This quick step takes five minutes but dramatically improves your final results.
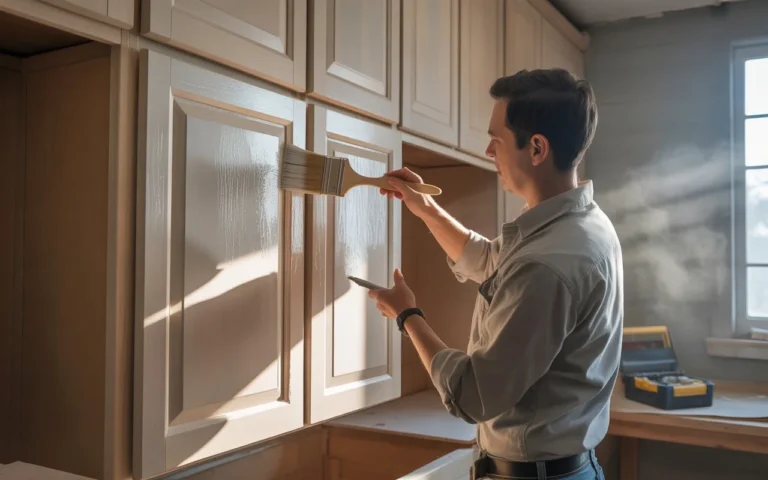
Step 6: Apply Paint Coats
Now comes the fun part. Stir your paint thoroughly before opening. Apply the first coat in thin, even layers. Watch for drips and brush them out immediately.
Let the first coat dry completely. Check your paint can for exact drying times. Most need 4-8 hours between coats, but some require overnight drying.
Apply a second coat the same way as the first. Two coats provide better coverage and durability than one thick coat. For painting sealed wood or painting over varnished woodwork, thin coats prevent runs and sags.
Step 7: Add a Topcoat for Protection
A clear topcoat adds extra protection to your work. Choose between glossy, semi gloss, or matte finishes based on your preference. Semi gloss works well for kitchen cabinets and high-traffic furniture.
Apply two thin topcoat layers with proper drying time between them. This seals your paint and makes cleaning easier. The topcoat also protects against scratches and wear.
For projects like painting varnished woodwork or trim, a topcoat extends the life of your work significantly.
What Kind of Paint Should You Use to Paint Over Varnished Wood?
The best paint depends on your specific project and comfort level. Oil-based paints create an extremely durable finish that resists chips and scratches. They work great for kitchen cabinets and furniture that gets heavy use.
Oil-based options do have drawbacks. They smell strong and need mineral spirits for cleanup. You must work in a well-ventilated area or wear a respirator mask. Drying times are longer too, often 24 hours between coats.
Water-based acrylic paints offer easier cleanup and less smell. They dry faster than oil-based types, usually in 2-4 hours. Modern formulas are quite durable and work well for most furniture projects.
Aerosol spray paint for wood is another option for small items or detailed pieces. Spray paint creates a smooth finish without brush marks. It works best on chairs, small tables, and decorative items.
Always choose what paint to use on wood based on the surface and expected wear. High-traffic areas need tougher paints while decorative pieces can use standard options.
What Happens if You Paint Over Varnished Wood Without Prep?
Painting won’t work if you don’t prepare. Paint won’t stick well to the shiny varnish surface. The edges of your new paint start to peel after a few days or weeks.
Where people touch the furniture the most is where chips tend to appear. The paint comes off in sheets, taking your time and money with it. The surface will be ugly and patchy, and it will look worse than it did before.
Because of good preparation, these issues don’t happen. Cleaning removes grease and dirt that you can’t see. Sanding creates tiny lines on the surface that allow paint to adhere to it. Everything works together in a way that lasts because of priming.
The prep work takes a few more hours, but it saves you from having to redo the whole job. When making a strong base for a house, think of it that way.
Can You Remove Varnish Without Sanding?
Yes, there are alternatives to sanding for removing paint. Use a heat gun to soften the finish enough to remove it with a putty knife. Move the heat gun back and forth slowly as you point it at the surface.
In seconds, the finish will bubble and get softer. Take it off while it’s still warm. This method works quickly, but you must be cautious with the heat. The wood below becomes damaged by excessive heat.
Chemical strippers remove varnish without requiring cleaning or heating. Use a brush to apply the stripper and wait for it to take effect. The finish gets sticky and soft. Cut it off with a knife and use mineral spirits to clean the surface.
Both methods require a lot of airflow and safety gear. Protect your eyes and hands with gloves, and work outside whenever possible to minimise exposure. Chemical fumes can be hazardous when confined in a small space.
However, most painting jobs don’t need the finish to be completely removed. It’s fine to use light sandpaper to roughen the surface. You should only use the stripping methods on jobs where you want to see the wood grain itself.
Common Mistakes to Avoid
Don’t rush the drying times between coats. Wet primer or paint under new layers causes adhesion problems. Always wait longer than the minimum time listed on the can.
Avoid thick paint coats. Multiple thin layers beat one thick layer every time. Thick coats sag, drip, and take forever to dry properly.
Never skip the cleaning step. That invisible film of grease or dirt prevents paint from sticking. A five-minute cleaning saves hours of repair work later.
Don’t use the wrong primer type. Match your primer to your paint. Oil with oil, latex with latex. Mixing them creates weak bonds that fail quickly.
How Long Does the Project Take?
A typical furniture piece takes 2-3 days from start to finish. Most of that time is waiting for products to dry. Your actual work time is only 3-4 hours spread across those days.
Day one covers cleaning, sanding, and priming. Day two handles the first paint coat. Day three finishes with the second coat and optional topcoat.
Larger projects like painting over varnished woodwork or cabinets take longer. Factor in more time for prep work and drying when dealing with multiple surfaces.
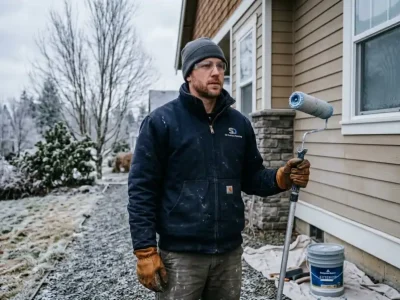
Allow SD Custom Painting To Do The Painting For You
Professional help makes sense for large or important projects. San Diego Custom Painting brings years of experience to every job. Our team knows exactly how to paint over varnished wood for perfect results.
We handle everything from furniture refinishing to complete cabinet painting services in San Diego. Our process ensures proper prep work and high-quality finishes that last for years.
Why spend your weekend fighting with paint and primers? Let our experts transform your varnished wood pieces while you relax. We use professional-grade materials and proven techniques for flawless results.
Contact San Diego Custom Painting today for a free estimate. We’ll assess your project and provide a detailed plan for bringing your vision to life.
FAQs
Can you paint on top of varnish without sanding?
You can use special bonding primers designed for glossy surfaces. These grip slick finishes better than regular primers. However, light sanding still gives the best results for long-term durability.
What’s the best primer for varnished wood?
Look for primers labeled as bonding or adhesion primers. Brands like Zinsser BIN and Kilz Adhesion work excellent on glossy surfaces. Match the primer type to your paint choice.
How long should the primer dry before painting?
Wait at least 24 hours after priming. Check your primer’s label for specific times. Humidity and temperature affect drying, so add extra time in damp or cold conditions.
Can you use chalk paint on varnished wood?
Chalk paint works on varnished surfaces with minimal prep. You still need to clean the surface thoroughly. Light sanding helps but isn’t always required with chalk paint formulas.
Will paint stick to polyurethane?
Polyurethane needs the same prep as varnish. Clean, sand, and prime the surface for best results. The ultra-smooth finish of polyurethane makes sanding especially important.
What grit sandpaper for varnished wood?
Start with 120-150 grit for removing the glossy finish. Switch to 220 grit for smoothing primer or between paint coats. Coarser grits like 80 grit can damage wood surfaces.
Do you need two coats of primer?
One good primer coat usually suffices on varnished wood. Apply a second coat only if the first coat looks thin or the varnish color shows through.
Can you spray paint varnished wood?
Yes, spray paint works great after proper surface prep. Clean and sand the varnish first. Use a bonding primer if you skip sanding. Apply thin, even coats to avoid runs.