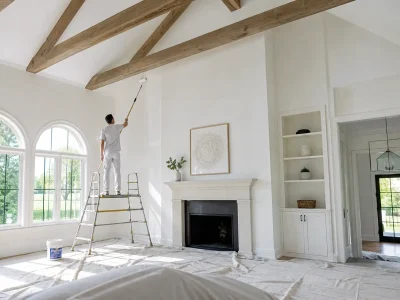

From cabinets and doors to trim and furniture, stained wood can add a feeling of warmth to home decor. If your style shifts and you don’t want to invest in new furniture or features, stained wood is definitely not a lost cause!
“Can you paint over stained wood without stripping the finish?
Table of Contents
ToggleThe answer is YES!
(Assuming that you have the foundations down, the appropriate preparation/primer, and paint on hand, the stained material just needs a breath of fresh air.) Painting over stains without stripping. Painting over stains doesn’t always clean up nicely.
You’ll see splotchy bleeds on top of your beautiful paint job, or you could notice chips if you have greasy, waxy, or grimy residue accumulated over decades. We cover the essentials of achieving great, long-lasting results without lengthy stripping efforts.
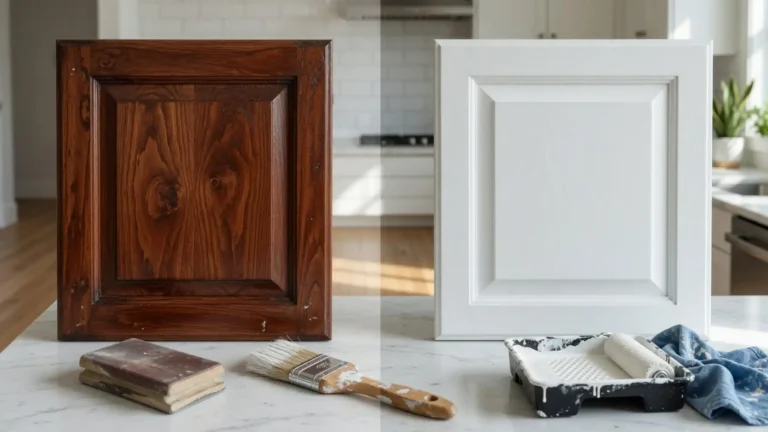
Do You Paint Over Stained Wood? Remove the Stain?
Yes, in most circumstances, painting over stained wood doesn’t require you to remove the stain 100%. The trick is a little prep before going over that stain. You don’t need to strip the stain entirely from your project, but you do need to prep the surface to be free of contaminants, knock down the current finish, repair any damage, and apply a proper primer.
This method saves you a lot of time, since you do not need to strip every last trace of stain from your project, as you would with some paint prep. This trick is very useful on projects such as painted kitchen cabinets, painted interior doors, painted trim and baseboards, and other types of painted wall paneling. If all of the stain is completely removed from your project, you are creating way more work and mess.
Also, the overall condition of your stained project is an issue. The way of preparation will vary with stained cabinets (and interior doors, baseboards, wall paneling, etc.) depending on if the original stain is peeling, chipped, covered with a failed finish, or coated with a wax that is contaminating it. Get a painter’s professional opinion to assess what’s needed for your painted home.
Why Proper Preparation Matters Before Painting Stained Wood
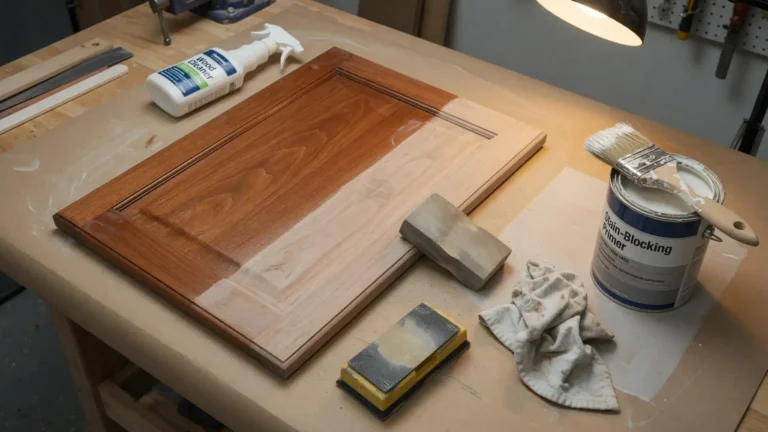
Most homeowners fall into the error of preparing stained wood the same way they’d prepare a painted wall. Wood Stain’s oils, tannins, waxes, or the like make it difficult for paint to adhere to a stain, or worse yet, discolor the new finish-Even the biggest “hump” often occurs after the first coat is applied. Prep yields a new, clean, anchored, and painted wood surface.
Prep gives the new coating something to cling to, ensuring less likelihood of chipping or peeling or “missing the highs and lows.”
This is generally a step not neglected by those perfectionistic people who want a lovely, professional final result. You can apply the stain nicely and smoothly if you prepare it correctly first, of course.
Prep Surface With A Deep Clean
Wash Your Wood Before Priming. Or sanding. Wipe off the surface of the wood, and be sure there is absolutely no grease, grime, fingerprints, or any other residue on the wood surfaces. You might be surprised at just how many accumulate on cabinets or particularly often-touched trim surfaces.
With your preferred wood cleaner designed for the job, wipe down the wood surface and then rinse; let the surface dry thoroughly.
You don’t want to leave residue, soaps, or oils, as this can hinder primer application.
Lightly Sand the Existing Finish
Sanding will dull the overall finish and create just a bit of texture that helps the primer latch on. You don’t necessarily need to sand with enough pressure to remove all the stain. Use a fine to medium-grit sandpaper (depending on your finish/surface type). Dust away completely once done sanding before starting the next step.
How to Paint Over Stained Wood Properly
Actually, how to paint over stained wood may vary depending on what kind of stain you would have to do and condition of the wood, but in any successful how-to, there is a basic process you should follow that includes several stages of painting: cleaning, preparing the wood, priming the wood, and painting. The first common mistake is painting stained wood without a primer. Even if the painted wood looks very tidy after sanding, this layer underneath will continue transferring itself to your paint. If stain-blocking primer is used correctly, the stain-blocking primer functions as an effective bridging agent from old paint to new paint and improves the application of paint on the wood.
Step 1: Wood Cleaning and Preparations
Initially, any dust, grease, and other contaminants like dirt can be cleaned from the surface of the wood. Cosmetic correction of the surface is done, and then lightly sanded to reduce gloss in the original paint. Before priming, eliminate any moisture on the surface; dust off any sanding dust. Sand to properly prepare it, but remove it; the former discoloration is not essential at this point.
Step 2: Apply the Right Primer
Apply the Correct Primer; stain blockers will be extremely important when painting red-painted wood stains or any knots that may bleed through your painted color. When dry, refer to your stain blocker manufacturer’s instructions and apply a coat; a second coat may be necessary on your wood project depending on the risk factor for bleed-through.
Step 3: Sand Between Coats When Appropriate
Lightly sand the painted finish if needed. If your painted finish seems and feels just a bit scratchy and/or gritty, it may call for a coat of very fine sandpaper before proceeding with additional coats. Brush off the dust and go! This applies to painting such wood pieces as cabinetry, furniture, doors, trim, and any other application that might be seen at close range.
Step 4: Apply Quality Paint
Use even coats of paint (thin; you will not be able to cover with one stroke of a paintbrush) in your chosen color and follow dry instructions. Depending on paint color, original stain color, primer, and whether you’re trying for that perfect painted effect, you may very well need two coats…or more! Don’t rush it!
Selecting the Best Primer for Stained Wood
Selecting a paint primer is key when painting wood. The wrong one can affect stain-blocking abilities or the paint’s adherence, but the right one may keep the paint from bleeding color. Typically, use better-quality primers when covering stain-blocked cabinets in lieu of low-VOC, inexpensive primers.
Oil-based paints or primers like shellac paint were favored, but since good-quality primers are now water-based, they can be substituted.
The type you use would depend on the wood that has been painted, the type of stain, the size of the wood’s discoloration, or the paint you are choosing for your project. He can make a choice that may require more than one coat to properly transform stained dark wood into painted lighter-colored wood.
Problems You Might Find When Painting Stained Wood
If you paint stains on wood properly, you can achieve wonderful results. But there can be some problems if you ignore your wood prep and the right stain removers, or when dealing with any type of paint products not meant for wood surfaces. By being aware of these issues before they occur, your work will not end up in some paint game later.
Bleeding is a readily apparent issue.
Brown, yellow, orange, or red stains seep from the wood or the prior stains and seep into your newly applied paint layer. Poor Adhesion: especially when painting over a slick, shiny stain finish, paint doesn’t adhere well without proper preparation of this coating surface.
Bleeding of the stain through the paint:
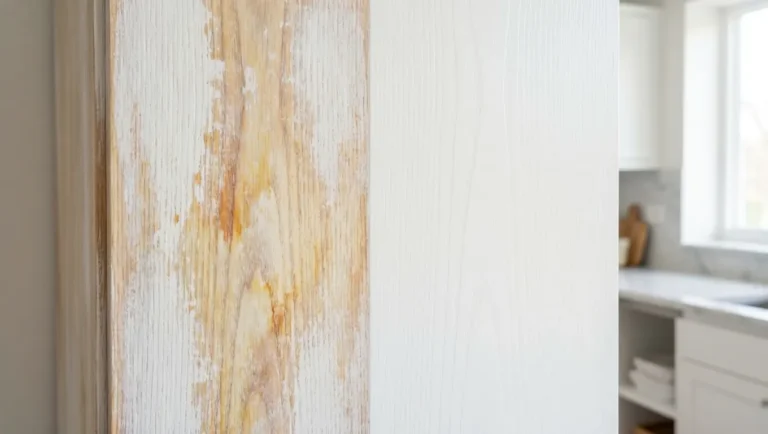
A case of stain bleed, or a patchy and grimy-looking new coat of paint, a real dilemma, caused by a more-than-likely staining underlayer. Usually found when using darker stain colours or specific wooden materials. More layers of paint will not solve the riddle; rather, a stain-blocking treatment is likely to save the situation by sealing off the staining layer, at work of blocking your finishing layers from coming into contact with the staining area.
Peeling or Poor Paint Adhesion
Paint chipping: Paint is likely to come off when it is put on top of an untidy, too-glossy, or inappropriate surface. If you skipped the basic process of removing previous layers of this product and preparing the existing coat beneath with the paint prep process, it would really affect the life of the product. The paint adhesion process can be successful if the surface has been cleaned, sanded, and primed. In the case of an old finish being imperfect, those loose parts must be taken off before applying a new one.
Uneven or Rough Finish
Poor sanding, excess dust, an excessively thick coat, and an improper painting method can all lead to a coarse finish, which would be particularly noticeable on cabinet and door surfaces that are smooth. Proper paint drying time and a thin intermediate sanded coat with clean painting tools can all prevent such issues from taking place.
When do you need a painter?
While there may be some projects small enough that a seasoned homeowner can handle themselves with stained-wood painting, larger stained-wood surfaces may require preparation and detail that you cannot anticipate. Custom cabinets, stair risers, long spans of trim, doors, and built-ins require a much greater commitment of time than anticipated. Professional painters have the skill of examining current finishes, choosing primers that work well over what is currently there, sanding difficult wood to achieve proper priming, and applying paint smoothly and evenly to even challenging spaces.
They can tell you if you need to remove the current coating from your wood before you paint.
If you have a stained-wood painting job where you can’t dedicate several weekends and achieve a predictable result, professional services can be quite valuable. SD Custom Painting can help you complete a stained-wood painting project with the appropriate level of planning and an enduring finish.
How much pre-paint preparation does wood staining require?
As you know, every painted surface is not created the same, nor is every stained-wood object. A very light-finish interior trim can be prepared with just a wash, a little buffing, and paint.
A stained cabinet with grease from 10+ years ago can require a whole lot more steps.
The color of the finish and quality of coating will matter most with painting over stained projects. Stains that are dark in tone can take far more preparation if you are covering with a very light color such as white. Inspect your wood for damage, shine, contamination, and any previous finishes that have been applied, and test any new material you choose in an area not visible to see if there is an issue.
Conclusion
So, yes, you can paint over stained wood, often. The key is to go beyond just the paint layer to focus on the prep. Whether you’re sanding, scraping, repairing holes, priming, or just choosing the right paint and the right application method, preparing the surface will be the deciding factor in whether your painted stained wood job looks like a quick fix or a permanent solution.
If you are on the fence about whether the stained wood you’re using needs a lot of prep work or what types of products you should be using, then professional advice might be a great idea. You can have someone like SD Custom Painting assess whether or not the painted wood that you have, or are trying to paint, has the correct foundation and design a painting method that is suitable for the task.
FAQs
Will I have to get every piece of the stain off before I paint?
Are there ever circumstances where a full clean and re-coat is best? Not if there is currently a suitable coating at hand; cleaning, sanding, and priming might be sufficient. Inadequate and deteriorated coatings will require other treatments before this, as in the sands.
How many coats should be applied to stained wood?
The No. The coat needed depends on the colour of the paint, the spread of primer, whether there is already a stain, and the finish you desire. A few heavy coats rarely give a better finish than a couple of thin coats. Follow re-coat & dry times as given for each product.
Will SD Custom Painting paint over stain?
Yes. SD Custom Painting can probably do some stained-wood projects. They are capable of performing all the correct prep work. The proper selection and application of primer by a professional spray painter is not something a homeowner can easily do. They know the technique to use based on what the existing finish is and its condition.