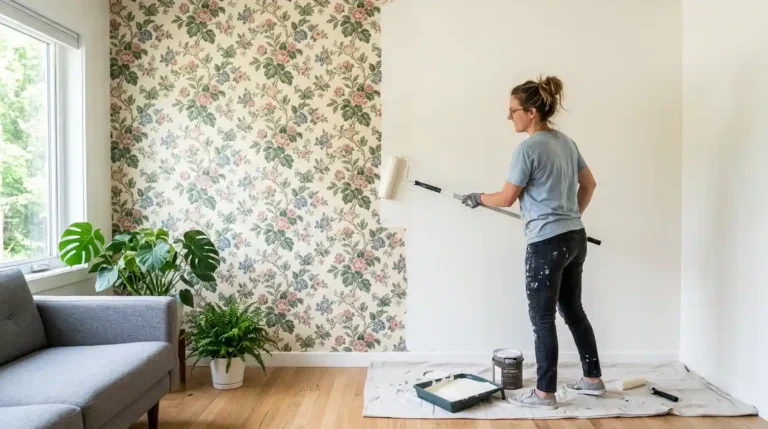
During renovations, most homeowners encounter a familiar problem: the old wallpaper must be removed, but the idea of scraping it off for three days seems like a nightmare. The temptation is to pick up a roller and hide it simply. You want a new appearance without the physical strain of demolishing walls that may have been put in place decades ago.
The short answer is yes, you can paint over wallpaper, but it isn’t always the right choice. While it saves time today, it can lead to peeling, bubbling, or a messy finish if the prep work isn’t perfect. This guide will help you decide if your walls are good candidates for this shortcut and show you the exact steps to get a professional result that lasts.
Table of Contents
ToggleKey Takeaways
- Painting over wallpaper works but only on smooth, firmly attached, non-vinyl paper
- Oil-based primer is non-negotiable. Water-based primer will ruin the job
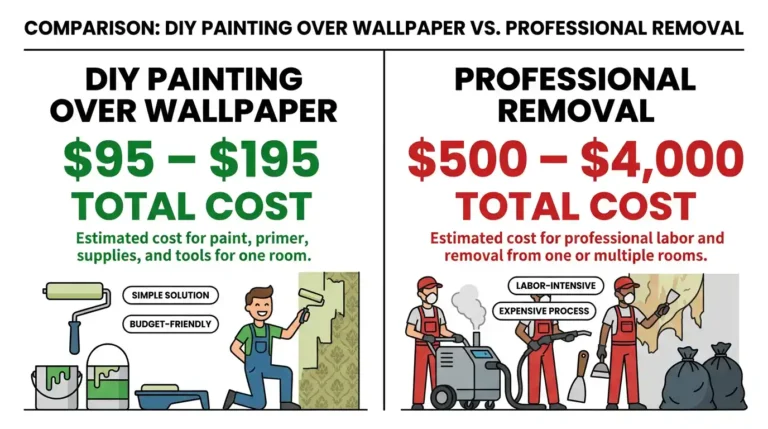
- DIY cost runs $95 to $195. Professional removal costs $500 to $2,000 per room
- Seams may still show slightly even after two coats
- Vinyl, textured, and peel-and-stick wallpaper should be removed, not painted
Should You Really Paint Over Wallpaper?
Most professional painters will tell you to remove wallpaper first. That advice isn’t wrong. Bare walls give you the cleanest, longest-lasting paint job. But “remove it first” ignores one big reality: wallpaper removal can destroy walls.
In older homes especially, wallpaper was often applied directly over unfinished drywall or raw plaster. When you strip it, you strip the wall surface with it. Now you’ve got a bigger problem than old wallpaper. You’re looking at extensive wall repairs before you can even think about paint.
So the real question isn’t just “can you do it?” It’s “does it make sense for your specific situation?”
Painting on top of wallpaper makes sense when:
- The paper is smooth, flat, and fully attached to the wall
- There are no large tears, peeling sections, or bubbles
- The pattern is not deeply textured or raised
- You’re working in a low-moisture room like a bedroom or living room
- You want to save $400 to $1,800 compared to professional removal
Painting over wallpaper does NOT make sense when:
- More than 20% of the surface is peeling or bubbling
- The wallpaper is vinyl or peel-and-stick
- The room has high moisture (bathrooms especially)
- You want perfectly smooth, flat walls
When You Absolutely Shouldn't Paint Over Wallpaper
Some wallpaper types just don’t work with paint. Know these before you buy a single can of primer.
- Vinyl wallpaper: Most modern wallpaper has a vinyl coating. Paint doesn’t bond well to plastic. You’ll get peeling within months. If you’re not sure what type you have, do a simple test: wet a corner and try to peel it. If it peels off cleanly in one sheet, it’s vinyl. Remove it.
- Peel-and-stick wallpaper: This is designed to be temporary. The adhesive weakens over time anyway. Adding paint weight speeds up that process. Don’t try to paint it.
- Grasscloth wallpaper: Natural fiber textures absorb primer unevenly. The result looks blotchy and uneven no matter how many coats you apply. Remove it.
- Heavily textured wallpaper: Paint follows whatever surface is underneath it. Every bump and ridge stays visible. If smooth walls are the goal, textured wallpaper has to come off.
- Peeling or damaged wallpaper: If edges are already lifting, paint makes it worse, not better. The added moisture from water-based products loosens adhesive even further. Either re-glue all loose sections before you start, or remove the paper entirely.
Step-by-Step: How to Paint Over Wallpaper
What You’ll Need
Cleaning supplies:
- TSP (trisodium phosphate) or mild degreaser
- Microfiber cloths or soft sponges
- Bucket of warm water
Repair supplies:
- Wallpaper seam adhesive
- Putty knife
- Spackle or joint compound
- 150-180 grit sandpaper
Painting supplies:
- Oil-based primer (critical not water-based)
- Gray-tinted primer for dark patterns
- 2-inch angled brush for cutting in
- 3/8 to 1/2 inch roller cover and frame
- Latex or oil-based topcoat paint
- Painter’s tape and drop cloths
- Mineral spirits for cleanup
Estimated cost for a standard bedroom: $95 to $195
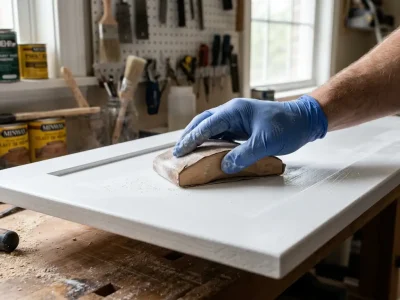
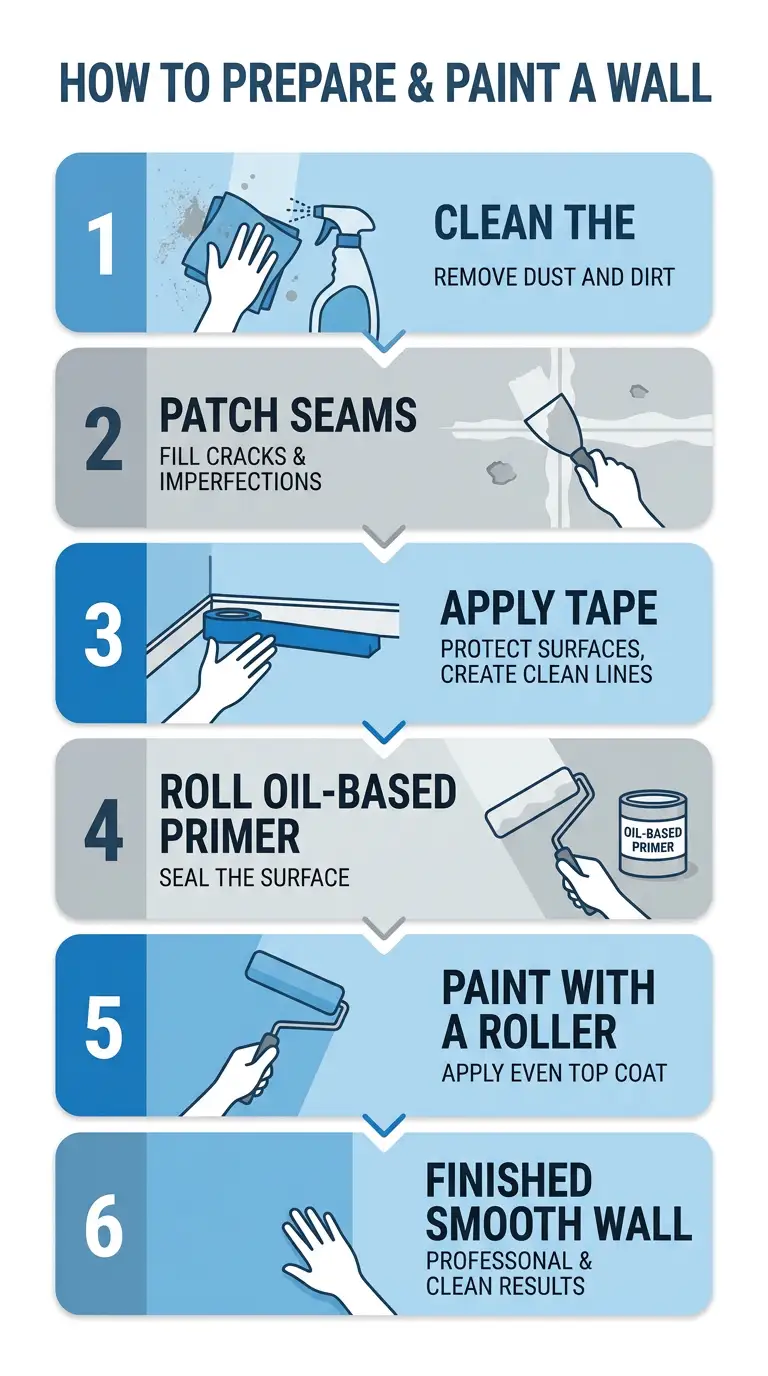
Step 1: Clean the Walls Thoroughly
Dirt, grease, and dust all prevent the primer from sticking. Wipe every wall with a barely damp microfiber cloth. Don’t soak the surface. Too much moisture loosens wallpaper adhesive and causes bubbling before you’ve even opened the primer can.
For kitchen walls with grease or cooking residue, mix TSP with water according to package directions. Apply with a well-wrung sponge. Let the walls dry for a full 24 hours before moving on. Don’t rush this step.
Step 2: Fix Every Loose Seam and Damaged Area
Inspect the entire wall, section by section. Run your hand along every seam. Feel for ridges, lifted edges, or soft spots.
For loose seams: lift the edge carefully with a putty knife. Apply wallpaper seam adhesive underneath. Press flat. Wipe away any excess glue with a damp cloth. Let dry overnight.
For small tears or holes: apply spackle directly over the damage. Let it dry completely. Sand smooth with 150-grit sandpaper. Wipe away sanding dust with a damp cloth.
Don’t skip this step. Every flaw you leave now will be more visible once paint is on the wall, not less.
Step 3: Tape and Protect Everything
Apply painter’s tape along baseboards, crown molding, door frames, and window trim. Press the tape edge firmly with your finger to prevent paint bleed.
Lay drop cloths across all floors. Oil-based primer stains. It does not come out of carpet or hardwood floors easily.
Step 4: Apply Oil-Based Primer: This Step Wins or Loses the Job
This is the single most important step in painting over wallpaper. Use oil-based primer only. Not water-based. Not latex. Oil-based.
Here’s why this matters: water-based primer soaks through wallpaper and reactivates the old adhesive. The result is bubbling, lifting, and peeling sometimes before the primer is even dry. Oil-based primer seals the surface and creates a solid barrier between the wallpaper and your topcoat.
If your wallpaper has a dark pattern or bold colors, use gray-tinted oil-based primer. White primer over dark wallpaper requires three or more topcoats for full coverage. Gray-tinted primer cuts that down to two.
Open windows and use fans. Oil-based primer has strong fumes. Wear an N95 mask. Don’t skip ventilation.
Start by cutting in around all edges with your 2-inch brush. Then roll the main wall sections using a W-shape pattern with your roller. This cross-pattern prevents visible roller lines when the primer builds up. Let the primer dry for a full 24 hours.
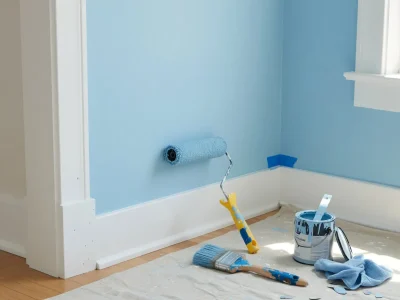
Step 5: Apply Your Paint
Once the primer is fully dry, you’re ready for the topcoat. Most people use latex paint here easier cleanup and lower fumes than oil-based topcoats.
For finish, choose matte or eggshell. Satin and gloss finishes highlight every imperfection on the wall. Since you’re painting over wallpaper, imperfections exist. Matte hides them better.
Lighter paint colors cover wallpaper patterns more easily than dark shades. If you want a dark color, plan on three coats instead of two.
Cut in with your brush first. Then roll using the same W-pattern. Let the first coat dry for 2 to 4 hours. Apply a second coat. Two coats is the standard minimum over wallpaper.
Project Timeline
- Day 1: Clean walls 2 hours of work, 24 hours drying
- Day 2: Repair seams, tape, prime 4 to 5 hours of work, 24 hours drying
- Day 3: First topcoat 2 to 3 hours of work, 4 hours drying
- Day 4: Second topcoat and cleanup 2 to 3 hours of work
- Total active work time: 10 to 13 hours over 4 days
The Pros and Cons of Painting Over Wallpaper
The Upsides of Painting Over Wallpaper
Cost savings are real. Professional wallpaper removal runs $500 to $800 for a single bedroom and $1,500 to $4,000 for a whole house. Painting over it yourself costs $95 to $195 in supplies. That gap is hard to ignore.
It protects your walls. Removing old wallpaper from unfinished drywall or plaster often damages the wall surface underneath. Painting over it avoids that risk entirely.
It’s beginner-friendly. You don’t need special skills or expensive tools. If you can roll paint on a wall, you can handle this project.
The Downsides to Painting Over Wallpaper
Seams may show. Even with skim coating and gray primer, faint seam lines sometimes remain visible. It depends on lighting and how closely someone looks.
Future removal is harder. Painted wallpaper is more difficult to strip than unpainted wallpaper. You’re committing to paint for the long term.
Not all wallpaper types qualify. Vinyl, textured, and peel-and-stick surfaces don’t work well with paint. Your options are limited based on what’s on your walls.
Pattern bleed-through is possible. Dark or bold patterns sometimes show through multiple coats. Gray-tinted primer helps, but doesn’t guarantee perfect coverage every time.
Effectively Cleaning the Wallpaper Is Essential
One thing people underestimate: how dirty wallpaper really is. Years of dust, cooking grease, fingerprints, and humidity leave a layer of residue on the surface. Primer applied over that layer won’t bond correctly. You’ll see peeling within weeks.
For standard rooms, a microfiber cloth with warm water is enough. For kitchens, use TSP cleaner. TSP cuts through cooking grease that regular soap won’t touch.
One important rule: use as little moisture as possible. Excess water loosens wallpaper adhesive. You want to clean the surface, not wet it. Wring out your cloth or sponge before touching the wall. If water is dripping, it’s too wet.
After cleaning, wait the full 24 hours. The wall needs to be completely dry before the primer goes on.
Use Primer and Prep Properly to Make Your Paint Stick
The most common reason painting over wallpaper fails is the wrong primer. Homeowners buy water-based primer because it’s cheaper and easier to clean up. Then the wallpaper bubbles, lifts, and peels. The entire job has to be redone.
Oil-based primer for painting over wallpaper is not optional. It seals the paper, locks down the adhesive, and creates the bonding surface your topcoat needs.
If the edges of your wallpaper are loose or curled, use seam patch glue before you prime. Press the glue into the space. Flatten the paper. Use a wet cloth to wipe off the extra. This step is important because it’s hard to fix an open edge after priming and painting over it without taking everything back down.
It’s worth the extra 30 minutes to use paintable glue at the ceiling line. It fills in the space where the wallpaper meets the ceiling, making a smooth edge that paint alone can’t do.
You can skim coat seams with joint compound if they are still very obvious after priming. Put on a small layer, let it dry, and then sand it smooth. Prime again before putting on the topcoat.
Is It OK to Paint Over Wallpaper? Room by Room
- Bedrooms and living rooms: Yes, these are the safest rooms for this project. Low moisture and minimal wall contact make results last longer here than anywhere else in the house.
- Kitchens: Proceed with caution. Grease buildup requires thorough TSP cleaning. Many kitchen wallpapers have a vinyl coating test before committing to painting on top of it.
- Bathrooms: Generally not recommended. Steam from showers works against wallpaper adhesive over time. If you must do it, use moisture-resistant primer and paint. Inspect seams every few months for lifting.
- Rental properties: Check your lease first. If painting is allowed, this is actually a smart choice for renters. Painting over wallpaper is less damaging than removal if you’re required to restore walls when you leave.
Real Cost Data: Paint Over Wallpaper vs. Remove It
DIY painting over wallpaper:
- Oil-based primer: $25 to $40
- Gray-tinted primer (if needed): $30 to $45
- Paint 2 gallons: $50 to $80
- Supplies (tape, rollers, brushes): $20 to $30
- Total: $95 to $195
DIY wallpaper removal (before painting):
- Steamer rental: $40 to $60 per day
- Adhesive remover: $15 to $25
- Wall repair supplies after removal: $30 to $50
- Paint after repair: $70 to $110
- Total: $155 to $245
Professional wallpaper removal:
- Single bedroom: $500 to $800
- Large living room: $800 to $1,500
- Full house: $1,500 to $4,000
Professional painting over wallpaper:
- Single room: $200 to $500
The math is clear. If your wallpaper is in good shape, painting over it saves real money. The only time removal is worth the cost is when the wallpaper type won’t accept paint or the condition is too poor to work with.
Make the Decision That Works Best for You
Here’s the honest bottom line. Painting over wallpaper is a real, workable option but only when the conditions are right. Good condition, smooth surface, right primer, right paint. Do those four things correctly and you can get results that were the same as last year.
If the conditions aren’t right, don’t force it. Vinyl wallpaper, heavy damage, or high-moisture rooms will cost you more time fixing a failed paint job than removal would have cost upfront.
Still not sure which route makes sense for your walls?
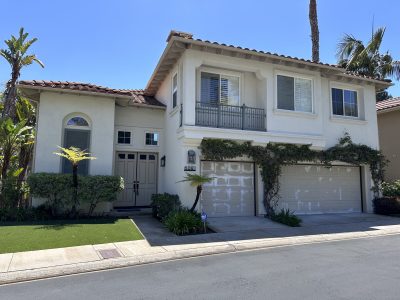
At San Diego Custom Painting, our team provides professional interior painting services in San Diego with over 27 years of hands-on experience. We assess your wallpaper, tell you honestly whether painting or removal is the smarter move, and handle the entire job from prep to final coat. No guesswork. No surprises. Call us at (619) 464-4030 for a free quote.
FAQs About Painting Over Wallpaper
Can you paint over wallpaper without removing it?
Yes, if the wallpaper is smooth, firmly attached, and not vinyl. Proper prep and oil-based primer are required for the paint to hold.
What primer should I use over wallpaper?
Always use oil-based primer. Water-based primer soaks into wallpaper and reactivates the glue, causing bubbling and peeling.
Will wallpaper seams show through paint?
Often yes, at least slightly. Skim coating seams with joint compound before priming minimizes this. Gray-tinted primer also helps hide lines.
How many coats of paint do I need over wallpaper?
One coat of oil-based primer plus two coats of topcoat is standard. Dark patterns may need a third topcoat or an extra primer coat.
Can you paint over vinyl wallpaper?
It’s not recommended. Vinyl repels paint and causes peeling. Remove it if possible, or use an oil-based bonding primer though results are not guaranteed.
How long will paint last over wallpaper?
Done correctly with oil-based primer, paint over wallpaper can last 5 to 10 years. High-moisture rooms reduce that lifespan.
Is painting over wallpaper a good idea for home sale prep?
It can work well for cosmetic updates before a sale as long as you disclose to buyers that wallpaper is underneath. A fresh neutral color over solid wallpaper helps rooms photograph better.
What finish paint works best over wallpaper?
Matte or eggshell. These finishes hide surface imperfections. Satin and gloss highlight every bump, seam, and ridge.
What happens if I skip the primer?
Paint won’t bond properly. Expect peeling at seams, pattern bleed-through, and a paint job that fails within weeks or months.
Can I paint over wallpaper in a bathroom?
It’s risky. Steam loosens adhesive over time. If you do it, use moisture-resistant primer and paint, and check seams regularly.