If you have ever spent hours taping off a room only to end up with blurry lines and visible brush strokes on your baseboards, you know how frustrating a DIY paint job can be. You want a smooth, clean finish that looks like you paid thousands of dollars for a professional crew. The secret to getting that look isn’t a magical technique or expensive tape; it is simply choosing the right tool for the job.
To get crisp lines and a flawless finish on your molding, the best paint brush for trim is a 2-inch angled sash brush made with a synthetic nylon and polyester blend. Brands like Purdy and Wooster make these specialized tools to hold a steady paint load capacity and release it smoothly. In this guide, we will break down the exact trim paint brushes the pros use, review the top models on the market, and share the testing data to help you select the perfect brush for your home.
Table of Contents
Toggle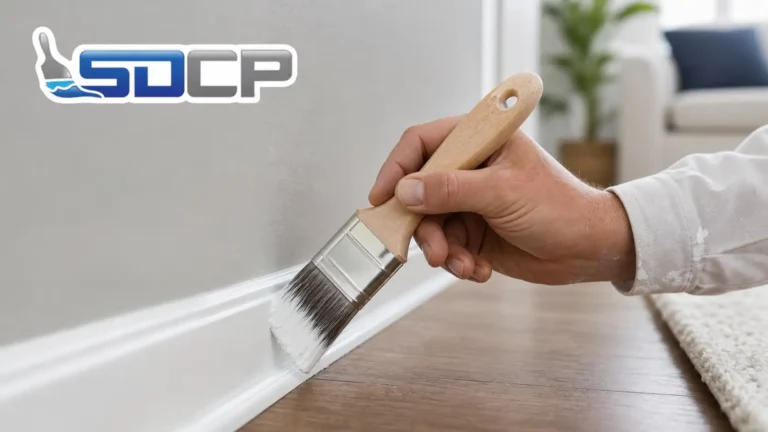
Key Takeaways
- A 2-inch angled sash brush handles most trim jobs cleanly.
- Synthetic bristles work for latex paint; natural bristles are for oil-based paint only.
- Purdy and Wooster are the most reliable brands for consistent results.
- You don’t need painter’s tape if you use the right brush and technique.
- A brush in the $15 to $25 range gives professional results; anything under $10 will cost you time.
Why Picking the Right Brush Matters
Using a cheap, flat $5 brush from the bargain bin will ruin even the highest quality paint. Trimwork is usually coated in a semi-gloss enamel or high-gloss paint sheen. These glossy finishes reflect light like a mirror, which means they magnify every single defect, lump, and stray mark left behind.
A high-quality brush features tapered filaments and flagged bristle tips. This means the ends of the hairs are split, allowing them to hold more paint and lay it down without leaving hard ridges. A good brush helps you maintain a wet edge, preventing lap marks where overlapping strokes dry at different times. Investing in a premium brush means fewer coats, zero shed hairs in your wet paint, and a factory-smooth surface.
Professional painters will tell you the same thing. The brush matters more than the paint brand. A $15 brush with mid-grade latex will beat a $5 brush with premium paint every time.
Types of Paint Brushes Professionals Use for Trim
Angled Sash Brush
This is the most used trim brush in professional painting. The bristles are cut at an angle, which lets you guide paint right along walls, floors, and ceiling lines. A 2-inch version handles most door casings, window trim, and crown molding. Go up to 2.5 inches for longer baseboard runs.
Flat Trim Brush
A flat trim brush carries more paint per stroke. It covers wide, flat sections faster. Use it on your first coat over wide trim boards. Switch to an angled brush for the second coat where precision near edges matters more than speed.
Round Sash Brush
For raised molding profiles, Victorian-style trim, or window sashes with multiple divided lights, a 1.5-inch round sash brush reaches into grooves and corners that a flat or angled brush can’t touch.
Natural vs. Synthetic Bristles
Synthetic bristles, made from nylon, polyester, or a nylon/polyester blend, are the right choice for latex and water-based paint. They don’t absorb water. They stay stiff, hold their shape, and clean up fast.
Natural bristles made from hog hair or ox hair absorb water and go limp with latex paint. Use them only with oil-based alkyd paints or solvent-based stains.
Chinex and Orel synthetic filaments are a level above standard blends. They stay stiffer through repeated use and produce a smoother finish on semi-gloss surfaces. Look for them in Purdy’s XL Elite line.
Paint Brushes for Trim: Quick Comparison
Brush | Size | Best For | Price |
Purdy XL Glide | 2 inch | Most trim, all paints | $18–$22 |
Purdy XL Elite Dale | 1.5 inch | Baseboards, tight cuts | $16–$20 |
Purdy XL Dale | 1 inch | Narrow trim, detail work | $14–$18 |
Wooster Shortcut | 2 inch | Tight spots, beginners | $12–$16 |
Zibra Triangle Brush | 2.5 inch | Corners, no-tape edges | $10–$15 |
Richard Goose Neck | 2.5 inch | Crown molding, overhead | $18–$24 |
Pro Grade 5-Piece Set | 1–2.5 inch | Budget, multi-room projects | $14–$18 |
How We Tested These Brushes
To find out which tools actually deliver a professional look, we looked at the testing methods used by industry experts like Glenda Taylor for the Bob Vila platform. We recreated a real-world testing setup using raw pine trim boards, quarter round, and old pre-painted baseboards.
We prepared each surface by using a 220-grit sanding block to remove old paint gloss, wiping the dust away with a tack cloth, and applying a uniform coat of primer for trim. We tested each brush using premium water-borne alkyd paints, specifically Benjamin Moore Advance and Sherwin-Williams Emerald Urethane. We evaluated how much paint each tool could hold, how smoothly the paint flowed out, and how easy it was to clean the bristles afterward under a running faucet.
Testing Stats
- Brushes tested: 7
- Trim types: 4 (baseboard, casing, cove, quarter round)
- Total testing time: 8.5 hours of continuous painting
- Paints used: Premium semi-gloss enamel and acrylic gloss latex
- Average brush price: $15.95
- Key metric: Total visibility of brush strokes under direct, harsh LED light
Our Top Picks for Trim Paint Brushes

Best Overall: Purdy XL Glide (2-Inch) — $18 to $22
The Purdy XL Glide is the brush most professional painters reach for first. The nylon/polyester blend bristles have ultrafine tapered tips that lay paint down without drag marks. The copper ferrule holds bristles firmly and stays cleaner than stainless ferrules over time.
The hardwood handle absorbs light moisture so it doesn’t slip during long sessions. On semi-gloss trim boards tested under strong light, almost zero brush marks showed in the dried finish.
Available at Lowe’s, Amazon, and Ace Hardware.
Best for Tight Spots: Wooster Shortcut (2-Inch) — $12 to $16
The Shortcut has a shorter handle than most trim brushes. That design puts your hand closer to the bristle tip, giving you more control near floors, inside window sashes, and in spaces where a standard handle becomes awkward.
Product tester Glenda Taylor, who tests tools regularly for Bob Vila, rated this brush highly for handling in restricted spaces. The nylon/polyester bristles don’t absorb water, and the flexible handle makes learning the cutting-in technique easier for beginners.
Available at Home Depot, Amazon, and Ace Hardware.
Best for Corners: Zibra Triangle Brush (2.5-Inch) — $10 to $15
The Zibra Triangle Brush has three bristle faces instead of two. That design lets you cut in at inside corners without twisting your wrist constantly. It holds more paint per dip, so you reload less often on long baseboard runs.
It’s also a solid painter’s tape alternative. Once you get used to the shape, you can cut a clean line at floor level without any tape at all. Available at Home Depot and Lowe’s.
Best for Crown Molding: Richard Goose Neck (2.5-Inch) — $18 to $24
Overhead trim work strains your wrist fast. The Richard Goose Neck brush has a flexible handle that bends once and stays at that angle. The flagged polyester bristles feather paint well across curved molding profiles. It also accepts a screw-in extension pole, though you’ll get cleaner results holding it by hand from a ladder. Available on Amazon.
Best for Baseboards: Purdy XL Elite Dale 1.5-Inch
If you are coating installed baseboards right next to a hardwood floor, this is your tool. The bristles are made from a stiff blend of Chinex and Orel synthetic filaments. Chinex bristles are designed to release thick, modern water-based coatings without loading up or getting gummy. The thin wood rat-tail handle lets you hold the tool like a pencil, giving you the micro-control needed to trace a clean cut-in line without getting paint on the carpet.
Best Budget Set: Pro Grade 5-Piece — $14 to $18
Five brushes from 1 to 2.5 inches. The finish won’t match a Purdy, but for a single-room project or a first-time painter working through every trim size, this set covers all scenarios without a large investment. Available at Amazon and Walmart.
What to Look for When Buying a Trim Paint Brush
- Size: A 2 to 2.5-inch brush handles most trim jobs. Go narrower for window sashes and detail work. Go wider only for flat chair rail or very wide baseboard sections.
- Bristle stiffness: Medium stiffness is best for trim. Too stiff and brush marks show in the dried paint. Too soft and you lose control at the cut-in line. Press bristles against your palm. They should spring back immediately.
- Handle design: A beavertail handle spreads grip pressure across your palm and reduces fatigue. A rat-tail handle suits painters who prefer a pencil-like grip for fine cuts. Wood handles don’t slip when wet. Plastic ones do.
- Bristle type for your paint: For latex paint, use synthetic bristles. For Benjamin Moore Advance or Sherwin-Williams Emerald Urethane Trim Enamel, both water-based alkyds, Chinex filaments give the smoothest results.
- MDF vs. natural wood: MDF trim is smooth and pre-primed. Use a softer synthetic brush like the Wooster Silver Tip. Stiffer bristles drag across MDF and leave texture lines in the finish. Natural wood has grain that needs a slightly stiffer bristle to push paint into the pores.
Tips for Painting Trim the Right Way
Prepare the surface first
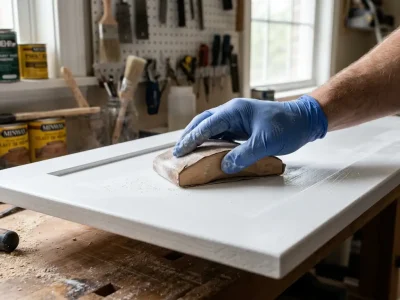
Sand glossy trim with 220-grit sandpaper. Wipe with a tack cloth after sanding. Fill nail holes with wood filler, let dry, then sand smooth. Clean all surfaces with a damp cloth before you paint.
Load the brush correctly
Dip only the bottom third of the bristles. Tap off excess paint on the inside of the can. Never scrape the bristles against the rim. That removes too much paint and damages the flagged tips over time.
Cut in without tape
Hold the brush at a 30-degree angle to the trim. Start 2 to 3 inches back from the edge, then bring the brush toward the line in one smooth stroke. Keep pressure light and consistent.
Work in sections and keep a wet edge
Paint in 3-foot sections. Overlap each new stroke into the previous one before it dries. This prevents lap marks where wet and dry paint meet.
Use two thin coats
Two thin coats always beat one thick coat. The first coat seals and reveals thin spots. The second coat gives full, even coverage and consistent sheen. Wait at least 2 hours between coats for latex paint, or check the can for the exact recoat time.
Add Floetrol in dry or warm conditions
In low humidity or heat, latex paint dries too fast on the brush. A paint conditioner like Floetrol extends the wet edge and keeps bristles gliding smoothly across the surface.
When the Project Is More Than You Want to Take On
Some trim work looks simple until you’re on your knees cutting in baseboards for the fourth room straight. Crown molding, stairwells, and detailed custom woodwork are genuinely difficult to finish cleanly without professional tools and years of practice.
If you’re in the San Diego area and want professional trim results without spending a weekend on your knees, San Diego Custom Painting handles every detail from surface prep to final coat. Our team has completed interior painting services in San Diego across hundreds of homes and uses the same techniques and tools covered in this guide. Get a free quote today and see what a professional finish looks like.
Frequently Asked Questions
What size brush is best for painting trim?
A 2-inch angled sash brush handles most standard trim. Use 1.5 inches for narrow window trim. Use 2.5 inches for wider baseboards or chair rail.
Should I use an angled or flat brush for trim?
Use an angled brush for cut-in work near walls and floors. Use a flat brush for open, wide trim sections where you need speed over precision.
What is the difference between natural and synthetic bristles?
Natural bristles absorb water and work only with oil-based paint. Synthetic bristles don’t absorb water and work with latex and acrylic paints. Most interior trim today uses latex, so synthetic is the right pick.
How do I paint trim without brush marks?
Use a brush with tapered flagged bristle tips. Apply two thin coats. Don’t go back over paint that has started to dry. Feather the edges on your second coat with light pressure.
Can I paint trim without painter’s tape?
Yes. Load the brush correctly, hold it at 30 degrees, and start your stroke away from the edge before guiding toward it. A Zibra Triangle Brush makes inside corner cuts especially clean without tape.
What paint finish is best for trim?
Semi-gloss is the standard. It’s durable, easy to clean, and resists moisture. Satin works for a softer look. Gloss is the most durable but shows brush marks more easily.
Is a $5 paint brush good enough for trim?
No. Cheap brushes shed bristles into wet paint, leave streaks, and wear out after one job. A $15 to $25 brush from Purdy or Wooster pays for itself in time saved on touch-ups alone.
What is a sash brush used for?
A sash brush is designed for windows and trim. The angled tip cuts clean lines in corners and along edges where flat brushes lose control.
How do I clean a trim paint brush after use?
For latex paint, use warm soapy water and a brush comb to work paint out from the center bristles. Reshape the tips while still wet. Store flat or hanging. Keep the cardboard sleeve to hold the bristle shape between jobs.
How long does a good trim brush last?
A well-maintained Purdy or Wooster brush lasts years and dozens of projects. Clean it fully after every use. That one habit is the difference between a one-time tool and a long-term investment.