Painting stripes transforms any room from plain to stunning in just one weekend. Vertical stripes make your ceiling look higher, while horizontal stripes make narrow rooms feel wider. Many homeowners avoid this project because they worry about crooked lines or paint bleeding under tape.
Learning how to paint stripes on a wall isn’t as hard as it seems. With the right tools, proper technique, and patience, you can create perfectly straight stripes that rival professional work. This guide covers everything from planning your design to achieving crisp, clean lines that won’t bleed.
Table of Contents
ToggleHow to Paint Perfectly Straight Stripes on Your Wall
Creating straight paint lines requires careful planning and the right approach. The key to success lies in proper preparation and using proven techniques that prevent common mistakes. Professional painters use specific methods to ensure clean, sharp edges every time.
Essential Tools and Materials You’ll Need
Before starting your striped accent wall project, gather these supplies:
Basic Tools:
- High-quality painter’s tape or Frog Tape
- 4-inch paint roller with covers
- 2.5-inch angled brush
- Level tool or laser level
- Tape measure
- Pencil
- Drop cloths
- Paint trays
Paint and Prep Materials:
- Base color paint (usually the lighter shade)
- Stripe color paint
- Primer (if needed)
- Clear caulk
- Sandpaper (120-grit)
- Clean rags
- Plastic sheeting
Pro tip: Invest in quality tape. Cheap tape often causes paint bleeding, ruining your hard work.
Step 1: Plan Your Stripe Design
Start by deciding on your stripe pattern. Measure your wall carefully to determine the best stripe width and spacing.
For vertical stripes: Measure wall width and divide by your desired number of stripes. Standard stripe widths range from 4 to 12 inches.
For horizontal stripes: Measure wall height and divide by the number of stripes you want.
Consider these design principles:
- Odd numbers of stripes often look more balanced
- Wider stripes work better in large rooms
- Narrow stripes suit smaller spaces
- Keep stripe widths consistent throughout the room
Step 2: Prep the Wall
Proper wall preparation ensures your paint adheres well and looks smooth.
Remove all furniture and wall hangings from the area. Cover floors with drop cloths to protect from paint spills.
Clean your walls with warm water and a damp cloth. Let them dry completely before proceeding.
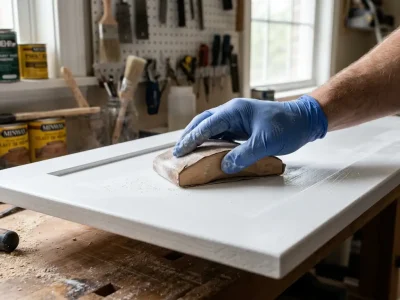
Fill any holes or cracks with a spackling compound. Once dry, sand smooth with 120-grit sandpaper. Wipe away all dust with a clean rag.
If your walls haven’t been painted recently or you’re going from dark to light colors, apply a coat of high-quality primer. This step is crucial for achieving even color coverage.
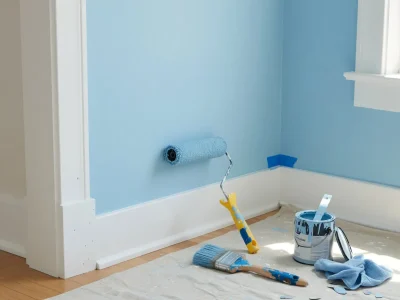
Step 3: Paint the Base Color
Your base color should typically be the lighter of your two chosen colors. This makes measuring and taping easier while providing better coverage for your stripe color.
Apply the base color using standard painting techniques. Cut in edges with your angled brush, then use a roller for the main wall area.
Most walls need two coats for even coverage. Allow each coat to dry completely according to the paint manufacturer’s instructions.
Wait at least 24 hours before moving to the taping stage. Rushing this step can damage your fresh paint when applying tape.
Step 4: Draw and Tape the Stripes
This step requires patience and precision. Take your time to ensure perfectly straight lines.
Mark your stripe locations with light pencil marks. Use your level to draw straight lines across the entire wall.
Pro technique: A laser level eliminates the need for pencil lines and ensures perfect accuracy.
Apply your painter’s tape along the pencil lines. Press firmly along all edges using your fingernail or a putty knife. This prevents paint from seeping under the tape.
Secret technique for crisp lines: Apply a thin bead of clear caulk along the tape edge. Smooth it with a damp finger. This seals any gaps between tape and wall, preventing paint bleeding.
Step 5: Paint the Stripes
Now comes the exciting part – creating your stripe pattern.
Critical step: Before applying your stripe color, paint a thin coat of your base color over the tape edges. This seals any microscopic gaps and guarantees crisp lines.
Let this sealing coat dry completely, then apply your stripe color.
Use smooth, even strokes with your roller. Work from top to bottom for vertical stripes, maintaining consistent pressure.
Two thin coats usually provide better coverage than one thick coat. Thick paint is more likely to bleed under tape edges.
Step 6: Apply Second Coat
Once your first stripe coat is dry, apply the second coat following the same technique.
Work systematically to ensure even coverage across all stripes. Pay special attention to areas where you might have missed spots during the first coat.
Step 7: Remove the Tape
Timing is crucial for this final step. Remove tape while the final coat is still slightly wet but not dripping.
Pull tape at a 45-degree angle, working slowly and steadily. This prevents paint from peeling off with the tape.
If you notice any imperfections, touch them up with a small artist’s brush once the paint is completely dry.
How to Paint Horizontal Stripes on a Wall
Painting horizontal stripes follows the same basic process but requires different planning considerations.
Horizontal stripes work well in narrow hallways, making them appear wider. They also suit rooms with high ceilings, helping create a more intimate feel.
Key differences for horizontal stripes:
- Measure wall height instead of width
- Use a longer level for accuracy
- Work more carefully around electrical outlets
- Consider ceiling height when choosing stripe width
The taping and painting process remains identical. Focus extra attention on keeping your horizontal lines perfectly level, as crooked horizontal lines are more noticeable than slightly off vertical ones.
Advanced Techniques for Professional Results
Dealing with Textured Walls
Textured walls present unique challenges for painting stripes. The texture can prevent tape from sealing properly, leading to paint bleeding.
Press tape down extra firmly on textured surfaces. Consider using a putty knife to ensure good contact with all surface irregularities.
The caulk sealing technique becomes even more important on textured walls. Apply caulk generously and work it into all crevices.
Color Psychology for Stripe Selection
Choose colors that complement your room’s purpose and lighting:
- Cool colors (blues, greens) make rooms feel larger
- Warm colors (reds, yellows) create cozy atmospheres
- High contrast stripes make bold statements
- Subtle tone-on-tone stripes add texture without overwhelming
Troubleshooting Common Problems
- Paint bleeding under tape: Usually caused by poor tape adhesion or skipping the sealing step. Always press tape edges firmly and apply the base color seal.
- Uneven stripe widths: Results from poor measuring or tape placement. Double-check measurements before taping.
- Visible pencil marks: Use lighter pencil pressure or choose paint colors that cover well.
When working on walls with stripes designs, proper how to clean painted walls techniques help maintain your beautiful finish long-term.
Budget-Friendly Alternatives
Quality materials matter, but you can save money without sacrificing results:
- Buy paint during sales
- Use standard brushes instead of premium ones
- Rent a laser level instead of buying
- Buy paint in larger quantities for better per-gallon pricing
Wall Designs with Paint and Tape: Beyond Basic Stripes
Once you master basic stripe techniques, explore creative variations:
- Diagonal stripes: Create dynamic visual interest
- Varied width stripes: Mix thin and thick stripes for modern looks
- Multi-color patterns: Use three or more colors for complex designs
- Geometric patterns: Combine stripes with other shapes
These advanced wall designs with paint and tape require the same fundamental skills you’ve learned for basic stripes.
Consider creating an how to paint an accent wall feature using advanced stripe techniques for maximum visual impact.
Choose SD Custom Painting for Your Interior and Exterior Painting
While DIY painting stripes can be rewarding, some projects benefit from professional expertise. Complex patterns, high walls, or time constraints might make professional help worthwhile.
San Diego Custom Painting offers expert interior painting services in San Diego for homeowners who want guaranteed professional results. Our experienced team handles everything from simple stripe patterns to complex decorative finishes.
Professional painters bring specialized tools, premium materials, and years of experience to ensure flawless results. We also complete projects faster than typical DIY timelines, getting your room back to normal quickly.
Final Thoughts
Learning how to paint stripes on a wall opens up endless decorating possibilities. The techniques in this guide work for any stripe project, from subtle accent walls to bold statement rooms.
Remember these key points for success:
- Take time with planning and measuring
- Invest in quality tape and materials
- Don’t rush the preparation steps
- Use the base color sealing technique
- Remove tape at the right time
With practice, painting stripes becomes an easy way to transform any room. Start with a simple two-color vertical stripe pattern to build confidence before attempting complex designs.
FAQs
How long does it take to paint stripes on a wall?
A typical 10×12 room with simple vertical stripes takes 6-8 hours spread over two days. This includes prep time, painting, and cleanup.
What’s the best tape for painting stripes?
Frog Tape or high-quality painter’s tape designed for clean lines works best. Avoid cheap masking tape, which often bleeds.
Should stripes be the same width as the gaps between them?
Not necessarily. Equal widths create a balanced look, but varying widths can be more visually interesting. The key is maintaining consistency throughout the project.
Can I paint stripes over existing paint?
Yes, as long as the existing paint is in good condition. Clean the wall thoroughly and ensure good adhesion before starting your stripe project.
How do I fix paint bleeding under tape?
For minor bleeding, use a small artist’s brush to carefully paint over mistakes once everything is dry. For major bleeding, you may need to sand and repaint affected areas.
What’s the most forgiving stripe width for beginners?
6-8 inch stripes are easiest for beginners. They’re wide enough to paint easily but narrow enough to hide minor imperfections.