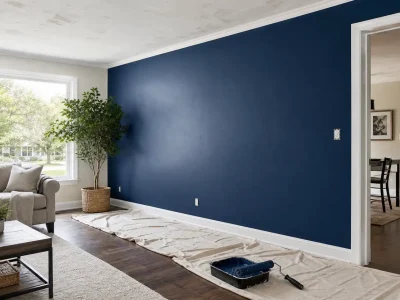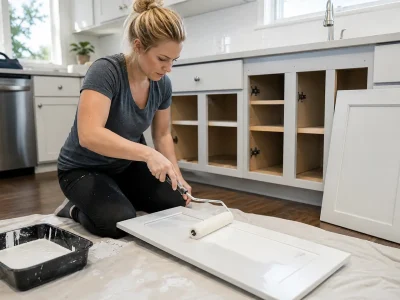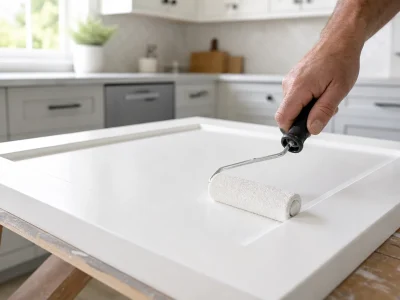

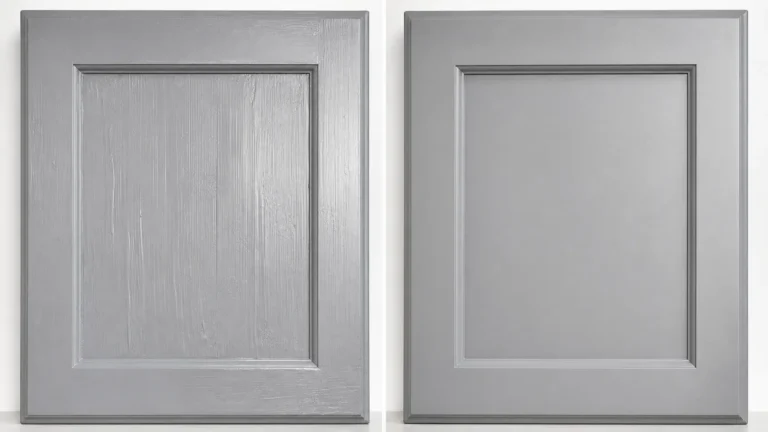
Painting your cabinets can provide a fresh, polished look and may save you money compared to buying new ones. Unfortunately, if you paint your cabinets with a roller without caution, you could leave marks in the finish, unlike the smoother look brush strokes can give.
However, the information below explains how to avoid roller marks on kitchen cabinets and will guide you through it. These few tips will explain not only how to avoid marks on your kitchen cabinets but also how to properly paint kitchen cabinet doors.
Table of Contents
ToggleYou can stop marks on your kitchen cabinets by following just a few specific steps. All of the tips listed below, along with proper prep work and priming, help you get smooth cabinet doors and a professional-looking finish, saving you time and the hassle of fixing paint mistakes later.
What Causes Roller Marks on Kitchen Cabinets?
There are various reasons why you may find marks in your kitchen cabinet paint. In order to know how to avoid them, you need to understand why they occur first. Some causes include:
- Using the wrong nap for your roller cover
- Applying paint either too heavy or too thin
- Rolling in different directions
- Using a less-than-quality roller cover
- Going over previously coated areas or sections that are already drying
- Not using a proper primer or doing prep work before painting your kitchen cabinets
- Applying primer onto cabinets that weren’t prepped properly or are dirty with contaminants
- Using paint not specifically made for cabinetry, since some paints aren’t formulated correctly for cabinets
For a perfectly flat surface such as cabinet doors, it is advised to use a short-nap roller cover. 6 mm (3/16 inch) nap covers are recommended by brands like Benjamin Moore for perfectly flat cabinets like doors.
How to Avoid Roller Marks When Painting Cabinets
1. Start With Proper Surface Preparation
Preparation is very crucial when aiming for the smoothest painted finish.
First of all, remove the cabinet doors and all hardware, if possible. Then wipe down the surfaces properly to remove any greasy coating, cooked residue, soil, and other contaminants. Since kitchen cabinets tend to collect grease from cooking, these contaminants could prevent the coat of paint from sticking well.
Wipe the cabinet down after cleaning and scuff the entire cabinet. This creates an adequate surface for the primer to stick to. Benjamin Moore specifically recommends cleaning and sanding before priming and painting.
2. Use a High-Quality Fine-Finish Roller
How do you pick an appropriate roller for applying paint to cabinet doors?
For cabinet doors with a smooth surface, choose a fine-finish roller with a very short nap. Microfiber rollers made specifically for cabinet painting have become increasingly popular.
Thick-napped rollers made for textured walls should definitely be avoided in this situation, as they leave behind unnecessary residue.
3. Don’t Overload the Roller
Putting too much paint onto the roller can result in drips, edges, and uneven coverage on the surface.
Apply even coverage onto the cabinet doors while avoiding the roller marks caused by excess paint.
4. Apply Thin, Even Coats
Instead of trying to cover the cabinet with one heavy coat, apply thinner, even coats and allow each coat to dry according to the paint manufacturer’s instructions.
A controlled application makes it easier to maintain an even finish and reduces the chance of visible roller texture.
5. Maintain a Wet Edge
This is probably the most crucial trick when learning to paint without marks. Roll from your wet section onto the section that is about to be painted. Don’t leave a dry section between one part of the cabinet you’ve already painted and one you haven’t touched yet.
Benjamin Moore emphasizes working wet-to-wet as well, warning that you need to stop once your cabinet can no longer be smoothly coated without leaving brush or roller marks, and you’ve reached a natural stopping point.
Don’t keep applying paint after that point, since the earlier coat will already be too dry.
6. Don’t Keep Rolling Over Drying Paint
This is a common mistake: don’t roll over a section that has already dried. Instead of removing imperfections, this only leaves the painted section with an undesirable texture. Just apply evenly and let it be.
If there is an imperfection in the coat after it has dried, sand lightly and repaint the appropriate section with the cabinet coating.
You may also want to read these articles:
Should You Use a Foam Roller or Microfiber Roller?
Both types can be effective, but the right roller choice will often come down to the paint product and the surface you’re painting.
A good-quality microfiber roller or fine-finish roller will often be the best choice for flat cabinet doors and drawer faces. Certain cabinet paints may also apply evenly with foam rollers.
Make sure to follow your paint manufacturer’s suggestions for roller usage. Roller compatibility and surface smoothness are the key factors to consider when choosing a roller for your cabinet coating.
How to Prevent Roller Marks on Cabinets During the Second Coat
Use the same care applying the second coat as you did with the first.
Before you apply the second coat:
- Make sure the first coat has sufficiently dried.
- Check the surface for any raised fibers or drips, and make sure there’s nothing left on the cabinet door.
- Lightly sand if necessary, but remove all sanding dust completely.
- Apply the next coat evenly.
- Do not overwork the paint.
Some cabinet coatings dry and/or cure significantly longer than average latex house paint, so check your specific product’s instructions for proper recoating and cure times.
How to Fix Roller Marks on Painted Cabinets
Roller marks are a common problem when painting kitchen cabinets. Instead of just rolling on a new, thick layer of paint, first assess how pronounced your roller marks actually are.
For Minor Roller Texture
If the paint is completely dry:
- Lightly sand the affected area with fine-grit sandpaper.
- Remove all dust.
- Apply another thin, even coat.
- Use a quality fine-finish roller.
- Avoid pressing too hard.
- Allow the paint to dry properly.
For Heavy Roller Marks
If your roller marks have created significant ridges or seem quite deep, you may need to sand them down before applying another coat of paint to get a perfectly smooth finish.
How to Fix Roller Marks on Painted Cabinets Without Repainting Everything
If roller marks appear in just one spot, you may only need to make a spot repair rather than stripping the entire cabinet. Start by carefully determining whether the marks are in the paint itself or on the surface underneath.
Lightly sand the marred area, gently working your way out to the surrounding area to create a slight feather edge.
Remove dust thoroughly, prime if needed with a compatible primer, and repaint with the original paint product. Keep in mind the sheen might not quite match, and depending on the size of the repair, it may look slightly different from the rest of the cabinet.
When Should You Use a Paint Sprayer Instead?
For homeowners hoping for a smooth, factory-like look, spray application of cabinet paint may be a better choice.
Professional cabinet painters often use spray equipment to create a high-quality, factory-type finish, since spraying can be remarkably uniform with proper control of equipment, paint product, prep, and technique. That said, the outcome really depends on the painter’s masking, equipment setup, paint, and spray technique.
A quality roller can work just as well in a DIYer’s hands if the prep work is done right and the paint is applied properly.
Common Cabinet Painting Mistakes to Avoid
If you’re looking to prevent roller marks on cabinets, avoid these common mistakes:
- Wrong roller nap
- Not degreasing and cleaning
- Painting over a shiny surface without proper primer and preparation
- Applying too thick a coat
- Pressing the roller onto the cabinet
- Poor or worn-out roller covers
- Painting over areas that have begun to dry
- Not sanding between coats, when the product requires it
- Putting cabinets back together before the paint has fully cured
Cabinet surfaces must handle daily wiping and the general wear of daily life, so meticulous preparation and application are both critical.
When Professional Cabinet Painting Makes Sense
Painting cabinets might seem easy, but making it look right and making it last involves more than a roller and a coat or two of paint. Professionals know how to:
- Handle the varied materials cabinets may be constructed from
- Choose the proper primers
- Know when to use a cabinet coating
- Apply the coat(s) evenly and with the right consistency
- Sand between coats when needed
- Control the conditions under which the cabinet painting is completed
- Minimize visible roller and brush strokes
- Keep surrounding countertops and surfaces protected from accidental brush or roller strokes
If you want a remodeled kitchen but don’t want to buy all new cabinets, professional cabinet painting may be the right choice.
These services are offered here at SD Custom Painting, who also paint homes inside and out!
Final Tips for a Smooth Cabinet Finish
The trick to roller-free cabinets isn’t one single move, but a combination of correct prep work, the right roller, gentle paint strokes, and patience.
Before you start painting, always make sure:
- Cabinets are clean and degreased.
- The previous finish is properly sanded.
- A suitable primer is applied.
- The correct, fine-finish roller is used.
- Paint is applied thinly and evenly.
- There is an even wet edge.
- You back-brush and roll while the paint is still wet.
- The paint gets plenty of time to dry before recoating, and fully cures before heavy use.
- Any defect gets a light sanding before recoating.
Take these steps, and your cabinets will look much smoother and more professionally painted than with just one tip alone.
Frequently Asked Questions
Why do my kitchen cabinets have roller marks?
Roller marks on kitchen cabinets can occur due to the wrong type of roller being used, too much pressure on the roller, inconsistent paint application, or rolling over paint that’s already drying.
What roller is best for painting cabinets?
A short-nap, fine-finish roller is normally best for smooth surfaces such as cabinets. One example for smooth surfaces like cabinet doors is a 3/16-inch nap roller.
Can you fix roller marks without stripping the cabinets?
You can often sand out roller marks after painting without stripping away all the layers. Once the area dries, sand lightly with sandpaper, clean off the dust, then apply one more thin, even coat.
How do you fix roller marks on painted cabinets?
Sand the dried, painted cabinet gently, dust the roller mark areas, then apply another thin, evenly spread coat of paint to the affected area.
Is spraying cabinets better than rolling?
Spraying gives a very smooth finish, but rolling is another great option for achieving an excellent, smooth result on cabinets if you use the right roller technique and the correct materials.