
You don’t need to tear out the kitchen to get that painted kitchen look that brightens a room and adds instant curb appeal. While you may be able to make your cabinets look 100% better by simply picking out a favorite shade and brushing it on, this easy DIY kitchen remodeling technique isn’t as straightforward as it seems. Lack of prep, poor product selection, the application of paint with a rushed hand, and insufficient drying and curing time are often the ingredients for a DIY project that quickly becomes an eyesore.
Don’t spend money and a weekend on DIY painting only to end up with cracking, peeling, streaks, or splotchy coverage. SD Custom Painting can walk you through cabinet painting to ensure it is a successful, beautiful transformation.
Table of Contents
Toggle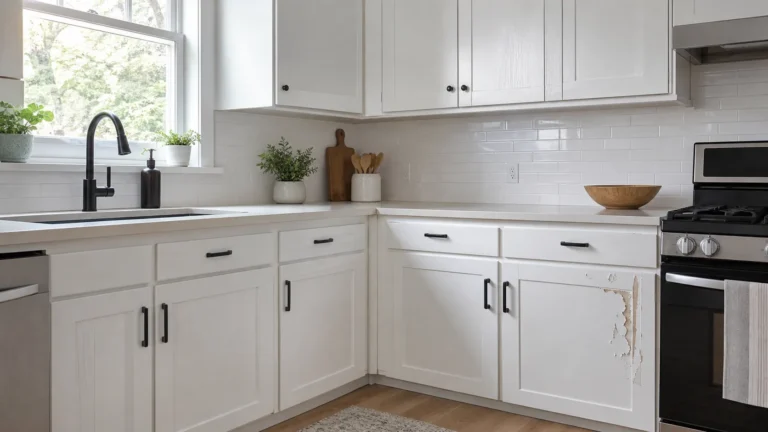
Why Cabinet Painting Requires More Than Just Paint
Cabinets endure all sorts of wear and tear that a wall generally never has to cope with. Kitchen cabinets take the heat from grease, moisture, fingerprints, cleaners, and excessive touch time. These factors necessitate that any paint adhesion is firmly fixed and that the coating holds up under a beating from daily use.
Painting a brand-new color over existing paint, to see what happens, frequently does not lead to desirable outcomes.
Several other things impact how your cabinets may or may not be painted:
- what they are made from
- how well the surface is preserved
- whether the cabinets have been painted before; etc.
Wood, laminate, MDF, and cabinets that are already painted all demand different approaches. For painting cabinets effectively, professional methods include the steps of assessing any existing paint or finish layer on the cabinets, fixing any holes or imperfections, cleaning cabinets thoroughly, and using appropriate paints and primers that are intended for cabinets. Making sure these foundational steps are completed is the surest way to avoid errors when painting cabinets.
A fabulous color cannot rescue badly prepped or poorly applied paint!
1. Skipping Proper Cabinet Cleaning
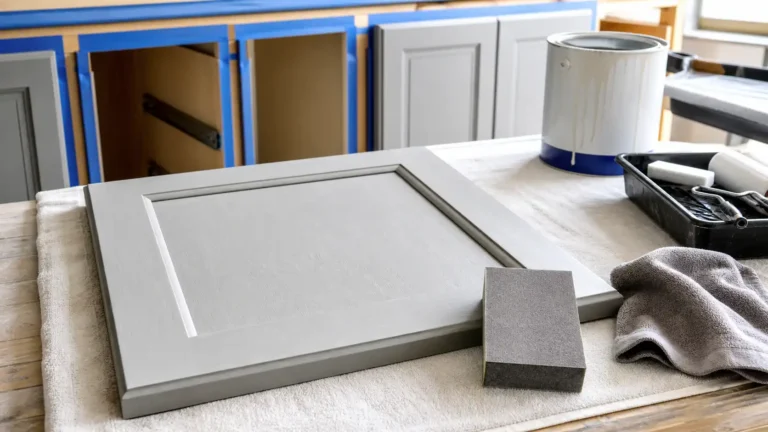
Painting cabinets while greasy. That’s the number one thing that goes wrong with painted cabinet projects. Kitchen cabinets and drawer fronts do absorb a lot of grime with handling, so whether it’s from the cooking stove, sticky fingers on the kitchen door, or from wiping cabinets down with wax. If the surface is contaminated, the primer and the paint likely won’t adhere or cure properly to it.
You really need a deep clean, not just a wipe down with a wet towel; you likely need the right degreaser for stubborn grime, and a good dry prior to getting to sanding.
At SD Custom Painting, cleaning isn’t an optional afterthought, but rather a critical part of prepping those cabinet surfaces and getting primer and paint to stick right from the start of the job.
2. Failing to Sand the Surface Properly
Sanding gets rid of the dirt, dust, and other inconsistencies in your cabinet surface so that the primer will adhere correctly. Common mistakes people make when sanding are either not sanding at all or sanding far too vigorously. Both will cause problems.
You generally only want to scuff up the finish and make an even, smooth surface without having to remove a large amount of material.
Sanding too much in some areas and not enough in others is noticeable after painting, and over-working a delicate or intricate panel door can damage detail work. The proper approach to sanding your cabinets really depends on your existing cabinet finish. A professional painter knows exactly how much sanding is needed for what kind of cabinets and other prep that might need to be done. Sanding helps with having an even, smooth coating on your cabinets and beyond.
3. Choosing the Wrong Paint or Primer
There’s No Universal Household Paint. Many interior paints are manufactured specifically to be used for walls. They’re not designed for doors and drawers, which can be subject to more touching, banging, and sticking. The wrong paint job could mean it peels; it may stick when they’re opened and closed, or you’ll be in for a rough finish.
Don’t forget the primer. Primers have their place.
Properly applied, a primer can assist with adherence to the cabinet and, more importantly, keep the original stains and color from “bleeding through” the new color or, once the new color cures, make it so it cannot “bleed through” as well. This is often critical if you’re going from a dark to a light cabinet color or when you’re not all too familiar with what’s already been used. When evaluating what not to do when painting cabinets, consider your leftover wall to paint a big problem if not evaluated, as it stands near the top of your list. When deciding what paint to use for your cabinets, first make the cabinet material, your existing cabinet paint, and the outcome you want to achieve are the determining factors in your selection.
4. Applying Paint Too Thickly
This also results from a failed attempt to cover everything with one thick coat and may create an “unclean finish.” Heavy paint can run, sag, take forever to dry, and create an uneven surface. In cabinet doors, it can dull the detail.
Thin controlled coats are more desirable. Applying many properly maintained coats allows time for the previous coat to become set (before the next is applied). This is more desirable than a thick, messy, one-layer coat. It is even more important to apply thinly over details (edges of doors, the recess in the door, etc.).
5. Ignoring Drying and Curing Time
When you can touch your paint without feeling wet, it doesn’t mean the finish is cured. Cabinets will be handled: opening and closing, rubbing against, and just generally being handled. Paint that hasn’t had time to cure would be worn quickly: fingerprints, sticking doors, scratching surfaces, etc.
Can also happen if you are in too big a hurry.
When the hinges go back on the cabinet, you may find they bind together if the coating hasn’t been properly cured before reassembling them. Work within recommended manufacturer’s time allowances. Heat, humidity, airflow, and type of coating used all contribute to the rate of cure. Allowing for ample cure time is easy and worthwhile.
6. Neglecting Repairs and Surface Imperfections
Painting will not cover every defect: The application of new paint has the potential of bringing attention to the imperfections you’ve failed to notice. If you can paint directly over dents, scratches, cracks, and non-uniform surfaces, you’re likely only presenting a new facade, rather than a professional and improved finish. Before priming, the best practice is to check the faces of the doors, drawers, and cabinet boxes for anything needing correction.
Cracks should be filled or sanded over as required to level out imperfections.
Any loose components must first be secured to frame members prior to painting. This step is especially crucial for vintage casework where, if the surface condition of the substrate material is weak, painting alone will not provide a lasting solution.
7. Forgetting About Cabinet Edges and Details
Cabinet fronts are not the only places that receive the lion’s share of paint for a cabinet job. The faces on drawer boxes, the edges of cabinets, recessed panel styles, raised panel cabinet doors, the corners of cabinets, the sides, top, bottom – all these areas need to be treated too. Ignoring these areas of the cabinets will also result in a patchy look.
Overpainting the edges can result in dripping paint or can cause cabinets to stick when they have been reassembled and closed.
Remember to wipe excess paint off your brush/roller every time you grab more for the next layer. Look at the cabinets in good lighting from a few different directions to find any spots you may have missed.
How to Avoid Common Cabinet Painting Errors
While preparation is essential when painting your cabinets, to most accurately prevent any problems with your paint job, view painting your cabinets as a process and not a Saturday project to freshen them up. Begin by assessing the condition of the cabinets to determine what repairs must be made, then clean each surface thoroughly prior to choosing appropriate priming and paint products. Take time to remove the hardware and, when feasible, the cabinet doors and front panels.
Label all hardware so that nothing gets lost in transit.
Apply coatings in controlled, light layers rather than attempting full coverage in a single application, and wait until each layer has had sufficient drying time to proceed with the next. When finished painting, inspect the surfaces carefully before moving on to reinstallation. Doing your research, using the proper product for cabinets, having adequate patience, and following the correct techniques can help you to avoid the most common mistakes when painting your cabinets. In situations of an enormous number of cabinets and a desire for absolute uniformity of paint and finishes, obtaining professional services would be ideal.
When Professional Cabinet Painting Is the Better Choice
DIY painting may be a good option for homeowners who do have the time, tools, and patience to address each preparation step of painting kitchen cabinets thoroughly. For example, it can be an imposing task to prepare and paint a large number of doors, drawer fronts, cabinet edges, decorative features, and other complex surfaces of a large kitchen cabinet set and maintain consistent application and results. Professional painters have the experience and know-how to deal with preparation, product selection, application procedures, and finish.
A professional painter can help determine and address problems that were not immediately apparent.
At SD Custom Painting, we can take the stress out of painting your cabinets. We understand the process and offer professional cabinet painting services so you don’t have to worry.
Final Thoughts
However, the result of painting kitchen cabinets may differ from what one hopes for if the painting project is not prepared and executed with due care and attention to detail. There are certain pitfalls to be averted, such as:
- Failure to clean the cabinets adequately
- Incorrect selection of painting products
- Uneven, heavy coatings of paint application
- Lack of proper drying of paint between the layers
- And failure to rectify existing damages and repairs before painting cabinets, and much more.
Homeowners may well understand these possible cabinet painting pitfalls and errors at the beginning to have clear expectations before the start of DIY cabinet painting or if they consider outsourcing the task to professionals. However, if one is sure of getting professional help and guidance from an experienced service like SD Custom Painting, they will come across fewer problems and gain the desired results from cabinet painting.
FAQs
How long does cabinet paint typically last?
Painted cabinets can last for several years or longer when properly prepared, painted with good quality paint, applied correctly, and generally treated with respect when in use.
Can I paint cabinets without sanding them?
Certain finishes for cabinets might be more acceptable to skip the preparation process, but inevitably, the preparation process that is not followed will result in less adhesion. The type of finish present and the material of the cabinet will determine the recommended preparation process.
Should cabinet doors be removed before painting?
Best to remove doors and drawer fronts. This is the best way to get access to edges and surfaces. Enables the work to be carried out with an even finish and reduces the risk of paint on hardware or around the area.
How many coats of paint should cabinets have?
How many coats will depend on the current color, product, surface condition, and finish required. Instead of a fixed number of coats, painters should adhere to the coating manufacturer’s instructions and lay down sufficient thin coats to achieve full coverage.
Can I use regular wall paint on kitchen cabinets?
Not all cabinet finishes are necessarily appropriate for cabinets with existing wall paint, which may not be as hardy. Generally, it is preferable to use a coating intended specifically for cabinetry / high usage surfaces, since durability and toughness are relevant.
How can I get a smoother cabinet finish?
A good prep, sanding, primer, paint, the right equipment, good application, and enough time for drying all help a paint job to appear even. Do not get into the habit of trying to change thin paint while it is partially dry. This will tend to compromise the paint film and cause the appearance of visual imperfections.