Proper room preparation makes all the difference between a paint job that lasts years and one that peels in months. When you skip the prep work, you waste time fixing mistakes later. Most DIY painters spend 60% of their project time on preparation because it directly affects the final result.
Learning how to prep a room for painting saves money and gives you results that look professional. The key is knowing which steps matter most and doing them in the right order. This guide walks you through each step with clear instructions that anyone can follow.
Table of Contents
ToggleWhat You'll Need to Prep Your Walls and Whole Room for Painting
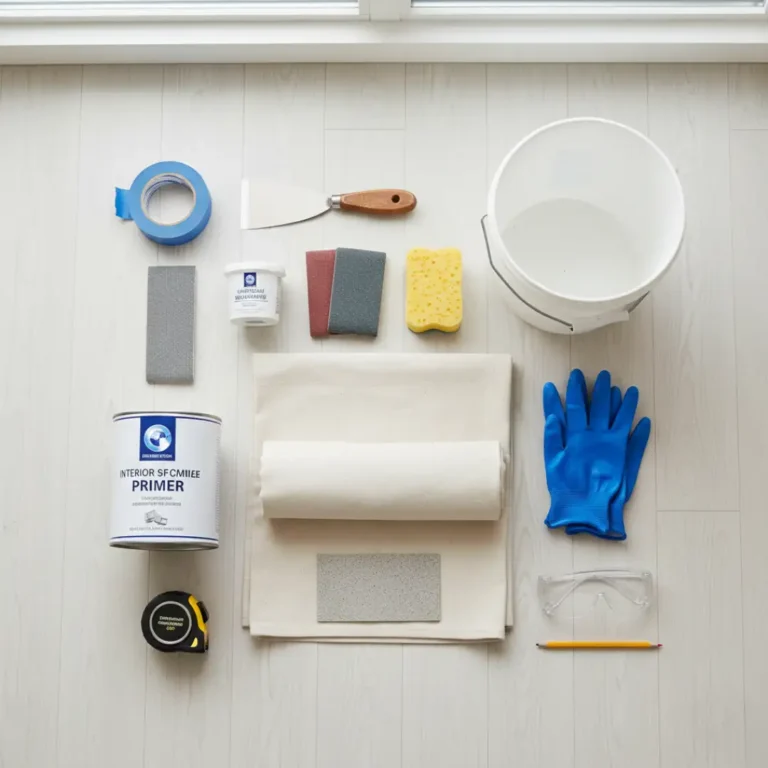
Getting your tools ready before starting saves trips to the store and keeps your project moving. Here’s what you need for proper room preparation.
Cleaning Supplies:
- Mild soap or TSP cleaner
- Bucket and warm water
- Sponge and cleaning cloths
- Rubber gloves
Repair Tools:
- Spackling compound or joint filler
- Putty knife (3-inch works best)
- Sandpaper (120-grit and 220-grit)
- Sanding block or electric sander
- Stripping knife for wallpaper
Protection Materials:
- Drop cloths or plastic sheeting
- Painter’s tape (blue or green)
- Protective sheets for furniture
- Dust masks
Surface Prep:
- Primer sealer (for problem areas)
- Stain blocker spray
- Screwdriver for hardware removal
- Ladder or step stool
Budget around $40-75 for basic supplies if you’re starting from scratch. Quality drop cloths cost $15-25 and last for years. Cheap plastic tears easily and creates more mess.
How to Prepare a Room for Painting in 8 Steps
Follow these steps in order for the best results. Skipping ahead causes problems you’ll need to fix later.
Step 1: Clear the Room Completely
Remove everything you can lift. This includes furniture, wall decor, curtains, and hardware. Moving items to the center and covering them sounds easier, but you’ll bump into things while working.
Take down curtain rods, picture frames, and shelf brackets. Store small hardware pieces in labeled bags so you remember where they go. Remove switch plates and outlet covers using a screwdriver. Keep the screws with the plates.
For heavy furniture that won’t move, push it to the room’s center and cover it completely. Use old sheets or drop cloths, not thin plastic that tears.
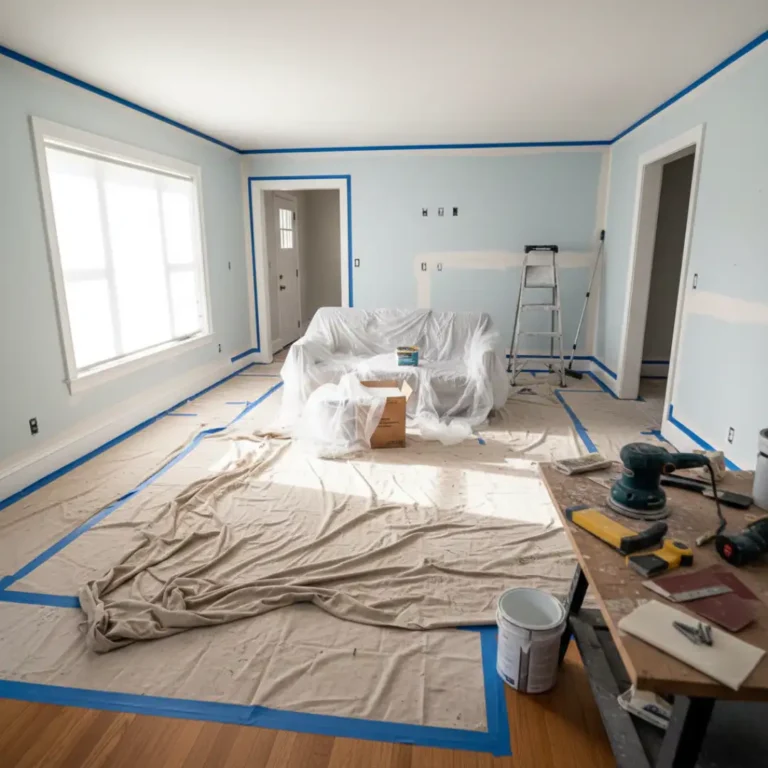
Step 2: Protect Your Floors and Remaining Items
Cover the entire floor from wall to wall. Canvas drop cloths work better than plastic because they absorb spills and don’t slide around. Tape the edges to baseboards if needed.
If you kept furniture in the room, wrap it properly. Dust and paint mist travel farther than you think. One coat of accidental overspray ruins fabric.
Step 3: Inspect Walls for Damage
Walk around the room slowly and look at every section. Check for nail holes, cracks, water stains, and peeling paint. Mark problem spots with painter’s tape so you don’t miss them.
Common issues include corner cracks from settling, nail pops from framing lumber shrinkage, and water damage near windows. Textured walls hide some flaws, but smooth surfaces show everything.
Step 4: Repair All Wall Damage
Fill nail holes and small cracks with spackling compounds. Push the filler in firmly with your putty knife. Scrape off excess so the patch sits flush with the wall. Let it dry completely (usually 2-4 hours).
For bigger holes or deep cracks, you might need two applications. Apply the first layer, let it dry, then add more. Dried filler shrinks slightly in deep gaps.
Water stains need special attention. Paint won’t cover them without treatment. Spray stain blocker over the area first. Let it dry before filling or painting.
Step 5: Sand the Repaired Areas
Once repairs dry hard, sand them smooth. Use 120-grit sandpaper for the first pass, then switch to 220-grit for a smooth finish. The goal is making repairs invisible to the touch.
Sand lightly in a circular motion. Press too hard and you’ll create dips. Wipe away dust with a damp cloth.
If you’re painting over gloss or semi-gloss paint, sand the entire wall lightly. This helps the new paint stick. You don’t need to remove the old paint, just rough up the surface.
Step 6: Clean All Surfaces Thoroughly
Dust, grease, and grime stop paint from bonding properly. Mix warm water with mild soap in a bucket. Wring out your sponge well so it’s damp, not dripping.
Wipe down walls from top to bottom. Pay extra attention to areas near light switches, door handles, and anywhere hands touch regularly. Kitchen walls often have grease buildup that needs scrubbing.
Skip sugar soap. It leaves a residue that causes adhesion problems with modern paints. Plain soap works fine for wall preparation before painting.
Wipe surfaces again with clean water to remove soap residue. Let the walls dry completely before painting. Damp walls cause paint to bubble and peel.
Step 7: Apply Painter’s Tape
Tape protects trim, ceilings, and baseboards from accidental brush strokes. Press the tape down firmly so paint doesn’t seep underneath. Run your finger or a putty knife along the edge.
Start with ceiling lines if you’re painting walls only. Then tape around door frames, window trim, and baseboards. Quality tape costs more but removes cleanly without pulling paint.
Don’t leave tape on for more than a few days. It becomes harder to remove and can take paint with it.
Step 8: Prime When Needed
Fresh plaster, bare drywall, and porous surfaces need primer. Without it, the first paint coat gets absorbed unevenly. You end up using more paint and still get poor coverage.
For new plaster, make a mist coat instead of buying primer. Mix your paint with 30% water (700ml paint plus 300ml water). This thinner coat soaks in and seals the surface. Let it dry for 2-3 hours before applying regular paint.
Brick walls need even more thinning. Use 70% water with your paint (3 parts paint to 7 parts water) for the first coat.
If you prefer ready-made primer, Zinsser Bulls Eye works well on most surfaces. It blocks stains and helps paint stick to tricky materials.
Proven Tips for Prepping Different Wall Surfaces for Painting

Different surfaces need different approaches. Here’s how to handle special cases.
Preparing New Plaster
Fresh plaster is extremely porous and soaks up paint fast. The surface pulls moisture from paint unevenly, creating blotchy spots that show through topcoats.
Apply a mist coat as described above. This seals the plaster and creates a stable base. Wait until the plaster is completely dry (usually 4-6 weeks after application) before painting.
Preparing Gloss or High Sheen Surfaces
Glossy finishes are too smooth for paint to grip. You must sand thoroughly until no shine remains. Use 120-grit sandpaper and work in small sections.
Wipe away sanding dust with a damp cloth. Check for glossy spots by looking at the wall from different angles. Any remaining shine means that area needs more sanding.
The surface should feel slightly rough to the touch. This texture gives new paint something to grab onto.
Preparing Walls After Wallpaper Removal
Peel-away wallpaper comes off easily. Traditional wallpaper stuck with paste takes more work. Use a stripping knife carefully to avoid gouging the plaster underneath.
Stubborn pieces need soaking. Wet them with a sponge and hot water. Wait a few minutes for the paste to soften, then scrape again.
After removing all the wallpaper, you’ll see adhesive residue. Wash it off completely with warm soapy water. Residue stops paint from sticking and creates bumps under the finish.
Inspect for damage once the wall dries. Wallpaper often hides cracks and holes. Fill any damage before painting.
Preparing Brick or Masonry Walls
Brick absorbs paint like plaster does. The porous surface needs sealing or your first coat disappears into the material.
Mix a thin mist coat (70% water, 30% paint) for brick surfaces. Brush it on and let it soak in. This seals the surface without clogging the brick texture.
After the mist coat dries, apply two coats of undiluted paint for full coverage.
Preparing Previously Painted Walls
Old paint in good condition needs minimal prep. Clean the surface and sand lightly if the finish is glossy. Fill any holes or cracks.
Peeling or flaking paint is different. These areas won’t hold new paint. Scrape away all loose material with a putty knife. Sand the edges smooth so you can’t feel where old paint ends.
Prime bare spots before painting. Otherwise, they absorb paint differently and create visible patches through your finish coat.
Common Mistakes to Avoid During Room Preparation
Rushing through prep work causes most painting problems. Here’s what to watch for.
- Skipping the cleaning step: Dirty walls prevent proper adhesion. Paint peels within months on greasy or dusty surfaces.
- Not letting repairs dry: Wet filler shows through paint and cracks as it dries. Wait the full recommended time.
- Using old, dried-out filler: Old spackling compound doesn’t bond properly. Buy fresh material for repairs.
- Painting over water stains: Stains bleed through regular paint. Always use stain blocker first.
- Taping too early: Put tape up just before painting. Tape left on walls collects dust that prevents clean paint lines.
- Forgetting to test patches: After repairs dry, feel the wall. If you can detect the patch, you’ll see it through paint. Sand it smoother.
Final Words
Proper room preparation takes time, but the results are worth every minute. Following these steps to painting a room gives you a finish that looks professionally done and lasts for years.
The difference between amateur and professional results isn’t painting skill. It’s preparation quality. Taking extra care during wall preparation before painting saves you from redoing work later.
When you need expert results without the DIY effort, San Diego Custom Painting offers professional interior painting services in San Diego. Our team handles all prep work and delivers flawless finishes backed by years of experience.
FAQs About Room Preparation For Painting
How long does it take to prepare a room for painting?
A standard bedroom takes 3-4 hours for complete preparation. Rooms with damaged walls or special surface conditions need more time. Budget a full day if you’re removing wallpaper or dealing with extensive repairs.
Do I really need to wash walls before painting?
Yes. Grease, dust, and grime create a barrier between paint and the wall surface. Paint applied over dirty walls peels easily and doesn’t cure properly. Cleaning takes 30 minutes and prevents failures that waste hours of work.
Can I paint over wallpaper instead of removing it?
You can paint over some modern wallpapers if they’re smooth and firmly attached. Textured wallpaper, vinyl wallpaper, and any loose sections need removal. Painting over wallpaper risks bubbling and peeling as adhesive breaks down under the paint.
What happens if I skip primer?
On new or bare surfaces, paint soaks unevenly without primer. You’ll need extra coats for coverage and colors won’t look right. On previously painted surfaces in good condition, you can skip primer if you’re using quality paint.
Should I sand between paint coats?
Light sanding between coats creates a smoother finish, but it’s not required for wall painting. If the first coat dried with drips or rough spots, sand them smooth before adding the second coat.
How do I know if my walls need primer?
Use primer on bare drywall, fresh plaster, stained surfaces, and dramatic color changes (especially dark to light). Previously painted walls in good condition usually don’t need primer if you’re using quality paint.