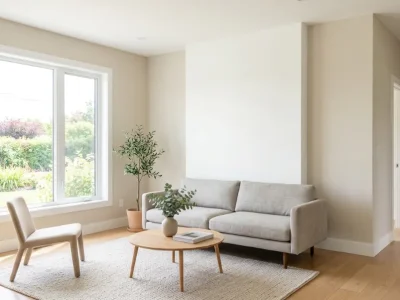
Painting trim transforms any room from ordinary to stunning. Fresh paint on baseboards, door frames, and window casings creates clean lines that make your walls pop. Whether you’re updating old molding or finishing new construction, the right approach makes all the difference.
Learning how to paint trim properly saves time and delivers professional results. This guide covers everything from choosing the best paint to applying the final coat. You’ll discover techniques that prevent common mistakes and create smooth, durable finishes.
Table of Contents
ToggleSupply List for Painting Trim
Getting the right supplies upfront prevents mid-project trips to the store. Here’s what you need for painting trim molding:
Preparation Supplies:
- Drop cloths or plastic sheeting
- Painter’s tape (1.5-inch and 2-inch widths)
- Putty knife for repairs
- Spackling compound for holes and cracks
- Sandpaper (120-grit and 220-grit)
- Sanding sponge for detailed areas
- Tack cloth for dust removal
- Caulk and caulk gun
Paint and Primer:
- High-quality primer (oil-based or high-adhesion latex)
- Semi-gloss or satin paint for trim
- Benjamin Moore paint for trim offers excellent durability and coverage
Tools:
- Angled brush (2-inch for most trim, 1-inch for detailed work)
- Mini roller and covers (4-inch) for wide baseboards
- Paint tray with liner
- Brush comb for cleaning
- Rags for cleanup
Safety Equipment:
- Safety glasses
- Dust mask
- Rubber gloves
Choose quality brushes for trim painting. Cheap brushes leave streaks and shed bristles into your paint. A good angled brush costs more but creates smoother finishes with fewer brush marks.
How to Paint Trim
The best way to paint trim follows a specific sequence. Each step builds on the previous one to create professional results. Rushing through preparation shows in the final finish.
Prepare the Room
Room preparation prevents paint splatters and makes cleanup easier. Start by removing furniture or covering it with plastic sheeting.
Apply painter’s tape along walls where they meet the trim. Use a putty knife to press tape edges down firmly. This prevents paint from bleeding under the tape. For carpet, tuck tape between the baseboard and flooring using the putty knife blade.
Lay drop cloths on floors, especially under areas you’ll be painting. Plastic works for temporary protection, but canvas drop cloths absorb spills better. They also stay in place without sliding around.
Check your work area for adequate lighting. Poor lighting hides brush marks and uneven coverage until it’s too late to fix easily.
Prepare the Trim
Clean trim removes dirt and grease that prevent paint adhesion. Use a damp cloth with mild soap for most cleaning. Kitchen trim may need degreasing cleaner to remove cooking residue.
Fill holes and cracks with spackling compounds. Push the compound into holes using a putty knife, then scrape excess flush with the surface. Let it dry completely before sanding.
Sand all trim surfaces lightly with 120-grit sandpaper. This creates texture for better paint adhesion. For previously painted trim, focus on glossy areas that need dulling. Sand with the grain on wood trim to avoid cross-grain scratches.
New trim needs special attention. Factory finishes often resist paint. Sand lightly with 220-grit paper to remove the sheen without creating deep scratches.
Remove sanding dust with a tack cloth. Regular rags just push dust around. Tack cloths pick up fine particles that could create rough spots in your finish.
Caulk gaps between trim and walls using paintable acrylic caulk. Apply steady pressure while moving the caulk gun along the joint. Smooth the bead with your finger dipped in water for clean lines.
Prime the Trim
Primer creates a uniform surface for paint adhesion. Skip primer and your paint may peel, especially on glossy surfaces or raw wood.
Use oil-based primer for maximum adhesion on glossy surfaces. Water-based high-adhesion primers work well for most situations and clean up easier. Spot-prime knots and stains first, then prime the entire surface once dry.
Apply primer with smooth, even strokes. Start with the detailed areas using an angled brush. Work primer into grooves and profiles completely. For wide, flat trim, use a mini roller for speed, then brush out roller marks.
Don’t overload your brush. Dip only the bottom third of bristles into the primer. Tap excess off on the container rim rather than wiping on the edge, which removes too much primer.
Allow the primer to dry according to manufacturer instructions. Most primers dry in 2-4 hours, but cure time affects paint adhesion. Wait the full recommended time before painting.
Sand lightly between coats if the primer raises the wood grain. Use 220-grit paper with light pressure. Remove dust before applying paint.
Paint the Trim
Quality paint makes the biggest difference in your final results. Semi-gloss paint works best for most trim applications. It resists moisture and cleans easily without showing every fingerprint like high-gloss paint.
Benjamin Moore Advance or similar high-quality paints level well and resist brush marks. These paints cost more but save time with better coverage and easier application.
Load your brush properly for smooth application. Dip bristles about one-third into the paint. Gently tap the brush on the container sides to remove excess. Don’t wipe the brush on the rim, which removes too much paint.
Start painting in less visible areas to warm up your technique. Apply paint in 2-3 foot sections using smooth strokes. Paint detailed areas first with the angled brush tip, then fill in flat surfaces.
For wide baseboards, use a mini roller to apply paint quickly, then immediately brush out roller texture with light strokes. This technique combines speed with a smooth finish.
Maintain a wet edge while painting. This means overlapping into wet paint as you work along the trim. Stopping and starting in the middle of a board creates lap marks that show in the final finish.
Remove painter’s tape while the paint is still slightly wet. Pull tape at a 45-degree angle to prevent peeling. If paint has dried, score along the tape edge with a sharp knife before removing.
Apply a second coat for full coverage and durability. Two thin coats look better and last longer than one thick coat. Sand lightly between coats only if you see brush marks or imperfections.
Painting Trim Tips for Professional Results
Temperature and humidity affect paint application and drying. Paint in temperatures between 50-85°F with low humidity for best results. High humidity slows drying and can cause paint to sag.
Work in good lighting to spot problems early. Portable work lights help in dim areas. Side lighting reveals brush marks and missed spots better than overhead lighting.
Keep a wet rag handy for quick cleanup. Wipe mistakes immediately before they dry. Once paint sets, removal becomes much harder.
For painting moldings and trim with deep profiles, use an angled brush to work paint into all the grooves. Take your time on detailed areas. These spots show poor technique more than flat surfaces.
Clean brushes properly to maintain them. Use soap and water for latex paint, mineral spirits for oil-based products. A brush comb removes dried paint from bristles and keeps them straight.
Final Thoughts
Learning how to paint molding and trim properly transforms your home’s appearance. The techniques covered here work for any trim painting project, from simple baseboards to elaborate crown molding. Taking time for proper preparation and using quality materials creates results that last for years.
Professional results require patience and attention to detail. Each step in the process matters, from surface preparation to final coat application. When you need expert results without the learning curve, consider professional interior painting services in San Diego. San Diego Custom Painting delivers flawless trim work using premium materials and proven techniques.
FAQs
What is the trick to painting trim?
The main trick is proper preparation and using the right tools. Clean surfaces, prime properly, and use a high-quality angled brush. Apply thin coats rather than trying to cover in one thick application. Take your time with detailed areas and maintain a wet edge while painting.
Can I paint my trim without sanding?
You can skip sanding on clean, well-adhered paint in good condition. However, glossy surfaces need light sanding for proper adhesion. New wood trim should be sanded lightly to remove mill glaze. When in doubt, sand lightly – it only takes a few minutes and prevents paint failure.
Is it better to paint trim with a roller or brush?
Brushes work best for most trim paintings. An angled brush handles details and creates smooth finishes on narrow trim. For wide baseboards over 4 inches, you can use a mini roller followed by brushing to eliminate roller texture. Never use a roller alone on trim.
How to prepare trim before painting?
Start by cleaning the trim with soap and water. Fill holes and cracks with spackling compounds. Sand lightly to create teeth for paint adhesion. Remove all dust with a tack cloth. Caulk gaps between trim and walls. Prime all surfaces, especially raw wood or glossy paint.
How many coats of paint does trim need?
Most trim needs two coats of paint for full coverage and durability. Dark colors or dramatic color changes may require three coats. Apply thin, even coats rather than trying to cover in one thick application. Allow each coat to dry completely before applying the next.