Your kitchen cabinets look tired and outdated, but the quote from a contractor to replace them just made your heart sink. Here’s the good news: painting your cabinets yourself can transform your entire kitchen for a fraction of the cost, and you don’t need professional experience to get professional results.
This guide will walk you through exactly how to paint kitchen cabinets from start to finish, including the real costs you’ll face, the materials you actually need, and the common mistakes that can ruin your project. Whether you’re tackling this as your first major DIY project or you’ve painted before, you’ll learn the step-by-step process to achieve a durable, beautiful finish that lasts for years.
Table of Contents
ToggleSupply Checklist: What You Actually Need
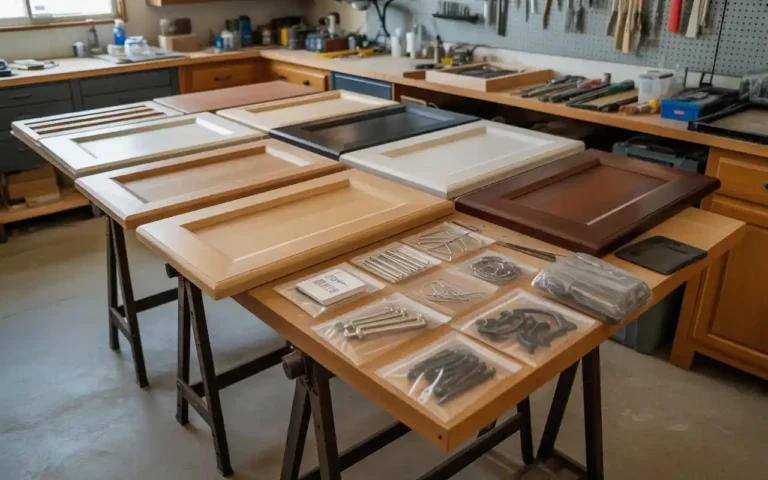
Before starting your cabinet makeover, gather these essential supplies. Most items are available at your local hardware store, and the total investment typically ranges from $150 to $400 depending on your kitchen size.
Cleaning and Prep Supplies:
- TSP (trisodium phosphate) or grease-cutting degreaser
- Clean rags or microfiber cloths
- 120-grit sandpaper for initial sanding
- 220-grit sandpaper for between coats
- Sanding block or orbital sander (optional but helpful)
- Wood filler or caulk for repairs
- Tack cloth for dust removal
Protection and Setup:
- Painter’s tape (2-inch width works best)
- Drop cloths or plastic sheeting
- Cardboard or sawhorses for drying surfaces
- Small containers or bags for hardware storage
- Screwdrivers (flathead and Phillips)
- Labels or masking tape for organization
Painting Supplies:
- High-quality primer (oil-based or bonding primer recommended)
- Cabinet-grade paint (semi-gloss or satin finish)
- 2-inch angled brush for detail work
- 4-inch foam roller or microfiber roller
- Paint tray
- Stir sticks
Optional But Helpful:
- Spray gun for professional finish (adds $50-100 to budget)
- Paint conditioner to reduce brush marks
- Latex gloves
- Respirator mask for ventilation
Understanding Cabinet Materials Before You Start
Not all cabinets are created equal, and your painting approach depends on what you’re working with. Wood cabinets are the easiest to paint and accept primer readily. Laminate or thermofoil cabinets require a bonding primer designed for slick surfaces. MDF (medium-density fiberboard) cabinets need careful attention because water-based products can cause swelling.
Check your cabinet material by looking at an inside corner or edge. Real wood shows grain patterns and layers. Laminate appears as a thin plastic-like coating over particle board. Knowing your material helps you choose the right primer and avoid adhesion problems later.
Step 1: Remove Doors, Drawers, and Hardware
Creating flat painting surfaces is the foundation of repainting kitchen cabinets successfully. Start by emptying all cabinets and clearing your countertops. Take photos of your cabinet layout with your phone before removing anything. These photos become your roadmap during reinstallation.
Remove all cabinet doors using your screwdriver. As you remove each door, place a piece of painter’s tape on the back and write its location (like “upper left” or “pantry door”). Remove drawer fronts by unscrewing from inside the drawer box. Take off all hinges, handles, and knobs, storing hardware in labeled bags by location.
Set up your work area in a garage, basement, or spare room where doors can lie flat and remain undisturbed for several days. Space is critical because you need room for doors to dry without touching each other. Sawhorses with 2x4s across them create perfect drying racks. If you’re short on space, lean doors against walls but place cardboard between them to prevent sticking.
Step 2: Clean Your Cabinets Thoroughly

Kitchen cabinets accumulate years of cooking grease, food splatters, and grime that prevent paint from adhering properly. This cleaning step cannot be skipped or rushed.
Mix TSP according to package directions or use a strong degreaser like Krud Kutter. Wearing gloves, scrub every surface with a sponge or cloth, paying extra attention to areas near the stove where grease builds up. Don’t forget the cabinet frames, edges, and inside corners where dirt hides.
Rinse all surfaces with clean water to remove cleaner residue. Any leftover TSP or degreaser creates a barrier between your primer and the cabinet surface. Let everything dry completely for at least 2-3 hours. You can speed drying with fans, but make sure surfaces are bone dry before moving forward. Moisture trapped under primer causes peeling and bubbling later.
While surfaces dry, inspect for damage. Fill any dents, scratches, or holes with wood filler. Use caulk to fill gaps where cabinet frames meet walls. Smooth repairs with your finger or a putty knife and let dry according to product directions.
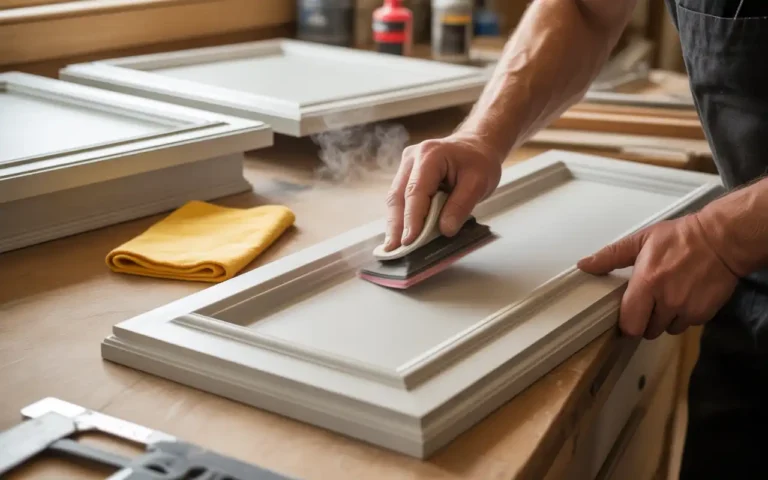
Step 3: Sand for Better Paint Adhesion
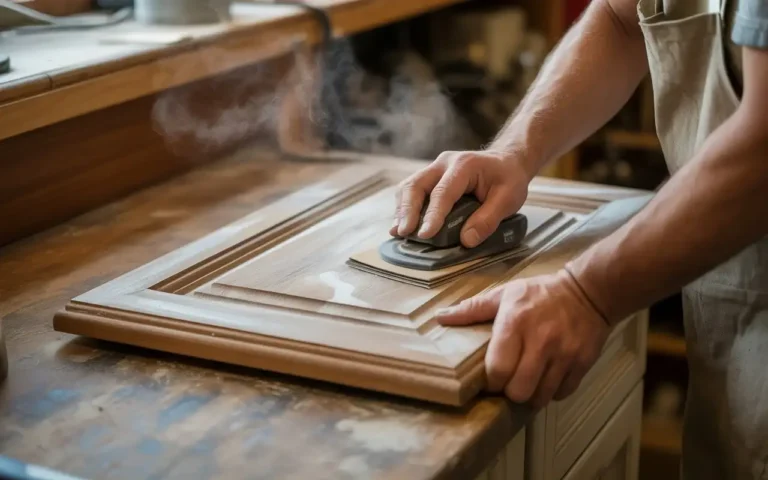
Sanding might seem tedious, but it’s the difference between paint that lasts ten years and paint that chips after six months. Most cabinet finishes are too smooth or glossy for primers to grip properly.
Using 120-grit sandpaper, sand all surfaces lightly. You’re not removing the existing finish completely, just roughing it up enough to give primer something to grab. Sand in the direction of the wood grain on wood cabinets. For laminate or painted surfaces, sand in any direction but keep pressure even.
Focus on flat surfaces first, then tackle detailed areas around raised panels or trim. An orbital sander speeds up this process on large flat doors but uses hand sanding for details to avoid damage. The surface should feel slightly rough to your fingertips, not smooth and slick.
After sanding, wipe down everything with a tack cloth or slightly damp rag to remove all dust. Even small amounts of dust create bumps in your primer and paint. Let surfaces dry if you use a damp cloth.
Step 4: Protect Your Kitchen and Surrounding Areas
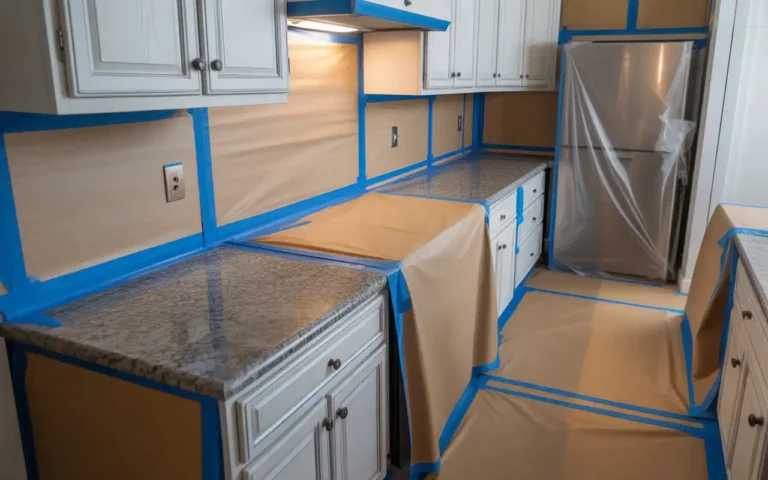
Before opening any paint cans, protect everything you don’t want painted. Apply painter’s tape along the edges where cabinets meet walls, ceilings, or appliances. Cover countertops completely with drop cloths or plastic sheeting, taping edges down so they don’t shift during painting.
If your cabinet frames are staying in place, tape off the interiors if you’re not painting them. Protect your floor with drop cloths, especially in the path between your work area and the kitchen.
Step 5: Apply Primer to All Surfaces

A high-quality primer creates the foundation for durable cabinet paint. Don’t skip this step or use cheap primer; it’s not worth saving $20 to risk your entire project.
For wood cabinets, use an oil-based primer or a high-adhesion acrylic primer. For laminate or previously painted cabinets, choose a bonding primer like BIN shellac-based primer or Zinsser Bulls Eye 1-2-3. These primers stick to slick surfaces where regular primers fail. If you’re making a dramatic color change from dark to light, use a stain-blocking primer.
Start with cabinet frames. Use your angled brush for edges, corners, and detailed areas. Load your foam roller lightly and roll flat surfaces in smooth, even strokes. Don’t overload your roller or you’ll create drips.
Move to doors and drawer fronts. Prime the backs first if you’re painting both sides. Apply primer in thin, even coats rather than one thick coat. Thick primer takes forever to dry and creates an uneven surface. Work in the direction of the wood grain when possible.
Let the primer dry completely. Most primers dry to touch in 1-2 hours but need 3-4 hours before sanding. Check the product label for specific dry times. Proper ventilation speeds drying and reduces odors.
Step 6: Sand Again for a Smooth Base
Once the primer dries completely, sand everything again using 220-grit sandpaper. This finer grit smooths out any brush marks, drips, or rough spots in the primer without removing it.
Sand lightly and evenly. You should see a light dust but shouldn’t be sanding through to bare wood or the original finish. Pay attention to areas where the primer may have pooled, like inside corners or along bottom edges.
Wipe away all dust with a tack cloth. This second sanding creates a perfectly smooth surface that makes your paint look professional.
Step 7: Apply Your First Coat of Paint
Choose a paint specifically designed for cabinets. Regular wall paint won’t hold up to the constant touching, cleaning, and wear that cabinets endure. Cabinet paints include harder resins that cure to a more durable finish. Semi-gloss or satin finishes work best because they’re easier to clean than flat paint while not showing every fingerprint like high-gloss.
Popular cabinet paint choices include Benjamin Moore Advance, Sherwin-Williams Emerald Urethane, or Behr Alkyd Enamel. These paints cost more than standard paint but provide better coverage and durability.
Start painting cabinet frames using the same technique as priming—brush for details and roller for flat areas. Maintain a wet edge by working in sections and not letting paint dry between sections.
Paint cabinet doors starting with any recessed or detailed areas using your angled brush. Then use your foam roller on flat surfaces. Roll in long, smooth strokes, overlapping each pass slightly. Don’t press hard or you’ll create texture. Let the roller do the work.
Apply thin coats rather than trying to get complete coverage in one pass. Thick paint takes longer to dry and shows brush and roller marks. Two thin coats always look better than one thick coat.
If you’re painting both sides of doors, paint backs first. Let dry for 24 hours, then flip and paint fronts. This prevents sticking and allows you to handle doors by their edges.
Step 8: Sand Between Paint Coats
After your first paint coat dries completely (wait at least 4-6 hours or overnight), do a light sanding with 220-grit sandpaper. This removes any dust particles that landed in wet paint and smooths minor imperfections.
Sand very lightly you’re just knocking down high spots, not removing paint. Wipe away dust with a tack cloth before applying the second coat.
Step 9: Apply Your Second Paint Coat
Your second coat provides full coverage and the final color depth. Use the same application technique as the first coat, working carefully to avoid drips or sags.
Two coats are usually enough for most projects. If you’re covering a very dark color with light paint, you might need a third coat. Always let each coat dry completely before deciding if you need another.
Step 10: Let Everything Cure Properly
Here’s where patience pays off. While paint may feel dry to touch in a few hours, it takes much longer to cure fully. Paint curing means the paint molecules cross-link and harden completely, reaching maximum durability.
Let cabinet doors and frames dry undisturbed for at least 48-72 hours before reinstalling. If possible, wait a full week. The longer paint cures before you stress it, the better it will hold up. Paint that hasn’t cured fully can stick to itself when doors close or show marks from hardware.
During curing, maintain good ventilation but avoid exposing painted surfaces to extreme heat or cold. Room temperature between 65-75°F is ideal.
Can You Paint Cabinets Without Sanding?
Many people want to know about painting cabinets without sanding. It is possible, but it is risky. You can use a “liquid deglosser.” This is a chemical that you rub on the cabinets. It eats away the shiny finish so paint can stick.
This works well if your cabinets are already in good shape. However, it does not fix bumps or scratches. Sanding is still the best way to get a perfect look. If you decide to skip sanding, you must use a very high-quality bonding primer like Zinsser BIN.
How Much Does It Cost to Paint Kitchen Cabinets?
The real cost of painting kitchen cabinets yourself breaks down like this for an average 10×10 kitchen with 20 cabinet doors:
Materials Cost:
- Primer (1 gallon): $35-50
- Cabinet paint (2 gallons): $90-140
- Sandpaper and supplies: $25-35
- Brushes and rollers: $20-30
- Painter’s tape and drop cloths: $15-25
- TSP or degreaser: $10-15
- Wood filler and caulk: $10-15
Total DIY Cost: $205-310
Compare this to professional cabinet painting, which typically costs $3,000-$8,000 for the same kitchen. You’re saving around $2,700-$7,700 by doing it yourself. Even if you need to buy some tools you don’t have, your total investment stays well under $500.
For a larger kitchen with 30-35 doors, expect to spend $300-450 on materials. Smaller kitchens or just painting lower cabinets might only cost $150-200.
Time Investment: Plan for 2-4 full days of work spread across 1-2 weeks including drying time. Break it down like this:
- Day 1: Remove doors, clean, and sand (6-8 hours)
- Day 2: Prime everything (4-6 hours)
- Day 3: Sand and first paint coat (4-6 hours)
- Day 4: Second paint coat (3-4 hours)
- Day 5+: Cure time (3-7 days)
- Final day: Reinstall (2-4 hours)
The best way to paint kitchen cabinets includes proper planning for these time commitments.
Maintaining Your Painted Cabinets
Once you’ve finished painting your cabinets, protect your investment with proper care:
Wait at least one week before cleaning painted surfaces. After that, use only mild soap and water with a soft cloth. Avoid abrasive cleaners or scrub pads that can scratch the finish.
Address spills and splatters immediately. While cabinet paint is durable, letting acidic foods or harsh cleaners sit on surfaces can damage the finish over time.
Touch up chips or scratches quickly to prevent them from spreading. Keep leftover paint for repairs. Small damage is easy to fix when caught early.
When to Consider Professional Help
DIY painting cabinets works great for most kitchens, but some situations benefit from professional help:
If your cabinets have extensive damage, deep scratches, or water damage, repairs might be beyond DIY scope. Professionals have tools and experience for complex repairs.
Spray-painted cabinets offer the smoothest finish but require expensive equipment and practice. If you want a sprayed finish without the investment, professional cabinet painting services in San Diego can deliver factory-quality results.
Very large kitchens with 40+ doors require significant time and space. If you can’t dedicate the needed space or time, professionals complete the job faster.
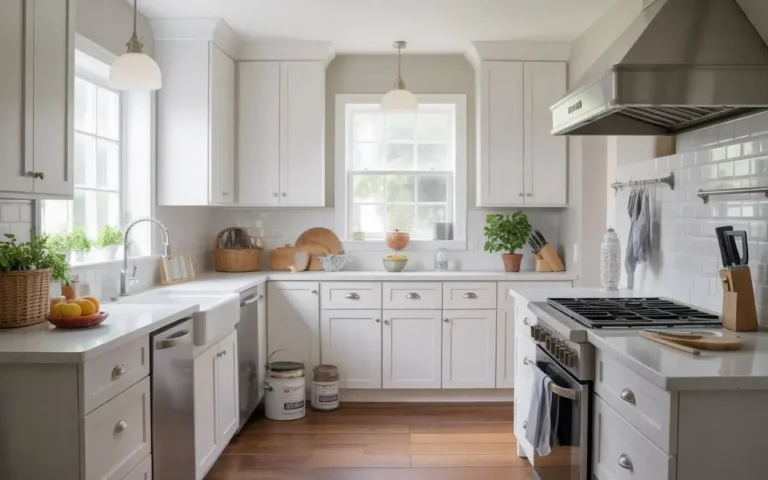
Final Thoughts
Painting kitchen cabinets yourself is one of the most rewarding home improvement projects you can tackle. The combination of dramatic visual impact and significant cost savings makes it worth the effort. By following these steps carefully and using quality materials, your cabinets will look professionally painted and last for many years.
Remember that patience during the drying and curing process pays off with better results. Don’t rush the timeline. Take your time with prep work, apply thin coats, and let everything cure properly before normal use.
If you’re in the San Diego area and decide you’d rather have professionals handle your cabinet transformation, San Diego Custom Painting specializes in cabinet painting services in San Diego with premium results and quick turnaround times. Whether you choose DIY or professional help, a fresh coat of paint brings new life to your kitchen without the expense of cabinet replacement.
Painting Kitchen Cabinets FAQs
What type of paint is best for kitchen cabinets?
Semi-gloss or satin cabinet-specific paints provide the best combination of durability and appearance. Look for acrylic-alkyd hybrid paints or urethane-fortified paints designed for cabinets and trim. These cure harder than standard latex paint. Avoid flat or matte finishes in kitchens because they’re difficult to clean and show every fingerprint.
How long before I can use my kitchen after painting cabinets?
You can use your kitchen immediately after painting the frames, but avoid closing cabinet doors for 48-72 hours minimum. Paint continues curing for 2-4 weeks, reaching maximum hardness around day 30. The longer you can wait before heavy use, the better. Avoid placing heavy items on shelves or aggressive cleaning for at least one week.
Should I paint the inside of my cabinets?
This depends on your preference and budget. Painting interiors creates a completely finished look but doubles your work and material costs. Most people paint only what’s visible when doors are closed. If cabinet interiors are stained wood in good condition, leaving them natural provides nice contrast. If interiors are damaged or dirty-looking, painting them improves the overall appearance.
Can I paint laminate cabinets?
Yes, but laminate requires special preparation. Use a bonding primer specifically designed for slick surfaces. Sand lightly to create texture but avoid sanding through the thin laminate layer. Some laminates are more paint-friendly than others. Thermofoil (the vinyl-wrapped cabinets) can be painted but may peel at edges where vinyl is lifting. Consider if painting is worth the effort on severely damaged laminate.
Do I need to use primer on previously painted cabinets?
Yes, always use primer even over old paint. Primer ensures proper adhesion and prevents the old color from bleeding through. It also helps block stains and creates a uniform surface for your new paint. Skipping primer on previously painted cabinets is a common shortcut that leads to poor results.
What’s the difference between cabinet paint and regular paint?
Cabinet paints contain harder resins that cure to a more durable finish capable of withstanding frequent touching, cleaning, and general wear. They’re formulated to resist chipping and scuffing better than wall paint. Regular latex paint stays slightly soft even after drying, making it prone to damage on high-use surfaces like cabinets. The price difference is worth it for longevity.