You just finished painting a room. The walls look great. Then you look at your roller and wonder is this thing trash now? Most people throw it out. That is exactly why they keep spending money on new rollers every project.
Knowing how to clean paint rollers properly takes less than 10 minutes and saves you real money. A quality roller costs $10–15 and can last 8–12 uses when cleaned right. That is $80–150 saved on a single house project. This guide walks you through every step from washing latex and oil-based paint off your roller, to drying, storing, and knowing when to skip cleaning entirely.
Table of Contents
ToggleWhy Cleaning Paint Rollers Actually Matters
Leftover paint ruins the nap texture of your roller cover. A damaged nap causes uneven coverage, streaks, and loose fibers in your paint finish. That means more work and worse results on your next project.
Cleaning your roller right after use is also much easier than dealing with dried paint later. Once latex paint dries on a roller, it becomes nearly impossible to fully remove without damaging the fibers. Oil-based paint is even harder.
Keeping your rollers clean is also good for your health. You can break down oil-based paint with solvents like mineral spirits, but you have to be careful when using them. Making sure your process is clean keeps your area safe and your tools in great shape.
What You’ll Need To Clean Paint Rollers Like a Pro
Getting your supplies ready first makes the whole process faster. What you need depends on the type of paint you used.
For water-based paint (latex or acrylic):
- 5-gallon bucket
- Dish soap or dish detergent
- Putty knife or 5-in-1 tool
- Wire brush
- Warm water
- Rubber gloves
- Fabric softener (optional but useful)
- Old newspapers or cardboard
For oil-based paint:
- Mineral spirits or white spirit
- Two disposable containers
- Putty knife
- Heavy-duty rubber gloves
- Safety glasses
- Old rags
- Bucket for final soap wash
For storage:
- Plastic wrap or resealable plastic bag
- Clean dry towels
- Dry storage area away from sunlight
The total cost for basic cleaning supplies runs about $12–18. These last through dozens of cleaning sessions.
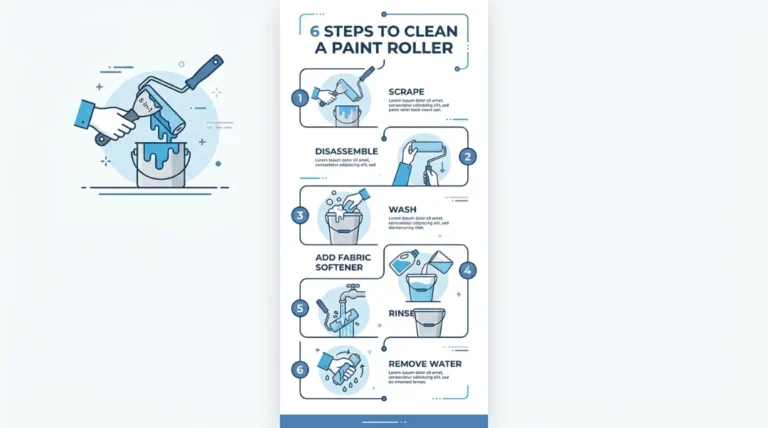
How To Clean Paint Rollers: Step-by-Step
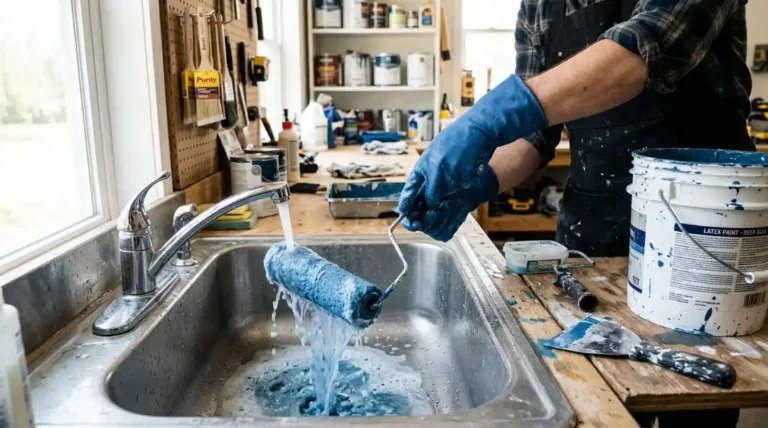
Start cleaning immediately after you finish painting. Latex paint starts drying within 30–45 minutes. The longer you wait, the harder the job gets.
Step 1: Scrape Off Excess Paint
Put your roller on top of the paint tray. Use your 5-in-1 tool or putty knife to scrape the paint back into the can. Use forceful, steady strokes to work from the top down. This gets back 2 to 4 ounces of paint that can be used.
Then roll the rest of the paint onto some old newspapers or cardboard. Keep rolling until hardly any color comes off. In this one process, you’ll get rid of around 75% of the paint.
Step 2: Take the Roller Apart
Pull the roller cover off the frame. Many people forget to clean the roller frame, which is a mistake. Dried paint on the metal cage stops the roller from spinning properly.
Fill your bucket with warm water around 110–120°F. Add 2–3 drops of dish soap. Too much soap creates foam that makes rinsing harder later.
Clean the roller frame with your wire brush, paying close attention to the end caps and cage wires. Latex dries fastest in these spots. Rinse the frame under running water and set aside.
Step 3: Wash the Roller Cover
Submerge the roller cover in your soapy water bucket. Use your gloved hands to squeeze and massage the paint out. Work from one end to the other with firm pressure.
The water will turn cloudy fast. Keep squeezing for 3–5 minutes. You will feel the fibers soften as the paint releases.
For thick nap rollers, hold the cover under running water while squeezing. Water pressure pushes paint out from deep inside the fibers.
Step 4: Add Fabric Softener (For Latex and Acrylic Paint)
This is the step most guides skip, and it makes a real difference. Once the water runs mostly clear, add one teaspoon of laundry fabric softener. Work it through the roller like shampoo. This reconditions the nap fibers and keeps the cover plush after drying. Give it one final rinse until the water is completely clean.
Step 5: Rinse Until Water Runs Clear
Run clean water over the roller for 2–3 minutes while squeezing continuously. Keep rinsing until water runs fully clear.
Test for hidden paint by squeezing the roller over white paper. Any color means you need more rinsing. Leftover paint will contaminate your next job and ruin the finish.
Step 6: Remove Excess Water
Shake the roller hard to remove water. Do this outside or over a tub, because water sprays in every direction.
Spin the roller on its frame 10–12 times. This pulls water out from the center of the nap. Skipping this step means your roller takes two days to dry.
How To Clean Oil-Based Paint Off a Roller
Water will not remove oil-based paint. You need a solvent such as mineral spirits or white spirit.
Safety first: Work outside or in a well-ventilated area. Wear rubber gloves and safety glasses. Keep mineral spirits away from heat sources and open flames.
First solvent bath: Pour enough mineral spirits into a container to cover the roller, about 1–2 cups. Work the roller in the solvent for 5–7 minutes. Squeeze and massage to release paint. The liquid will turn cloudy as paint comes out.
Remove the roller and squeeze the dirty solvent into a separate container. Save it for proper disposal at your local hazardous waste facility. Never pour used mineral spirits down a drain or into a storm drain.
Second rinse: Use fresh mineral spirits for a final rinse to remove the last paint residue. About half a cup is enough.
Final wash: Fill a bucket with warm soapy water. Wash the roller to remove the solvent smell and any remaining residue. Rinse well under running water.
Note: For cheap foam rollers priced at $3–4, cleaning with mineral spirits costs more in materials and time than buying a replacement. Save the deep cleaning process for quality roller covers priced $12–20.
How To Handle Dried Paint on a Roller
If you caught it early and only a few spots have dried, try the full wash method first.
For fully dried latex paint, soak the roller in hot water at 140–150°F for two hours. Add a quarter cup of white vinegar to help break down the latex. Work the roller every 30 minutes.
The success rate is about 30–40%. If paint will not come out after that, replace the roller. Any cleaning process strong enough to remove fully dried paint will destroy the nap texture.
For fully dried oil-based paint, replacement is almost always the better choice. The time and solvent cost more than a new roller cover.
How To Dry and Store Paint Rollers
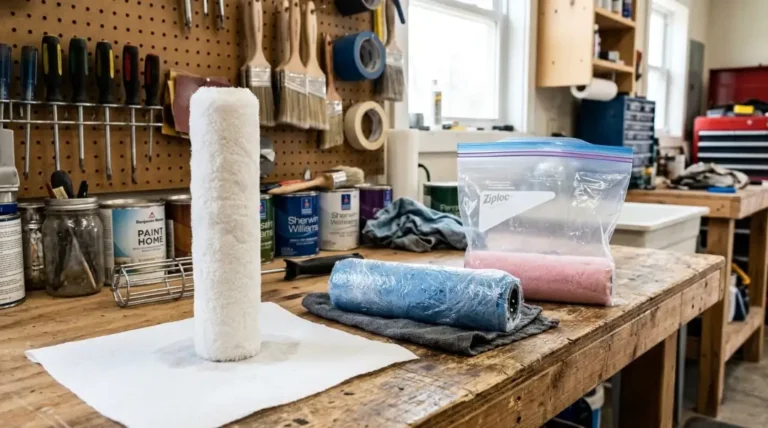
Never lay a wet roller flat to dry. This flattens the nap fibers and creates lines in your next paint job.
Stand the roller cover upright on one end or hang it from a wire hook. Air needs to flow around all sides. Drying takes 24–48 hours depending on humidity. Speed this up by placing the roller near a fan, not a heater. Direct heat melts synthetic fibers.
Check if the roller is fully dry by touching the center of the nap. If it feels damp at all, give it more time. A partially wet roller dilutes your paint and causes drip marks.
Short-term storage (1–3 days between coats): Wrap the roller tightly in plastic wrap. Squeeze out all air and seal the edges. Store in your refrigerator. The cool temperature keeps latex paint wet for 2–3 days. Let it warm to room temperature for 30–60 minutes before reusing.
Long-term storage (project finished): Once fully dry, wrap the roller cover in a clean plastic wrap or resealable plastic bag. Label it with the nap size 3/8″, 1/2″, etc. Store in a dry area away from direct sunlight. Sunlight breaks down synthetic fibers over time.
Should You Clean Your Roller Between Coats?
No. If you are painting again the same day or the next morning, do not wash the roller. A damp roller will dilute your paint and affect the finish.
Instead, wrap the roller tightly in plastic wrap or a plastic bag. Store it in the refrigerator overnight. Let it come to room temperature before your next coat. This saves time, water, and wear on the roller fibers.
Only wash your roller when the project is fully done or when you are switching paint colors.
When Should You Dispose of a Paint Roller?
Replace your roller cover when you notice any of these signs:
- Fibers are shedding into the paint
- Nap texture is permanently flattened
- Dried paint remains in the core even after cleaning
- The roller leaves streaks that a clean roller would not
A quality microfiber or synthetic blend roller cleaned properly after each use lasts 8–12 projects. Foam rollers are harder to clean thoroughly because foam traps paint deep inside. Those are best disposed of after one or two uses.
How to Clean a Paint Tray
Most instructions don’t even mention this step. If you don’t pay attention to your paint tray, the excess paint will solidify.
Wash the tray with warm, soapy water and a rag or sponge right after you use it for latex paint. Before putting it away, rinse it well and let it dry completely.
If you’re using oil-based paint, wipe off any extra paint with a rag first. After that, wash the tray with soap and water and rinse it well.
A clean paint tray keeps dried paint chunks from getting on your roller when you paint again.
SD Custom Painting Company Knows Clean Tools Make Cleaner Walls
At San Diego Custom Painting, clean tools are part of every job. Our crews clean and inspect rollers after every single project. This is why our interior and exterior painting services in San Diego consistently deliver smooth, professional finishes with zero fiber marks or uneven texture.
Whether it is a living room refresh, a full cabinet repaint, or a home exterior, the condition of the roller directly affects the quality of the wall. A well-maintained roller covers evenly, holds more paint, and leaves no lines.
We recommend proper roller care to every homeowner who asks us about DIY painting. If you want professional results without hiring help, your tools are the starting point. And if you prefer to leave it to experienced painters, our team is ready to help. Contact San Diego Custom Painting for a free estimate on your next project.
Final Thoughts
Cleaning your roller right after use is the single best habit you can build as a DIY painter. It takes 10 minutes and turns a $12 roller into a tool that lasts through 10 or more projects.
Use warm water and dish soap for latex and acrylic paint. Use mineral spirits for oil-based paint. Scrape first, wash thoroughly, rinse until clear, and always dry the roller standing upright. Store it in plastic wrap when dry.
Your walls will look better. Your tools will last longer. And you will spend less money replacing rollers every time.
FAQs About Cleaning Paint Rollers
How do I clean paint rollers with dried paint on them?
Soak the roller in hot water with white vinegar for two hours if the paint is latex-based. Work the roller every 30 minutes. The success rate is low around 30–40%. If paint will not come out, replace the cover.
How do you clean a paint roller without making a mess?
Start by scraping excess paint back into the can with a putty knife. Roll leftover paint onto cardboard. Then wash in a bucket rather than directly under a tap. This contains the mess and prevents paint from clogging your sink drain.
What is the best way to clean paint rollers used with oil-based paint?
Mineral spirits or white spirit is the most effective option. Soak and work the roller in solvent, replace with fresh solvent, then finish with a warm soapy water wash. Always dispose of used solvent at a hazardous waste facility.
How many times can you reuse a paint roller?
A quality microfiber or synthetic blend roller lasts 8–12 uses when cleaned properly after every project. Cheap foam rollers may only handle 1–2 cleanings before the fibers break down.
Can you put a paint roller in the washing machine?
No. Paint clogs the machine and permanently damages it. The agitation also destroys roller fibers. Always hand wash rollers in a bucket.
Do you clean paint rollers with hot or cold water?
Warm water at 110–120°F works best for latex and acrylic paint. Hot water can set some paints and damage natural fibers. Cold water does not loosen paint as effectively.
How long can a paint roller sit between coats?
A wrapped roller stored in the refrigerator stays usable for 2–3 days between coats. Let it warm to room temperature for 30–60 minutes before reusing.
When should I throw away a paint roller cover?
Replace it when fibers are shedding, the nap is permanently flat, or dried paint stays in the core after cleaning. A roller in poor condition leaves marks on your walls regardless of how well you paint.