When you look at your outdated oak kitchen, the big question isn’t just about the color. It is about whether those deep, swirling wood grains will ruin your new look. If you are asking can you paint oak cabinets, the short answer is yes. You can absolutely turn honey oak into a modern, factory-smooth masterpiece without the high cost of a full remodel.
The challenge with oak is its “open-grain” texture. Unlike maple or cherry, oak has deep pores that act like tiny valleys. If you simply slap paint over them, you will see every ridge and crater through the finish. This guide will show you the exact professional steps to hide that grain and prevent the yellow staining known as tannin bleed.
Table of Contents
ToggleCan You Paint Oak Cabinets: Expert Answer
You can paint oak cabinets, but they need more work to get ready than cabinets made of other woods. Oak’s visible wood grain and spongy surface make it the hardest to work with. These deep holes hold on to dirt and grease, old finishes, and can even send signals through paint if they are not sealed properly.
The grain won’t go away totally, but if you prime the wood properly, it will look less noticeable. It’s better to hide the roughness of oak cabinets with lighter colors, so most people choose to paint them white or gray. It takes three to five days to finish a kitchen, not the weekend that some blogs claim.
Why Oak Is Different From Other Cabinet Woods
Oak has larger, deeper pores than maple, cherry, or birch. These pores create texture that shows through thin paint layers. The wood also contains tannins that can bleed through primer, causing yellow or brown stains on your fresh paint. This is why repainting oak cabinets demands specific primers rated for tannin blocking.
Cabinet doors also move with humidity changes. Oak expands and contracts more than other hardwoods, which means your paint needs flexibility to avoid cracking. Skip the cheap paint, and this becomes a bigger issue within months.
Real Cost Breakdown: Paint vs. Replace
Here’s what painting oak cupboards actually costs in 2025:
DIY Painting Costs:
- Quality primer: $80-120 per gallon (need 1.5-2 gallons)
- Cabinet paint: $90-150 per gallon (need 1-1.5 gallons)
- Sandpaper and supplies: $50-80
- Tools (if buying): $150-300
- Total DIY cost: $370-650
Professional Painting:
- Standard kitchen (15-20 cabinet doors): $3,500-6,000
- Large kitchen (25+ doors): $6,000-9,000
- Includes all labor, materials, and warranty
Cabinet Replacement:
- Stock cabinets: $8,000-15,000
- Semi-custom: $15,000-30,000
- Custom cabinets: $30,000+
Painting saves 70-85% compared to replacement. Even hiring professionals costs half what new cabinets would.
What You'll Need to Paint Oak Cabinets
Essential Materials
Cleaning Products:
- Krud Kutter Original Formula or TSP substitute
- Naphtha for final solvent wipe
- Deglosser (Krud Kutter Gloss Off works well)
Primers: Water-based, high-solids primers work best for oak. Professional painters use Envirolak 170EPLR or Centurion CW1107 (both around $100/gallon). For DIYers, Zinsser BIN shellac-based primer or Kilz Premium work, though they’re not ideal for the reasons explained later.
Paint: Use KCMA-rated cabinet paint, not regular wall paint. Sherwin Williams Urethane Trim Enamel in Satin finish offers good durability. Benjamin Moore Advance is another solid choice. Expect to spend $90-150 per gallon.
Fillers:
- Wood filler for dings and scratches
- Bondo for larger repairs (dries faster, sands easier)
Tools You’ll Need
Sanders:
- Orbital sander for flat surfaces (P80-120 grit)
- Mouse sander for corners and details (P80-120 grit)
- Fine sandpaper for between coats (P220-320 grit)
Application Tools:
- Angled brush (2-inch)
- Foam roller and tray
- Paint sprayer (optional but recommended for 10+ doors)
Other Supplies:
- Tack cloth (low-tack preferred)
- Shop towels
- Screwdriver for removing hardware
- Containers for screws
- Dust mask or respirator
- Safety glasses
- Gloves
How to Paint Oak Cabinets Like a Pro in 9 Steps
Step 1: Remove Cabinet Doors and Hardware
Take all cabinet doors off their hinges. Keep the screws in labeled bags so you know which door goes where. Remove all knobs, pulls, and hinges from the doors. You don’t need to remove the hinges from the cabinet boxes unless you’re replacing them.
Number each door with painter’s tape on the back. This saves confusion during reinstallation. Take photos of your kitchen before starting so you remember the original layout.
Step 2: Deep Clean Everything
This step makes or breaks your project. Oak’s porous surface traps years of cooking grease, food particles, and cleaning product residue. Use Krud Kutter Original Formula with a green scrub pad or non-woven sanding pad. Clean every surface, paying extra attention to areas near the stove.
Make several passes. What looks clean often isn’t. The grooves in shaker-style cabinets hide the most grime. Let doors dry completely, preferably overnight with a fan running. Painting over damp wood causes adhesion failure.
After the degreaser dries, do a final wipe with naphtha on a clean cloth. This removes any remaining wax or polish that hides in the wood pores. Work in a ventilated area and wear gloves. Naphtha evaporates quickly, so you can prime within 30 minutes.
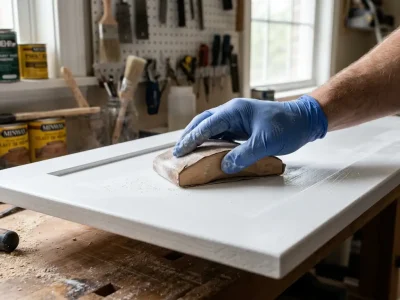
Step 3: Sand the Existing Finish
Use P80 or P120 grit sandpaper with your orbital sander on all flat surfaces. You’re not sanding down to bare wood. You’re scuffing up the existing finish so the primer can grip. The surface should feel rough to the touch when done.
Switch to the mouse sander for detailed areas, corners, and routed edges. Sand the cabinet boxes too, even though they’re harder to reach. Any unsanded area risks paint failure later.
Vacuum all dust, then wipe everything with a tack cloth. Even small amounts of dust create bumps in your finish.
Step 4: Fill Imperfections Carefully
Fill dents, scratches, and old hardware holes with wood filler. On oak, use as little filler as possible. Smooth spots stand out on textured wood when light hits the surface. Only fill what needs filling.
Let the filler dry completely (check the can for timing). Sand filled areas smooth with P220 grit sandpaper. The filler should sit slightly below the surrounding wood surface to account for primer buildup.
Never caulk the gaps where cabinet door panels meet the frame. These gaps allow wood movement. Caulking them causes cracking as the wood expands and contracts.
Step 5: Apply First Primer Coat
Prime all surfaces, starting with detailed areas using your angled brush. Get primer into every groove, corner, and routed edge. Then use the foam roller on flat surfaces. Rollers apply paint faster and more evenly than brushes on large areas.
Apply primer thicker than you think necessary. Oak needs heavy primer coats to fill those pores. Professional painters apply 5-6 wet mils, which look almost too thick. Don’t worry about minor drips on this coat.
Let the primer dry according to the can instructions. Most water-based primers need 2-4 hours between coats.
Step 6: Sand and Apply Second Primer Coat
Sand the first primer coat lightly with P220 grit. You’re removing bumps, not the primer itself. Hand sand this coat instead of using power tools. You want control to avoid sanding through to bare wood.
Vacuum and tack cloth again. Apply the second primer coat using the same brush-then-roll technique. This coat should look more even than the first. Check for any spots where wood grain shows through. Those areas need extra primer.
Most painting oak kitchen cabinets projects need a third primer coat. Oak’s deep pores demand it. Don’t skip this step trying to save time.
Step 7: Final Primer Sanding
After the final primer coat dries completely (wait overnight if possible), sand with P320 grit. This ultra-fine sanding creates the smooth surface that makes painted cabinets look professional. Hand sand only. Power sanders remove too much primer at this stage.
The goal is glass-smooth. Run your hand over every surface. Any bump or rough spot will show through your topcoat. This is where patience pays off. Spend the extra time here, and your paint looks sprayed on.
Vacuum and tack cloth one more time. Dust is still your enemy.
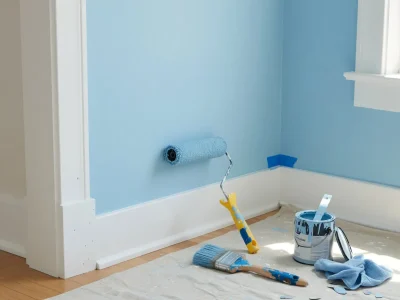
Step 8: Apply Paint Coats
Use the same brush-and-roll method you used when you primed. Use your angled brush to paint the small parts first, and then roll the flat parts. Use thin, even layers of paint. Two thin coatings are always better than one heavy coat.
Primer and paint dry in different ways. Look out for runs and drips, especially on surfaces that are up and down. Brush them out right away if you spot them forming. Leave the paint alone after it starts to dry. Fixing only half-dry paint makes it worse.
There should be at least 8 hours between paint applications. Even if they feel dry to the touch, many cabinet paints take 12 to 24 hours to cure between layers fully. Look at the directions on the paint can.
If you find any flaws, simply sand the paint with P320 grit between applications. This is something that most painters do as a matter of course. It’s what makes the difference between decent and great results.
Step 9: Reinstall Doors and Hardware
Let paint cure for 48-72 hours before reinstalling. Paint feels dry after a few hours, but it’s not fully hard. Installing doors too early causes dings and fingerprints that never come out.
Rehang doors using your photos and numbering system as reference. Install new hardware if you’re upgrading. Modern brushed brass or matte black pulls transform painted oak cabinets into a contemporary look.
Avoid slamming doors for the first week. Cabinet paint continues hardening for 7-10 days. Treat them gently during this break-in period.
Common Mistakes That Ruin Oak Cabinet Paint Jobs
- Skipping the Degreaser: Oak’s pores trap grease. Paint won’t stick to greasy wood. Clean multiple times with a quality degreaser.
- Using Wrong Primer: Regular wall primer doesn’t seal oak properly. Tannin bleeding happens within days. Spend the money on a proper cabinet primer.
- Not Enough Sanding: Every surface needs sanding before primer, between primer coats, and between paint coats. There’s no such thing as “no-sand” paint that actually works.
- Rushing Dry Times: Paint that feels dry isn’t fully cured. Following can instructions for dry times prevents soft paint that scratches easily.
- Painting in Bad Conditions: Temperature below 60°F or above 85°F causes problems. High humidity (over 70%) extends dry times and can cause blushing in water-based products.
Best Paint Colors for Oak Cabinets
White remains the most popular choice for painting oak cabinets to white. It gives the biggest visual impact and brightens dark kitchens. Sherwin Williams Pure White and Benjamin Moore Simply White are go-to colors.
Gray tones also work beautifully. Sherwin Williams Repose Gray or Storm Cloud (used in the laundry project mentioned earlier) offer sophisticated alternatives to stark white. These colors hide grain showing through painted oak cabinets better than pure white.
Avoid dark colors like navy or black on oak. The grain texture shows more obviously under dark paint, and every imperfection becomes visible. Stick with light to medium tones for best results.
Maintaining Your Painted Oak Cabinets
Clean with mild soap and water only. Harsh cleaners or abrasive scrubbers damage cabinet paint. Wipe up spills immediately, especially near the stove where grease accumulates.
Avoid hanging wet towels on cabinet doors. Constant moisture causes paint to soften and peel. Use soft-close hinges if possible. They reduce impact stress that chips paint over time.
Touch up chips and scratches as they happen. Keep leftover paint for repairs. Small touch-ups blend in. Ignored damage spreads.
Plan to repaint every 8-12 years with proper maintenance. Professional spray jobs last longer than brush-and-roll applications, but all painted cabinets eventually need refreshing.
When to Hire a Professional vs. DIY
Go DIY if:
- You have 1-2 weeks available for the project
- Your kitchen has fewer than 15 cabinet doors
- You’re comfortable with power tools and patient with detail work
- Budget is tight (under $700 for materials)
Hire a pro if:
- You need the kitchen functional throughout the project
- You have 20+ cabinet doors (full kitchen)
- You lack tools like sanders and sprayers
- You want warranty protection on the work
- The cabinets have existing damage or previous failed paint jobs
Professionals save you time and frustration. They also know how to handle problems like severe tannin bleed, damaged wood, or poorly installed cabinets. Their paint sprayers create finishes that brushes and rollers can’t match.
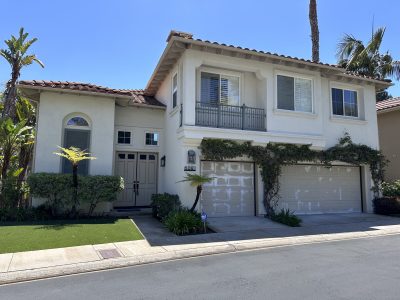
For homeowners in Southern California looking for expert results, San Diego Custom Painting offers professional cabinet painting services in San Diego with warranties on all work. Sometimes the peace of mind is worth the investment.
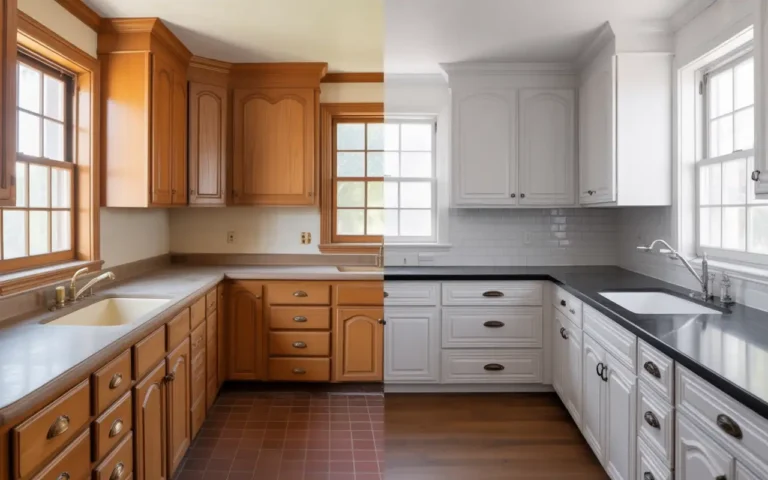
Paint Oak Cabinets Before and After: What to Expect
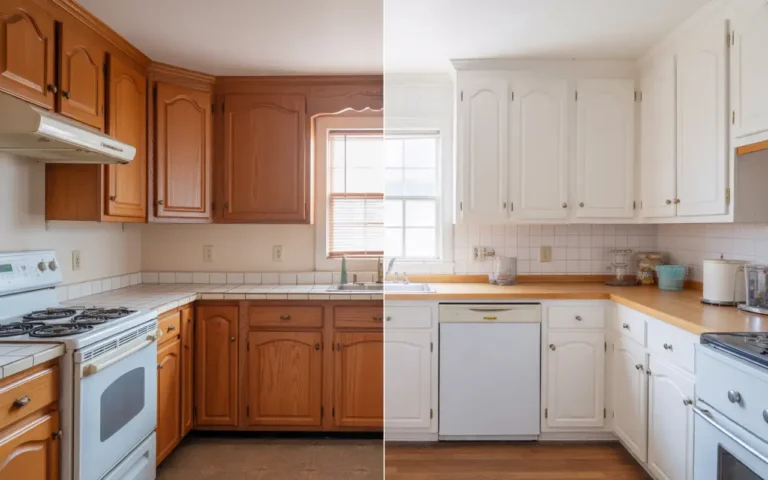
The transformation feels dramatic. Honey oak cabinets from the 1990s become fresh, modern features. Your kitchen instantly looks updated, even if everything else stays the same.
Expect the wood grain to still be visible up close. It’s softer and less obvious, but the oak’s texture remains. This isn’t a flaw. It’s wood, not plastic. The texture actually adds character once painted.
Light reflects differently off painted surfaces. Your kitchen will feel brighter and larger. White or light gray cabinets bounce light around the room in ways dark oak never did.
Hardware choices make a huge impact. Swapping outdated brass pulls for modern finishes completes the transformation. Budget $3-8 per pull for quality hardware.
Final Words
So, can you paint oak cabinets and get results you are proud of? Yes, when the process is done with care and patience. Oak cabinets can be transformed without replacing them. The key is proper prep, the right products, and realistic expectations.
If you want expert help, San Diego Custom Painting offers professional cabinet painting services in San Diego. Our team has hands-on experience with oak kitchen cabinets, cabinet doors, and wood grain control. We focus on long-lasting finishes that look clean and hold up to daily use.
FAQs About How to Paint Oak Cabinets
How long does it take to paint oak cabinets?
Plan for 3-5 days minimum. Day 1: removal and cleaning. Day 2: sanding and first primer. Day 3: second primer coat. Day 4: paint coats. Day 5: cure time and reinstall. Rushing causes problems. Full cure takes 7-10 days.
Will the wood grain show through?
Some grain texture remains visible, especially on close inspection. Proper priming minimizes it significantly. Three primer coats work better than two. Light paint colors hide grain better than dark ones.
Can you paint oak cabinets without sanding?
No. Sanding creates the mechanical bond that holds paint to wood. Products claiming “no-sand” formulas underperform. Even deglosser can’t replace proper sanding. This step is mandatory for lasting results.
What’s the best paint for oak cabinets?
Use KCMA-rated cabinet paints only. Sherwin Williams Urethane Trim Enamel, Benjamin Moore Advance, or professional-grade options like Milesi or Envirolak 200 series. These resist chipping, scratching, and moisture better than standard paints.
How much does painting oak cabinets cost?
DIY costs $370-650 for materials. Professional painting runs $3,500-6,000 for average kitchens. Full cabinet replacement costs $8,000-30,000+. Painting saves significant money while delivering modern aesthetics.
Do I need a special primer for oak?
Yes. Oak’s tannins bleed through regular primer, causing yellow stains. Use shellac-based or water-based primers specifically rated for tannin blocking. Professional painters prefer Envirolak 170EPLR or Centurion CW1107. Budget options include Zinsser BIN or Kilz Premium.
Should I use a paint sprayer or brush and roller?
Sprayers create the smoothest finish but require practice and proper ventilation. For 10+ doors, sprayers save significant time. For smaller projects, quality brushes and foam rollers deliver good results. Most DIYers succeed with brush and roller methods.
How do I prevent paint from chipping?
Use proper primer, apply adequate coats (minimum two), let paint fully cure before use, and choose flexible cabinet paints. Sherwin Williams and Benjamin Moore cabinet lines resist chipping better than standard paints. Soft-close hinges reduce impact damage.