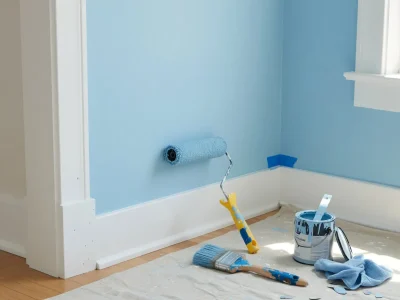
You just patched a hole in your wall and you want to know exactly when you can start sanding or painting. Waiting around for a wall repair to dry can stall your whole project. If you apply a fresh topcoat over wet spackle, the trapped moisture will cause your paint to bubble, crack, or peel away from the drywall.
So let’s settle it. How long does spackle take to dry? As a general rule, standard spackle takes 1 to 2 hours to dry to the touch for small nail holes, while deep wall gouges require a full 24 hours to cure completely. The precise time depends heavily on your specific patch depth, your room humidity, and whether you applied a vinyl compound or a lightweight spackle.
Table of Contents
ToggleQuick Answer: How Long Does Spackle Take to Dry
For a quick reference before you grab your sanding block, use this breakdown based on the type of spackle:
- Standard spackle: dry to the touch in 1 to 2 hours, safe to paint after 24 hours.
- Fast-dry spackle: dry to the touch in 10 to 30 minutes, safe to paint after 1 to 2 hours.
- Lightweight spackle: dry to the touch in about 1 hour, safe to paint after 24 hours.
- Heavyweight spackle: dry to the touch in 2 to 5 hours, safe to paint after 24 hours.
- Epoxy spackle: dry to the touch in about 5 hours, safe to paint after 24 hours.
These times assume a normal room temperature and normal humidity. If your bathroom is steamy or your basement is damp, add extra time. We’ll get into that below.
What Is Spackle?
Spackle is a thick paste you use to fill small holes, dents, and cracks in drywall or plaster. You spread it into the damage with a putty knife, let it dry, sand it smooth, then paint over it. It comes premixed in a tub, ready to use straight out of the container, or as a powder you mix with water yourself.
Spackle is not the same thing as joint compound, even though people use the words like they mean the same thing. Spackle is thicker, dries faster, and shrinks less. It’s built for small repairs, not for finishing whole walls. We’ll cover the difference in more detail further down, because it actually affects how long you’ll be waiting around.
How Long Does It Take for Spackle to Dry?
This is where most drywall spackle dry time guides get vague. They tell you “a few hours” and leave you guessing. Here’s what actually determines your wait, broken down by type.
Standard (gypsum) spackle
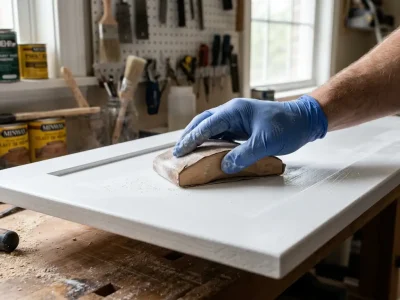
This is the spackle most people grab at the hardware store. It’s dry to the touch in about 1 to 2 hours. But dry to the touch doesn’t mean fully cured. The inside of the patch is still losing moisture even after the surface feels solid. Wait a full 24 hours before you sand and paint.
Fast-dry (quick-dry) spackle
Products like 3M High Strength Small Hole Repair are built for speed. Small nail holes patched with this type can be dry to the touch in 10 minutes. Give it 30 minutes to an hour to be safe, then you can typically sand and paint the same day. This is the best choice if you’re patching before a showing, a party, or just don’t want to wait.
Lightweight spackle
Lightweight formulas use a vinyl base and are made for small holes and dents, not big repairs. Spackling paste dry time for lightweight products runs around 1 hour to dry to the touch, with a full 24-hour cure before painting.
Heavyweight (all-purpose) spackle
Heavyweight spackles are thicker and made for bigger jobs, deeper holes, or gouges. Heavyweight spackling holds up better in larger repairs but takes longer, usually 2 to 5 hours to dry to the touch, with 24 hours before painting.
Epoxy spackle
Epoxy spackle is the strongest option and works on wood and masonry as well as drywall. It takes about 5 hours to dry to the touch and a full 24 hours to cure before painting.
Here’s the same information in a quick table.
Spackle Type | Dry to the Touch | Safe to Paint |
Standard (gypsum) | 1 to 2 hours | 24 hours |
Fast-dry | 10 to 30 minutes | 1 to 2 hours |
Lightweight | About 1 hour | 24 hours |
Heavyweight | 2 to 5 hours | 24 hours |
Epoxy | About 5 hours | 24 hours |
One thing worth repeating: dry to the touch and fully cured are two different things. If you sand too early, you’ll pull chunks out of the patch. If you paint too early, the moisture trapped underneath will push through the paint later and leave a dull or discolored spot. That’s the single most common mistake in a DIY spackle job.
You may also want to read this: How long does it take for spray paint to dry?
How to Tell If Spackle Is Fully Dry
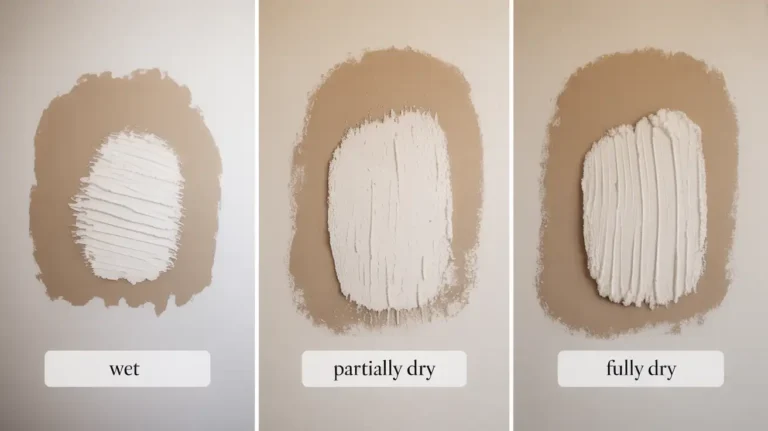
You don’t need fancy tools for this. Press your finger lightly against the patch. If it feels cool or slightly damp, it’s not ready. Dry spackles feel room temperature and firm. Color is another clue. Most spackles look slightly darker or grayer when wet and turn lighter, often bright white, once fully dry. If part of the patch still looks darker than the rest, give it more time before you sand that spot.
Factors Affecting Spackle Dry Time
The times above are averages. Your actual wait depends on a few things you can control and a few you can’t.
Size and depth of the repair
A small nail hole dries fast because there’s barely any spackle to dry. A deep gouge or a hole bigger than a coin takes much longer, since the spackle underneath the surface has to dry too, not just the top layer. If you filled a hole deeper than a quarter inch, plan on it taking longer than the times listed above, and check that it’s fully dry before moving forward.
Number of coats
If your hole needs two or three coats because the spackle shrinks as it dries, each coat needs to dry before the next goes on. Skipping this step is how you end up with a patch that looks fine on day one and cracks by next month.
Humidity
Spackle dries by letting the water in it evaporate into the air. If the air is already full of moisture, that process slows down. Spackle dries best between 50 and 70 percent humidity. A bathroom right after a shower or a basement with poor airflow will add real time to your wait.
Temperature
Spackle dries best between 50 and 90 degrees Fahrenheit. Cold rooms slow drying down noticeably. If you’re patching a garage or a room without heat in winter, expect it to take longer than the standard estimate.
Airflow
A closed-up room with no air movement traps moisture near the wall. Even a small amount of air circulation speeds things up.
Ways to Speed Up the Drying Process
If you’re on a deadline, here’s what actually works.
- Open a window: Fresh air moving through the room helps moisture leave faster. Skip this one if it’s raining or the outside air is more humid than inside.
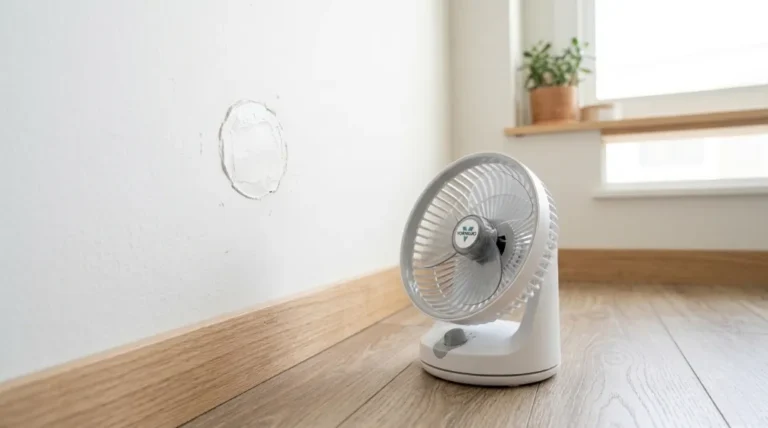
- Run a fan: Point it at the wall, not just around the room. Moving air across the surface speeds up evaporation more than a fan just spinning somewhere else in the room.
- Use a dehumidifier: This is the most effective single fix if humidity is your problem. It pulls moisture out of the air directly, which gives the water in the spackle somewhere to go.
- Turn on the AC: Cool, dry air from an air conditioner does double duty: it lowers humidity and keeps the room in a good temperature range.
- Use a hair dryer on a low, cool setting for small patches: Don’t use heat directly on the patch. Fast surface heat can dry the outside while the inside stays wet, which causes cracking later. A cool setting held a few inches away is safe for touch-ups.
Don’t do this: don’t use a heat gun, don’t put a space heater directly on the wall, and don’t rush a big repair by skipping coats. These shortcuts cause more rework than they save.
How Spackle Drying Times Compare With Joint Compound
People often use spackle and joint compounds like they’re interchangeable. They’re not, and the drying time is one of the biggest differences.
Joint compound, also called drywall mud, is what professionals use to finish drywall seams and larger wall sections. It’s thinner, spreads easier over big areas, but takes longer to dry and shrinks more as it does. A small joint compound patch can dry in about 2 hours. Larger seams or taped joints can take up to 12 hours, and some pros wait a full 24 hours before sanding a big job.
Spackle is built for small, targeted repairs. It’s thicker, holds its shape in a hole without sagging, and generally dries faster for equivalent size. If you use joint compound on a small nail hole, you’re waiting longer than you need to. If you use a spackle to finish a full drywall seam, it can crack over time because it’s not made to flex over a large joint the way compound is.
Simple rule: small holes and dents, use spackle. Full walls, seams, and large drywall sections, use joint compound.
Getting a wall repair right isn’t just about picking the correct product. It’s also about how the whole wall gets prepped, primed, and painted afterward, which is where a lot of DIY patches start looking uneven once paint goes on. If you’d rather have it done right the first time, San Diego Custom Painting handles wall repairs and finish work as part of our interior painting services in San Diego, so the patch blends into the wall instead of standing out under the paint. Reach out if you want a second opinion before you paint over a repair.
Get a free estimate from San Diego Custom Painting
Skip the trial and error. Our team handles wall repairs and full interior painting services in San Diego done right the first time.
Conclusion
Spackle dry time comes down to type, size, and the room you’re working in. Standard spackle needs 1 to 2 hours to be dry to the touch and a full day before paint. Fast-dry products can be ready in under an hour. Bigger or deeper repairs, humid rooms, and cold temperatures all add time, and rushing the process is the one thing that consistently ruins an otherwise good patch. Wait it out, check that the color and feel are right, and your repair will hold up under paint instead of showing through it.
FAQs About Spackle Dry Time
Can you paint over a spackle the same day?
With a fast-dry spackle on a small hole, yes, usually within 1 to 2 hours. With standard spackle, wait the full 24 hours. Painting too soon traps moisture and causes the paint to look dull or uneven later.
How long does spackle take to dry before sanding?
Most spackles are ready to sand in 1 to 2 hours. Fast-dry types can be ready in 10 to 30 minutes. Sand too early and you’ll pull the patch out of the hole instead of smoothing it.
Does spackle dry lighter or darker?
Most spackles dry lighter than they look when wet, often shifting from gray to bright white. If a section still looks darker than the rest, it likely isn’t dry yet.
Why is my spackle still soft after 24 hours?
This usually means the patch is too deep, the room is too humid, or too much spackle was applied in one layer. Add a fan or dehumidifier and check again in a few hours. Very deep holes sometimes need a second thin coat instead of one thick one.
Can I use a hair dryer to dry spackle faster?
Yes, in a cool setting, held a few inches from the wall. Avoid hot air or a heat gun, since fast surface drying can crack the patch while the inside is still wet.
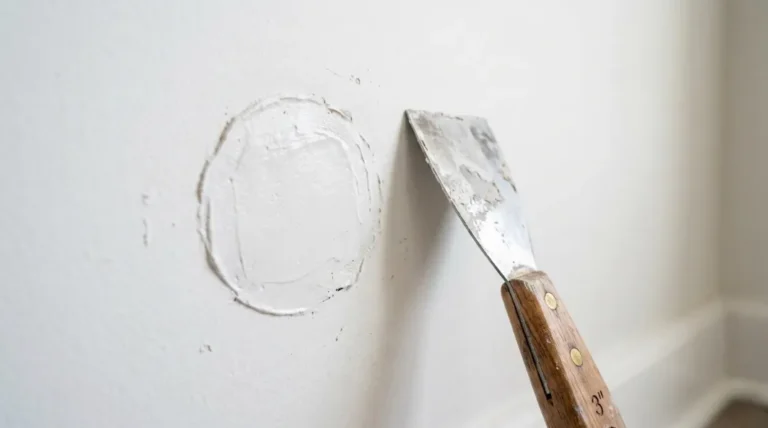
What happens if you sand spackle too early?
It gums up your sandpaper, smears instead of sanding smooth, and can pull the patch back out of the hole. If this happens, let it dry longer and reapply if needed.
Is the spackle waterproof once it’s dry?
No. Dried spackle is not waterproof and shouldn’t be used in areas with direct water exposure, like inside a shower. It holds up fine in normal painted walls once sealed with paint or primer.