Removing old kitchen cabinets is often the first step of a major kitchen remodeling. While this task might appear challenging, with proper tools and a plan in place any homeowner can safely tackle this task. This comprehensive guide will show how to remove kitchen cabinets while protecting walls while still permitting reuse if desired.
Follow our step-by-step instructions for both upper and lower units to successfully complete your demolition phase and get one step closer to achieving your dream kitchen!
Table of Contents
ToggleSafety Considerations: Your Most Important First Steps
Turn Off Utilities:
- You must shut off the electricity and water to the kitchen area.
- Find your home’s main breaker box and flip the circuit breaker labeled for the kitchen to the “Off” position. Use a voltage tester to make sure the power is truly off at any exposed wires or outlets.
- Locate the water shut-off valves under the sink and turn them clockwise to stop the water supply. If you have a gas line, call a professional to disconnect it before beginning work on base cabinets near the stove.
Protect the Area:
- Demolition creates dust and debris.
- Cover your countertops and floors with drop cloths or hardboard to prevent scratches and dents.
- Seal off the kitchen doorway with plastic sheeting to contain the dust in the work zone.
Use Personal Protective Equipment (PPE):
Wear safety glasses, work gloves, and a dust mask. Heavy lifting is involved, so consider wearing steel-toed boots.
What You'll Need for Cabinet Removal
Gathering the right tools before you start saves time and frustration. Most items are basic home improvement supplies.
Essential Tools:
- Electric drill with driver bits
- Pry bar for removing trim and loosening glued cabinets
- Utility knife for cutting through caulk and paint
- Screwdriver set (Phillips and flathead)
- Adjustable wrench for plumbing connections
- Hammer for removing nails and trim
- Step ladder for reaching upper cabinets
- Headlamp or work light for seeing inside dark spaces
Safety Equipment:
- Safety glasses
- Work gloves
- Dust mask
- Steel-toed boots
Supplies:
- Tarps or drop cloths to protect floors and countertops
- Plastic bags for storing screws and hardware
- Masking tape and marker for labeling parts
- 2×4 lumber pieces for temporary cabinet supports
- Towels for cushioning surfaces
A cordless drill makes the job much easier than a corded model. You’ll be reaching into tight spaces where a cord gets in the way.
Preparing Your Work Area
Proper preparation prevents damage and keeps the project organized.
Start by emptying all cabinets completely. Clear countertops of appliances, decorations, and daily items. You need a clean workspace with room to maneuver.
Shut off power to the kitchen at the circuit breaker. Turn off the water supply valves under the sink. If you’re removing a cabinet with a gas line, close the gas shutoff valve.
Cover countertops with thick towels or moving blankets. Lay tarps on the floor to catch falling debris. These simple steps save your surfaces from scratches and dents.
Take photos of your cabinet layout before you start. Capture close-ups of how cabinets connect to each other and the wall. These pictures help if you need to reference the original setup later.
Remove any trim or molding around cabinets. Slide your utility knife along the edges where caulk or paint seals the cabinet to the wall. Cut through these seals now rather than fighting them when the cabinet is half-removed.
How to Remove Kitchen Wall Cabinets
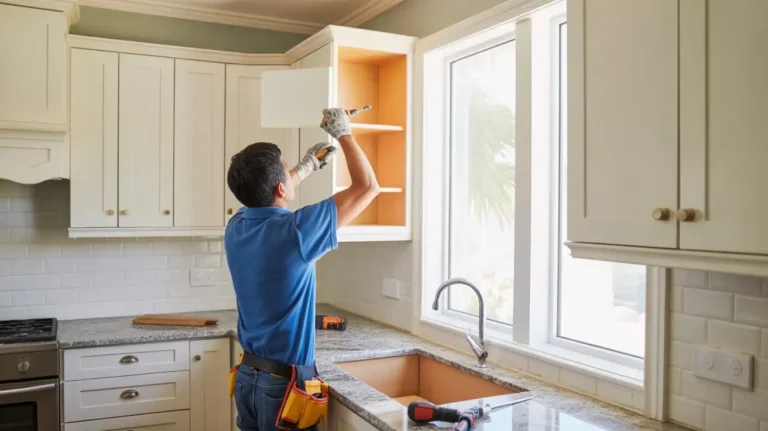
Upper cabinets come off first. This prevents damage to base cabinets and gives you a clear path to work.
Step 1: Remove Doors and Shelves
Unscrew cabinet doors at the hinges. Keep the hinges attached to the doors for easier reinstallation. Lift shelves off their support pins and set them aside. Leave the pins in place unless they’re blocking access to screws.
Step 2: Disconnect Any Appliances
Unplug under-cabinet lighting or built-in microwaves. Disconnect any electrical connections inside the cabinet boxes. If you’re unsure about electrical work, hire a licensed electrician for this step.
Step 3: Create Temporary Supports
Measure the distance from your countertop to the bottom of the wall cabinet. Cut 2×4 boards to this length. Place these supports under the corners of the cabinet you’re removing. They catch the cabinet if your grip slips during removal.
Step 4: Locate and Remove Side Screws
Look inside adjacent cabinets where they meet. You’ll find small screws holding cabinets together side by side. Remove these screws with your drill. Some may be hidden under decorative caps or wood plugs.
Step 5: Find the Wall Mounting Screws
Shine a light inside the cabinet and look at the top back corner. Most wall cabinets attach with four screws driven through a mounting rail into wall studs. Some older cabinets use more screws. Check the bottom back edge too, as some designs use screws there.
The screws typically have large washers to distribute weight. They’re often painted over, so you may need to chip away paint to find them.
Step 6: Remove Wall Screws Carefully
Have your helper press firmly against the cabinet front, holding the cabinet against the wall. Start removing screws from the bottom and work up. Remove the top screws last.
Loosen each screw gradually rather than removing one completely before moving to the next. This keeps weight distributed evenly.
When you reach the final two screws, make sure both people have a firm grip. Remove the second-to-last screw completely, then carefully back out the final screw while supporting the full cabinet weight.
Step 7: Lower the Cabinet Down
Once all screws are out, shift your grip to the sides of the cabinet. One person takes each side. Lift slightly upward to clear any remaining connections, then lower the cabinet slowly to the countertop below. Rest it there briefly before lifting it completely away.
If the cabinet won’t budge, stop pulling. You likely missed a screw or there’s hidden adhesive. Check again before forcing it.
Move the removed cabinet out of your work area immediately. This keeps your workspace clear and prevents accidental damage.
How to Remove Kitchen Base Cabinets
Lower cabinets require more steps because of plumbing, appliances, and countertops.
Step 1: Disconnect the Sink
Turn off water supply valves under the sink by rotating them clockwise. Place a bucket under the pipes to catch residual water. Use your adjustable wrench to disconnect the water supply lines from the faucet.
Loosen the slip nuts on the drain pipes by hand or with pliers. These are the large plastic or metal rings connecting pipe sections. Remove the P-trap carefully as it holds water.
If you have a garbage disposal, unplug it from the outlet under the sink. Disconnect the drain pipe from the disposal unit.
Step 2: Remove the Dishwasher
Shut off power to the dishwasher at the circuit breaker. Open the lower front panel to access the water supply line and drain hose. Turn off the water supply valve and disconnect the line with a wrench.
Unscrew the mounting brackets under the countertop that hold the dishwasher in place. These are usually two screws on the top front edge of the unit.
Disconnect the drain hose from the garbage disposal or drain pipe. Gently pull the dishwasher forward. If it won’t slide out, check if flooring installed after the cabinets is blocking it.
Step 3: Remove the Countertop
Look under the countertop from inside the base cabinets. Most countertops attach with screws driven up through corner brackets. Remove these screws with your drill.
Use your utility knife to cut through any caulk sealing the countertop to the wall or backsplash. Slide the blade along the entire length of the seal.
With a helper, lift the countertop straight up and off the cabinets. Laminate countertops are lighter, while granite or quartz requires two or more people. Set the countertop aside on sawhorses or padding.
Some countertops may have additional adhesive. If yours won’t lift easily, work a pry bar carefully under the edges to break the bond.
Step 4: Remove the Toe Kick
The toe kick is the recessed board at the bottom of base cabinets. Slide your pry bar behind it and gently pull outward. Some toe kicks nail in place, others snap into clips.
Work slowly if you plan to reuse the toe kick. The thin material cracks easily with too much pressure.
Step 5: Detach Side Connections
Just like wall cabinets, base cabinets screw together where they meet. Look inside adjacent cabinets for these connection screws. Remove them with your drill.
Step 6: Disconnect from the Wall
Shine your light along the back inside edge of the base cabinet. You’ll find screws going through the cabinet frame into the wall studs. Most base cabinets use four to six screws.
Remove these screws completely. Some cabinets also attach through a metal hanging rail at the top back edge.
Step 7: Pull Out the Cabinet
With all screws removed, grip the cabinet on both sides. Pull straight out and away from the wall. Base cabinets are heavy, so use proper lifting technique with your legs, not your back.
If pipes run through the cabinet sides, you may need to cut notches in the cabinet with a jigsaw to clear them. Alternatively, disconnect the pipes completely if they’re accessible.
Set removed cabinets on moving dollies or hand trucks to wheel them out of the house. This saves your back and prevents floor scratches.
Dealing With Stubborn Cabinets
Sometimes cabinets resist removal despite following all steps correctly.
Glued Cabinets
Older installations often used construction adhesive in addition to screws. After removing all visible screws, work a pry bar between the cabinet back and the wall. Start at the sides and work toward the center. Pry gently in multiple spots rather than forcing one area.
Place a piece of wood behind the pry bar to protect your wall from damage. Apply steady pressure rather than jerking motions.
Stripped Screws
If screw heads strip out, try a rubber band. Place it over the stripped screw head and press your drill bit through the rubber into the screw. The rubber fills the gaps and provides grip.
For severely damaged screws, use a screw extractor bit. These reverse-thread bits grab stripped screws as you drill counterclockwise.
Hidden Fasteners
Some custom cabinets hide screws under wood plugs or decorative caps. Look for circular patches that don’t match the wood grain. Pop these out with a small flathead screwdriver to access hidden screws.
Check inside corner cabinets thoroughly. Installers sometimes place extra fasteners in hard-to-see locations for added stability.
What to Do With Removed Cabinets
You have several options for disposing of old cabinets responsibly.
Donation
Cabinets in good condition make excellent donations. Habitat for Humanity ReStore accepts kitchen cabinets and resells them to fund home building projects. Local community centers, churches, and schools often need storage solutions.
Clean cabinets and include all doors, shelves, and hardware. Take measurements so potential recipients know if they’ll fit.
Selling
Solid wood cabinets, especially custom or high-quality brands, sell well on Craigslist, Facebook Marketplace, or OfferUp. Price them at 40-60% of replacement cost depending on condition.
Include dimensions, materials, and clear photos in your listing. Be ready to have buyers pick up quickly.
Disposal
For cabinets headed to the landfill, rent a dumpster or schedule a bulk trash pickup. A 10-yard dumpster handles a typical kitchen’s worth of cabinets comfortably.
Some waste management companies recycle wood from old cabinets. Call ahead to ask about recycling options in your area.
Break down cabinets before disposal to save space. Remove doors, back panels, and shelves. This makes transport easier and may reduce disposal costs.
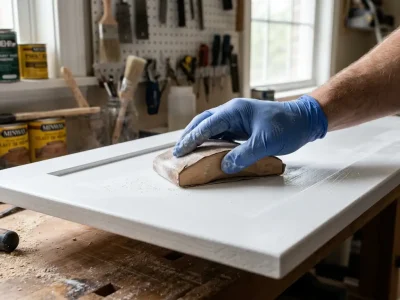
Repairing Walls After Cabinet Removal
Removing cabinets always leaves marks on walls that need attention.
Fill screw holes with spackle or drywall compound. Use a putty knife to press compound into holes, then scrape excess smooth with the wall surface. Let it dry completely before sanding.
Larger damaged areas may need drywall patches. Cut a piece of drywall slightly larger than the damaged area, secure it with drywall screws, then tape and mud the seams.
Sand all repairs smooth with fine-grit sandpaper. Wipe away dust before priming and painting.
If you removed a tile backsplash with the cabinets, expect more extensive wall repair. Tile removal often damages the drywall paper or plaster underneath.
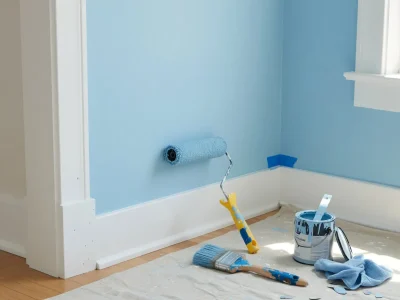
Create Your Dream Kitchen
With the old cabinetry gone, you have a blank canvas. This is the perfect time to think about a fresh, modern look. If your plans include new paint, now is the time to prepare the space. For homeowners in the area, San Diego Custom Painting provides top-tier cabinet painting services in San Diego and kitchen remodeling, offering a fast and cost-effective transformation before new units go in or as a standalone refresh. A professionally painted finish can make the new kitchen a reality even faster.
Final Thoughts
The process of how to remove kitchen cabinets is methodical, not difficult. By prioritizing safety and following these clear, step by step instructions, you gain confidence and control over your remodel. The work of removing kitchen cupboards clears the path for your new design. Remember that patience is a vital tool, especially when trying to remove the cabinet without causing damage. Take your time, and you will have a successfully cleared space ready for the next phase of your renovation.
FAQs About Removing Kitchen Cabinets
Can I remove kitchen cabinets without damaging the walls?
Yes. The key is to cut all caulk or paint lines with a utility knife and use a thin piece of scrap wood when using a pry bar to gently separate the cabinet from the wall. Go slowly when removing the securing screws. This careful process is the best way to ensure minimal damage.
How do I remove a cabinet that is glued to the wall?
Cabinets glued to the wall require a slow and careful approach. Start at a seam and wedge a stiff putty knife between the cabinet and the wall. Then, gently tap a pry bar into the gap, using a piece of wood as a cushion against the wall surface. Work along the edges, increasing the pressure slowly to break the glue’s bond without tearing the drywall.
Is it possible to reuse the cabinets after I take them down?
Absolutely. To reuse them, label each cabinet with its location (e.g., “Upper left 1”), carefully unscrew all fasteners, and remove the units in one piece. This gentle approach of how to remove cabinets from walls without damage ensures the cabinet frames remain intact for re-installation in a garage, laundry room, or second life elsewhere.
Do I need a professional to disconnect the plumbing or electric?
For safety and code compliance, it is strongly recommended to have a licensed electrician or plumber disconnect and cap any live wires, gas lines, or permanent plumbing fixtures before you begin removing kitchen cabinets. Your safety is worth the investment.