A piece of furniture in your living room has a varnish that has turned yellow, is boring, or simply doesn’t go with your decor. It sounds like a nightmare to strip it completely. The good news? You’re not required to. It is possible to paint over varnished wood, and if you follow the proper procedures, the finished product will appear smooth, clean, and durable.
Everything is covered in this guide, including priming, painting, finishing, and preparation. Whether you’re updating a door, a side table, or an old cabinet, we have clear, easy-to-follow instructions that will help you do it correctly the first time.
Table of Contents
ToggleKey Takeaways
- Painting over varnished wood is possible without full stripping
- Light sanding is strongly recommended for better paint adhesion
- A bonding primer is the most important step most beginners skip
- Acrylic (water-based) paint works best for indoor furniture projects
- Chalk paint is a beginner-friendly option that requires minimal prep
- Skipping prep steps leads to peeling, bubbling, and wasted effort
What Exactly is Varnished Wood?

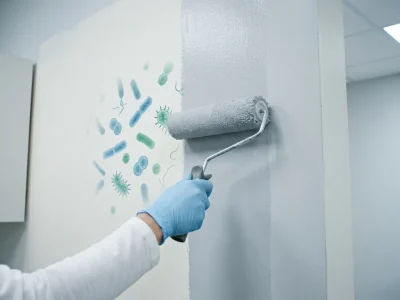
Varnished wood features a sleek, transparent coating known as varnish, providing a durable protective layer. Varnish is crafted from a blend of resins, oils, and solvents that transform into a sleek, glossy, or semi-glossy finish on the wood surface.
This coating safeguards wood against moisture, scratches, and the rigours of everyday use. That’s precisely what complicates the process of painting over it: paint struggles to adhere to a smooth, sealed surface.
Imagine attempting to apply tape to a slick, greasy pan. Without proper preparation, paint can easily slide, peel, or bubble off in just a matter of weeks.
Can You Paint Over Varnished Wood?
Yes, you can paint over varnished wood. The key is proper surface preparation. Without cleaning, light sanding, and a quality bonding primer, the paint won’t adhere correctly. Skipping these steps leads to peeling, flaking, and a finish that looks unprofessional within months.
The varnish creates a sealed, non-porous surface. Paint needs something to grip onto. That’s why prep work isn’t optional, it’s the foundation of the entire project.
The good news is that you don’t need to sand down to bare wood. A light scuff sand, a clean surface, and the right primer are all it takes to get paint bonding properly.
According to painting industry surveys, improper surface prep accounts for over 80% of paint adhesion failures on wood furniture.
Preparing Varnished Wood Before Painting
Preparation is the stage where many DIY projects falter. Hastening through this phase is the primary cause of paint peeling from varnished wood. Discover the right way to achieve it.
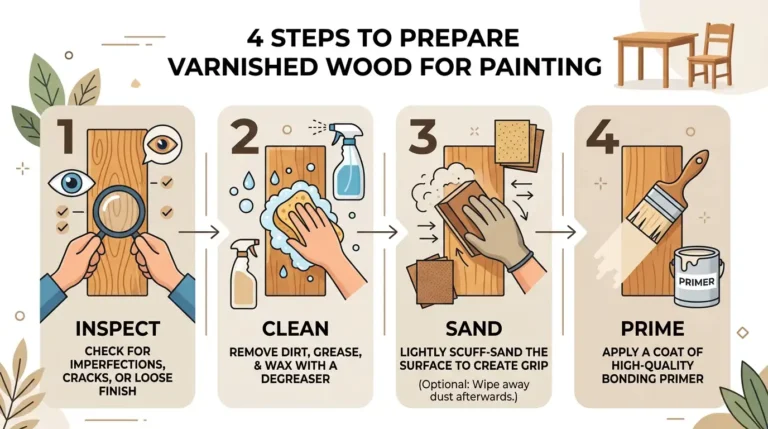
Step 1: Inspect the Wood for Damage
Before anything else, check the surface carefully. Look for cracks, chips, deep scratches, or areas where the old varnish is already flaking off.
Fill cracks with a wood filler and let it dry completely. If the damage is severe, the surface may need professional attention before painting sealed wood makes sense.
Step 2: Clean the Surface Thoroughly
Dirt, grease, and old cleaning product residue all block paint adhesion. Wash the surface with warm water and a mild degreaser or dish soap.
Wipe it down with a clean cloth and let it dry fully for at least a few hours. A poorly cleaned surface is one of the most common reasons painting over varnished wood fails early.
Step 3: Sand the Surface Lightly
Use 120 to 180-grit sandpaper and scuff the surface lightly. You’re not trying to strip the varnish just roughing it up enough for the primer to grip.
After sanding, wipe away all dust with a tack cloth or slightly damp rag. This step is critical when painting on top of varnish because the gloss is what stops paint from sticking.
Pro tip: Always sand in the direction of the wood grain to avoid visible scratch marks in the final finish.
Step 4: Apply a Bonding Primer
This is the step most beginners skip and it’s the most important one. A bonding primer seals the surface, prevents tannins from bleeding through, and gives the paint a surface it can actually hold onto.
For most indoor furniture and cabinet projects, a water-based bonding primer works well. For tannic woods like oak or walnut, use an oil-based primer or an anti-tannin primer to prevent brown staining through your topcoat.
Apply one even coat with a brush or roller. Let it dry fully usually one to two hours before moving on.
How to Paint Over Varnished Wood: Step-by-Step Instructions
Once your surface is prepped and primed, the painting process itself is straightforward.
Choose the Right Paint
Acrylic (water-based) paint is the ideal option for those looking to repaint varnished wood indoors. Experience rapid drying, minimal VOC emissions, and a variety of finishes, including matte, satin, and gloss.
Oil-based paint offers exceptional durability and a robust finish, yet it requires a longer drying time and emits a potent solvent odour. This product is ideal for high-traffic areas such as floors and exterior doors.
For those seeking a low-prep solution, chalk paint is definitely a contender. It adheres seamlessly to varnished wood with just a touch of sanding, resulting in a stunning matte finish. A wax or varnish topcoat is essential for protecting it afterward.
Apply the First Coat
Stir your paint thoroughly before starting. Apply a thin, even first coat using a quality brush or short-nap roller.
Thin coats are always better than thick ones. A thick coat takes longer to dry and is more likely to drip or show brush marks.
Sand Between Coats (Optional but Recommended)
Once the first coat dries, lightly sand with 220-grit sandpaper. This removes any dust nibs or brush marks and gives the second coat something to grip.
Wipe away the dust before applying the next coat.
Apply a Second (and Third) Coat
Most surfaces need two coats for a solid, even finish. High-traffic areas like cabinets or doors may need a third coat.
Let each coat dry fully before applying the next. Rushing this step causes smearing and an uneven finish.
Common Mistakes to Avoid
This is where most DIY projects fall apart. Avoid these errors and your finish will last for years.
- Skipping the primer: Paint will peel within weeks on a glossy varnished surface without a bonding primer.
- Using thick coats: Always apply thin coats and build up gradually.
- Painting in cold or humid conditions: Ideal temperature is between 50°F and 85°F with low humidity.
- Not letting coats dry fully: Patience here directly affects the final result.
- Ignoring wood type: Oak and pine behave differently; tannic woods need special primers to prevent bleed-through.
Can You Paint Over Varnished Wood Without Sanding?
Yes, painting over varnished wood without sanding is possible, but it comes with real trade-offs. Chalk paint is the most popular no-sand option and bonds reasonably well to sealed surfaces. However, for a durable, long-lasting finish on furniture or cabinets, at least a light scuff sand is strongly recommended.
Without any sanding, the paint has a much harder time gripping the glossy surface. You might get away with it on a decorative piece that sees little use, but on cabinets, doors, or furniture, skipping the sand almost always leads to early peeling.
If sanding isn’t an option, use a liquid deglosser or liquid sandpaper instead. It chemically dulls the surface and improves adhesion without any physical sanding.
SD Custom Painting Tips for a Better Wood Varnish Finish
These are the small details that separate a good result from a great one.
- Work in a well-ventilated room at room temperature
- Use a good quality brush cheap brushes leave visible streaks
- Always paint in the direction of the wood grain
- Use painter’s tape to protect edges and hardware
- For cabinets and doors, an airless sprayer gives a smoother finish than a brush or roller
- Apply a clear topcoat after painting for extra protection against scratches and wear
Allow SD Custom Painting To Do The Painting For You
Painting over varnished wood is a manageable DIY project, but it takes time, patience, and the right materials. If you’re working on a larger space like kitchen cabinets, interior doors, or built-in shelving the process can quickly become overwhelming.
That’s where SD Custom Painting comes in. Our team specialises in cabinet painting services in San Diego, delivering smooth, professional results without the mess or guesswork. We handle the prep, priming, painting, and finishing from start to finish.
If you want it done right the first time, reach out to SD Custom Painting today and get a free estimate for your project.
Final Thoughts
Transforming varnished wood with a fresh coat of paint is an economical solution to revitalise your space, eliminating the need for new furniture or extensive renovations. Success hinges on your adherence to the preparation steps.
Prepare the surface by cleaning it thoroughly, then lightly scuffing it for better adhesion. Next, apply a bonding primer before choosing the appropriate paint for optimal results. Complete these four steps, and you’ll achieve a durable finish that lasts for years to come.
Achieving this transformation is simple and doesn’t demand any specialised tools or extensive experience. Success hinges on mastering the fundamentals and taking the time to do it right.
FAQs: Painting Over Varnished Wood
Can you paint on top of varnish without sanding?
You can use special bonding primers designed for glossy surfaces. These grip slick finishes better than regular primers. However, light sanding still gives the best results for long-term durability.
What’s the best primer for varnished wood?
Look for primers labeled as bonding or adhesion primers. Brands like Zinsser BIN and Kilz Adhesion work excellent on glossy surfaces. Match the primer type to your paint choice.
How long should the primer dry before painting?
Wait at least 24 hours after priming. Check your primer’s label for specific times. Humidity and temperature affect drying, so add extra time in damp or cold conditions.
Can you use chalk paint on varnished wood?
Chalk paint works on varnished surfaces with minimal prep. You still need to clean the surface thoroughly. Light sanding helps but isn’t always required with chalk paint formulas.
Will paint stick to polyurethane?
Polyurethane needs the same prep as varnish. Clean, sand, and prime the surface for best results. The ultra-smooth finish of polyurethane makes sanding especially important.
What grit sandpaper for varnished wood?
Start with 120-150 grit for removing the glossy finish. Switch to 220 grit for smoothing primer or between paint coats. Coarser grits like 80 grit can damage wood surfaces.
Do you need two coats of primer?
One good primer coat usually suffices on varnished wood. Apply a second coat only if the first coat looks thin or the varnish color shows through.
Can you spray paint varnished wood?
Yes, spray paint works great after proper surface prep. Clean and sand the varnish first. Use a bonding primer if you skip sanding. Apply thin, even coats to avoid runs.