Most people grab a brush and start painting. Then they wonder why the paint peels, looks uneven, or why the edges are a mess. Knowing how to prep a room for painting is what separates a clean, professional-looking finish from a frustrating do-over. The prep work is not glamorous, but it’s the part that actually decides how good your walls look in the end.
In this guide, you’ll get a clear, step-by-step process for room preparation before painting, including wall repairs, taping, cleaning, and priming. No fluff, no skipped steps.
Table of Contents
Toggle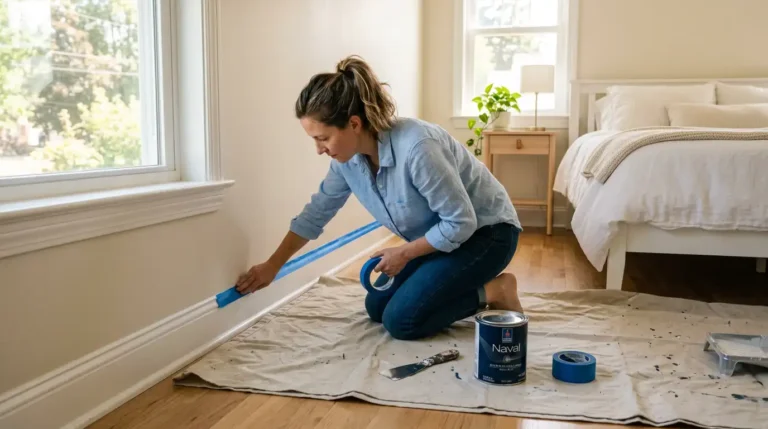
Key Takeaways
- Good prep work takes 2 to 4 hours depending on room size
- Skipping wall repair is the #1 reason paint looks bad after drying
- Painter’s tape applied wrong causes more problems than no tape at all
- You need primer in specific situations (new drywall, dark colors, patched holes)
- Total prep supply cost: $40 to $90 for a standard bedroom
What You'll Need to Prep Your Walls for Painting
Before you touch the walls, get these supplies ready. Having everything in one place saves trips back and forth.
Wall Repair Supplies:
- Spackle or lightweight wall filler
- Putty knife (3-inch)
- Fine-grit sandpaper (120 to 220 grit)
- Sanding block
Cleaning Supplies:
- Bucket of warm water
- Mild dish soap or TSP substitute
- Sponge and clean cloths
- Gloves
Protection Supplies:
- Canvas drop cloths (not plastic, they’re slippery)
- Painter’s tape (FrogTape or 3M ScotchBlue)
- Plastic sheeting for large furniture
Painting Prep Tools:
- Screwdriver (for outlet covers and switch plates)
- Ziploc bags (for screws)
- Duster or microfiber cloth
- Ladder or step stool
Estimated Cost Breakdown:
Item | Approx. Cost |
Spackle + putty knife | $8 to $12 |
Sandpaper pack | $5 to $8 |
Canvas drop cloth | $12 to $20 |
Painter’s tape (2 rolls) | $10 to $16 |
TSP substitute cleaner | $6 to $10 |
Total | $41 to $66 |
If you already own some of these, you’re looking at $20 to $30 out of pocket.
5 Steps to Prepare Your Space for Painting
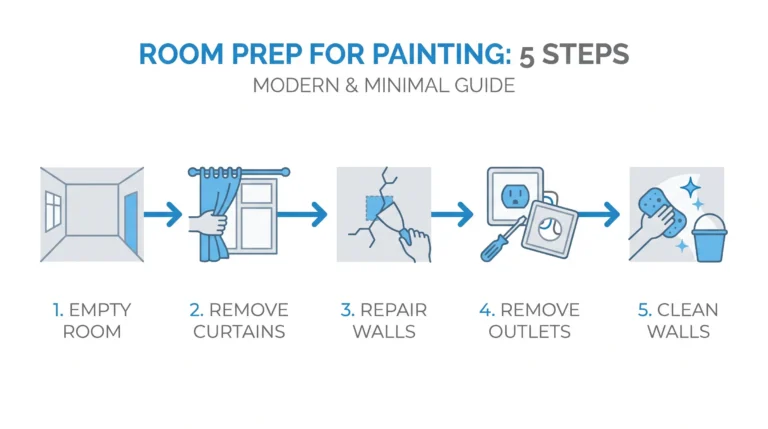
1. Empty the Room and Protect Furniture
Start by getting as much furniture out of the room as possible. Even small items left in the room become obstacles that slow you down and risk paint splatter.
For heavy pieces you can’t move, push them to the center of the room. Then cover everything with canvas drop cloths. Canvas is better than plastic because it absorbs drips instead of letting them slide across the floor.
Lay drop cloths along the entire floor perimeter where you’ll be working. Tape the edges down lightly so they don’t shift when you’re on a ladder.
Time estimate: 20 to 30 minutes
2. Remove Curtains and Rods
Take down curtain panels and rods completely. Painting around curtain hardware leaves visible gaps and creates uneven edges.
Once the rods are off, patch the wall anchor holes if you’re not putting them back in the same spots. This takes 5 minutes and makes a big difference in the final look.
Time estimate: 10 to 15 minutes
3. Take Everything Off Your Walls and Repair Them
Remove all wall art, nails, and anchors. This is the step most beginners rush, and it always shows.
How to repair nail holes:
- Push a small amount of spackle into the hole with your putty knife
- Smooth it flat with the blade
- Let it dry completely (30 to 60 minutes for small holes)
- Sand the area lightly until it’s flush with the wall
- Wipe away dust with a damp cloth
For larger cracks or anchor holes, apply two thin layers of filler instead of one thick layer. Thick filler shrinks as it dries and leaves a dimple you’ll see through the paint.
Pro tip: Hold a flashlight flat against the wall after sanding. Any uneven spots will cast a shadow. Fix those before you move on.
Time estimate: 30 to 45 minutes depending on damage
4. Figure Out Switches and Outlets
You have two options here: tape around the covers or remove them.
Removing them gives you cleaner lines with zero risk of tape bleed. Use a screwdriver to take off each plate, then drop the screws and covers into a labeled Ziploc bag. One bag per outlet or switch. You’ll thank yourself during re-installation.
If you leave the covers on, press painter’s tape firmly around each edge. Use a putty knife or an old credit card to press the tape seam flat. Loose tape edges are how paint seeps underneath and ruins the line.
Time estimate: 15 to 20 minutes
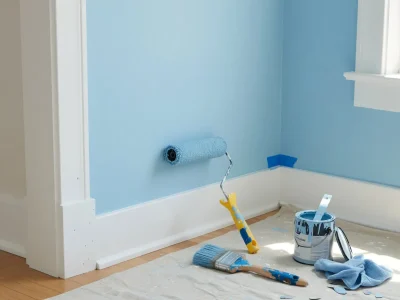
5. Prep Your Walls
This is the most important step for how to prep a room for painting correctly.
Clean your walls first.
Dust, grease, and grime prevent paint from sticking. Use warm water with a few drops of dish soap. Wipe down the entire wall surface with a sponge, then rinse with clean water and let the walls dry fully.
Do not skip drying time. Painting over damp walls causes bubbling and peeling within weeks.
Note: Avoid sugar soap on latex-painted walls as it can leave a residue that affects paint adhesion.
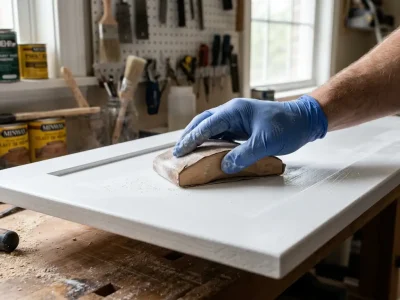
Sand lightly.
Even if the walls look smooth, a light sand with 220-grit sandpaper helps paint bond better. This is especially important on glossy or semi-gloss surfaces. After sanding, wipe off all dust with a dry microfiber cloth.
Time estimate: 30 to 45 minutes for a standard bedroom
The Nitty Gritty of Prep Work: Taping and Priming
How to Tape a Room for Painting
Learning how to tape a room for painting properly makes the difference between sharp edges and sloppy lines.
Apply painter’s tape along baseboards, crown molding, window frames, and door casings. Place the tape edge exactly on the trim line, not on the wall. Press the full length of tape down firmly as you go.
Use a credit card or plastic putty knife to burnish the tape edge flat. Run it along the full length of tape after each section. This seals out paint bleed.
Common taping mistake: Leaving tape on too long. While the final coat is still a little wet, remove the painter’s tape. If paint is allowed to dry completely on the tape, pulling it off can chip the wall paint with it.
For carpet rooms, slide the tape edge down between the baseboard and carpet with a putty knife. This protects the carpet fibres without the use of extra sheets.
Do You Need to Prime?
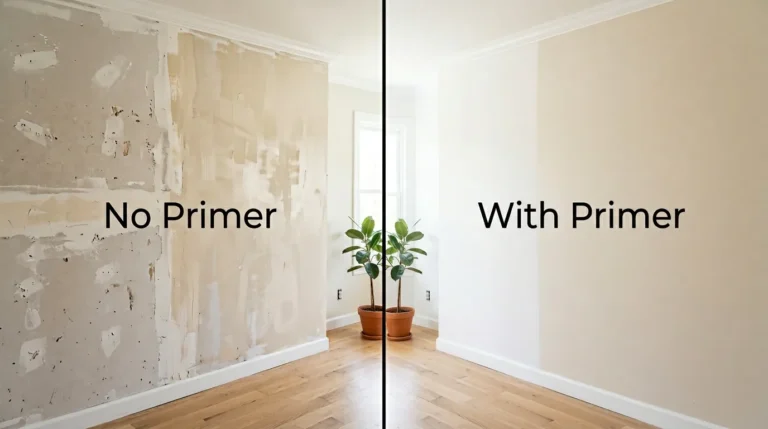
Not always. Here’s a clear breakdown:
Prime when:
- You’re painting over new drywall
- You patched multiple holes or large areas
- You’re going from a dark color to a lighter one
- The wall has stains (water marks, smoke, crayon)
- You’re painting over a high-gloss finish
Skip primer when:
- The existing paint is in good condition
- You’re staying with a similar color
- The paint you’re using is labeled paint-and-primer-in-one
For new or bare plaster, use a mist coat first. Mix your paint with 20 to 30% water and apply one thin coat. Let it dry fully before the main coat. This seals the porous surface and prevents uneven absorption.
Surface-Specific Prep Tips
- Bathroom walls: Scrub with a mildew-killing cleaner first. Any mold under the paint will push through within months.
- Kitchen walls: Degrease with a TSP substitute before cleaning. Cooking grease builds up invisibly and kills paint adhesion fast.
- Previously wallpapered walls: After stripping, check every inch for leftover paste. Sand any raised seams flat. Apply a coat of oil-based primer before painting to prevent the old paste from bleeding through.
- Glossy or semi-gloss walls: Sand thoroughly until all sheen is gone. If you paint over gloss without sanding, the new paint will peel within a year.
How Long Does Room Prep Take?
Room Size | Prep Time Estimate |
Small bedroom (10×10) | 1.5 to 2.5 hours |
Standard bedroom (12×12) | 2 to 3.5 hours |
Living room (16×20) | 3.5 to 5 hours |
Full bathroom | 1 to 2 hours |
Plan your prep the day before painting. That way walls are fully dry, repairs are cured, and you can complete two full coats of paint in a single day.
Skip the Hassle: Let the Pros Handle It
If prep work feels like too much or your walls need serious repair, the team at San Diego Custom Painting handles everything from wall prep to the final coat. As a trusted provider of interior painting services in San Diego, they bring the tools, the experience, and the attention to detail that gets the job done right the first time. No prep stress, no touch-ups, no wasted weekends.
Get a free estimate from San Diego Custom Painting today and see how affordable a professional finish can be.
Conclusion
Good prep work is 80% of a great paint job. Clean walls, tight tape lines, repaired holes, and the right primer where needed give you results that actually last. Rushing prep is why most DIY paint jobs look DIY. Take your time on these steps and the painting part becomes easy.
FAQs About Preparing a Room for Painting
Do I need to wash walls before painting?
Yes. Dust, grease, and oils on walls prevent paint from bonding. A simple wipe-down with warm soapy water and a clean rinse is all you need for most rooms.
How long should walls dry before painting?
At least 2 hours after cleaning. If you used a mist coat or primer, wait the full drying time listed on the product, usually 1 to 4 hours.
Can I skip sanding if my walls look smooth?
For flat walls in good condition, light sanding is optional. For glossy surfaces, sanding is not optional. Paint will not stick properly to an unsanded gloss finish.
What’s the best painter’s tape for clean lines?
FrogTape is the top pick for sharp edges. 3M ScotchBlue is a close second. Both work well on smooth walls. For textured walls, use a wider tape and press the edges down firmly.
How do I know if I need primer?
If your wall has stains, you’re making a big color change, or you’re painting new or repaired drywall, use primer. For repainting a similar color on clean walls, primer is optional.
What happens if you paint over dirty walls?
Paint adhesion fails. You’ll see peeling, bubbling, and uneven coverage within weeks or months. Cleaning takes 20 minutes and saves you from repainting the whole room.
How much does prep work cost for a bedroom?
Between $40 and $90 for supplies if you’re starting from scratch. If you already have drop cloths and basic tools, you can prep a standard room for under $30.