The short answer is yes, you can paint over polyurethane. However, if you simply open a can of standard latex paint and brush it over a smooth, clear polyurethane topcoat, you are setting yourself up for a frustrating DIY failure.
Polyurethane is designed to do one specific job: repel everything. Its plastic-like resin shield prevents moisture, oils, and liquids from penetrating the underlying wood. Unfortunately, that smooth surface also prevents paint from establishing a proper bond. Without the correct preparation, your new coat of paint will lift, scratch, and peel away in sheets.
Table of Contents
ToggleTransforming a clear-coated piece of furniture, trim, or cabinetry into a beautifully painted finish requires shifting your focus from painting to adhesion mechanics. By breaking the surface gloss and using the right chemical primers, you can easily paint over any polyurethane finish.
The Short Answer, Then the Real Answer

Yes you can paint over polyurethane. But “can” and “should just wing it” are different questions. Polyurethane’s whole job is to seal wood and resist things sticking to it, which is exactly what makes it a hostile surface for new paint. A mechanical bond is physical — sandpaper scratches create tiny grooves for the paint to seep into and lock onto, and that’s the piece most people skip or rush.
Three things determine whether the paint job lasts two decades or two weeks:
- Surface prep — cleaning, then creating “tooth” through sanding or a chemical deglosser
- The right primer — a bonding or stain-blocking primer, not whatever’s already in the garage
- Patience during cure time — dry-to-touch is not the same as fully cured, and rushing this step is where most DIY jobs actually fail
Why Paint Doesn't Stick to Polyurethane in the First Place
Polyurethane cures into a smooth, plastic-like film. Sanding does not remove the polyurethane it roughens it, increasing the surface area the primer has to grab. Skip that step, and even a premium paint will eventually lift, because it’s essentially sitting on top of a slick shell rather than bonding into it.
There’s a second, less obvious problem: tannin bleeds. Old polyurethane, especially over stained wood, can hold tannins and resins that migrate upward through your new paint over time, leaving yellow or orange blotches weeks after you thought the job was finished. This is why the primer choice matters as much as the sanding.
Step-by-Step: How to Paint Over Polyurethane
1. Clean Thoroughly
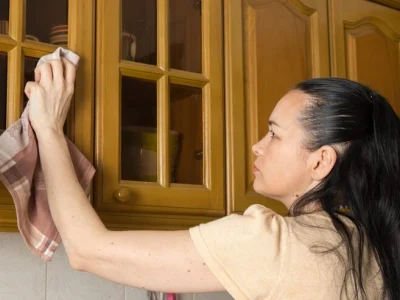
Grease, wax, silicone furniture polish, and kitchen residue all repel paint. Wipe the surface down with mineral spirits, a TSP substitute, or a degreaser, then do a final pass with a clean, lint-free cloth. If the cloth picks up grime, clean again paint will not bond to a dirty surface no matter how well you sand it afterward.
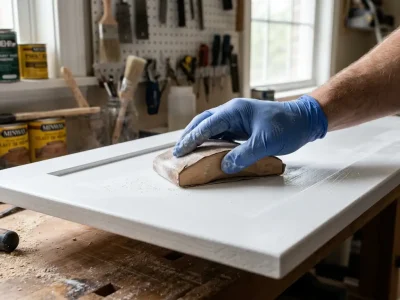
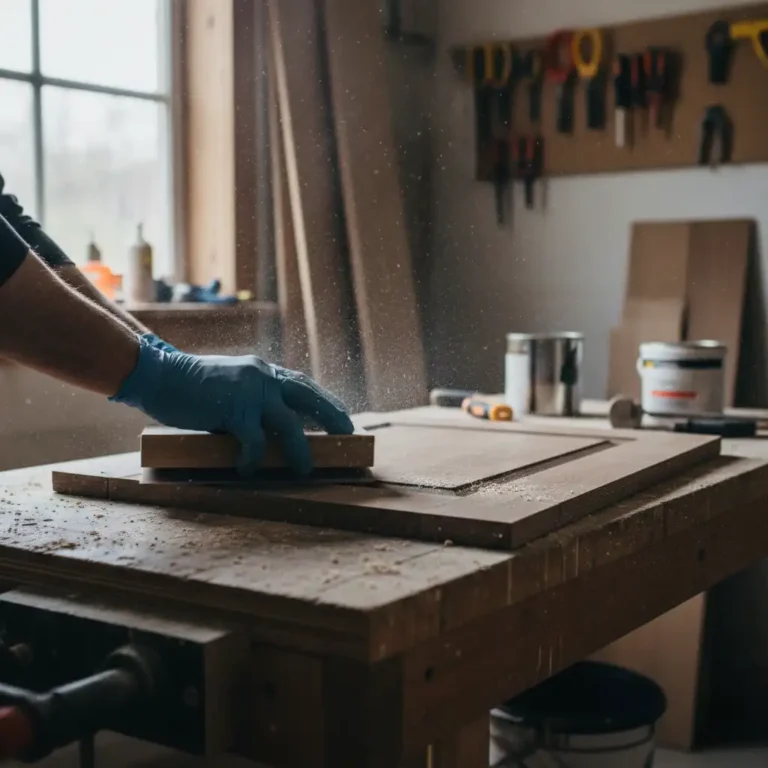
2. Sand to Create “Tooth” (Not to Strip the Finish)
You’re not trying to remove the polyurethane, just dull the sheen enough that a primer has something to grip.
- Glossy or smooth surfaces: start with 120–150 grit to cut through the shine
- Follow-up pass: 180–220 grit to even out scratch marks and smooth the surface
- Detailed carvings or trim: a sanding sponge, folded sandpaper, or a liquid deglosser works better than a power sander
- Sand in the direction of the wood grain, with light, even pressure the goal is a uniformly dull, matte surface with no shiny patches left
If you’d rather skip sanding entirely, a liquid deglosser chemically etches the finish and works well on detailed or curved pieces, though most professionals still hand-sand large flat surfaces for the most consistent result.
3. Wipe Away Dust
Sanding dust trapped under primer ruins an otherwise perfect prep job. A tack cloth or slightly damp rag, followed by full dry time, is a five-minute step that prevents a redo.
4. Prime With a Bonding or Stain-Blocking Primer
This is the step that actually determines success. Standard wall primer is built to soak into porous drywall or bare wood; it isn’t designed to grip a sealed, glossy surface. You need a primer specifically formulated for slick or problem surfaces.
- Oil-based bonding primer — the most common recommendation for adhesion and sealing tannins
- Shellac-based primer (e.g., B-I-N style products) — the strongest stain-blocker, dries fast, sticks to almost anything
- Water-based bonding primer — an option when odor or VOCs are a concern, though it typically needs a more thorough sanding pass first
Apply a thin, even coat and resist the urge to load the brush thick primer takes longer to cure and shows brush strokes through the topcoat. Let it dry fully (check the can; oil-based primers often need 4–8 hours, longer in humid conditions), then lightly sand with 220-grit to knock down any brush marks before painting.
5. Paint in Thin, Even Coats
Once primed correctly, most paint types will adhere to oil-based enamel, acrylic latex, or chalk paint. Apply the first coat, let it dry fully, then apply a second coat for even coverage and durability. High-traffic surfaces like cabinet fronts often benefit from a third coat.
6. Respect Cure Time, Not Just Dry Time
This is where most projects fail after the fact. Dry-to-touch happens in hours; a full cure to the point where the paint reaches its maximum hardness and won’t scuff or dent under normal use takes much longer.
- Wait at least 24–48 hours before rehanging doors or reattaching hardware
- Wait about a week before normal daily use
- Wait 3–4 weeks before placing heavy or abrasive items directly on the surface
Choosing the Right Primer: A Comparison
Primer Type | Best For | Adhesion Strength | Stain Blocking | Trade-Offs |
Oil-based bonding primer | Cabinets, furniture, trim | High | Good | Strong odor, mineral spirits cleanup, longer dry time |
Shellac-based (e.g., B-I-N) | Heavy tannin bleed, dark stains | Very high | Excellent | Fast dry time but strong fumes, pricier per can |
Water-based bonding primer | Low-VOC preference, light stains | Moderate–high | Fair | Needs more thorough sanding first, may raise wood grain |
Adhesion promoter / spray systems | Vinyl, plastic, small trim pieces | High (on non-wood) | N/A | Product-specific compatibility, best for niche materials |
Surface-by-Surface Notes
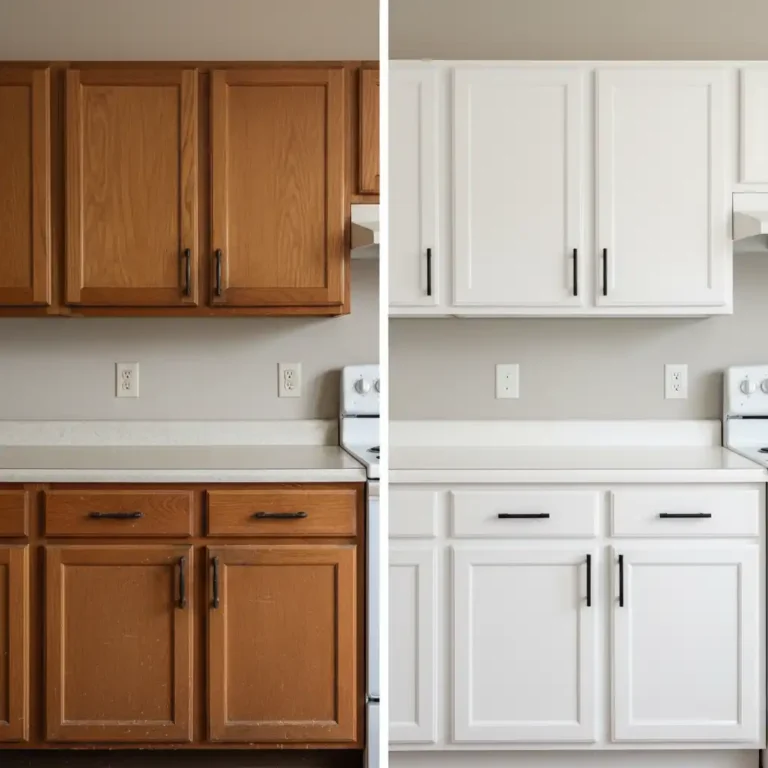
- Cabinets: Remove doors and hardware first. Number them so they go back in the right spot. Prioritize a bonding primer cabinets get touched constantly, and adhesion failure shows up fastest at edges and handles.
- Hardwood floors: Sanding is non-negotiable here given foot traffic; use a floor-rated bonding primer and a durable topcoat like a urethane-alkyd enamel.
- Furniture: Curved legs and carved details are where a liquid deglosser earns its keep hand-sanding every groove of a chair leg isn’t realistic.
- Trim and molding: Because trim shows brush strokes more visibly than large flat surfaces, thin coats and a good-quality brush matter more than product choice.
Myth vs. Fact
Myth: You can paint directly over polyurethane without sanding or priming if the paint is “high quality” enough.
Fact: No amount of paint quality substitutes for surface prep. Without sanding or a deglosser and the right primer, even premium paint will eventually peel because it has nothing to physically or chemically grip.
Myth: Water-based paint won’t work over polyurethane — you need oil-based.
Fact: Water-based (latex/acrylic) paint works fine over polyurethane as long as the surface is properly primed with a bonding primer. Oil-based paint is often preferred for extra durability, not because water-based paint fails outright.
Myth: Dry to the touch means the paint job is finished.
Fact: Dry-to-touch and fully cured are different states. Paint can feel dry within hours but remain soft underneath for days or weeks rushing hardware reinstallation or heavy use during this window is a leading cause of dents, scuffs, and peeling.
From Experience: What Actually Goes Wrong on Real Projects
Having walked through more than a few kitchen cabinet refinishes and furniture flips, the failure pattern is almost always the same: someone sands “enough” to make the surface feel smooth, rather than sanding enough to make it dull. A glossy patch the size of a coin is enough to create a weak spot where paint lifts first.
The second most common mistake is impatience with cure time reattaching cabinet hardware the same day the primer looks dry, which dents the finish before it’s had a chance to fully harden. Neither mistake is expensive to avoid; they just require slowing down at the two steps people are most eager to rush past.
Conclusion
Painting over polyurethane comes down to three things done properly: cleaning, sanding (or deglossing) to create teeth, and priming with a product built for slick surfaces. Skip any one of those and the paint job might look fine for a few weeks before it starts telling on itself at the edges. Get all three right, and there’s no real reason to strip a finish just to change its color: cabinets, trim, furniture, and floors can all be refreshed this way and hold up for years.
Surface finishes and product formulas keep improving, and bonding primers in particular have gotten more forgiving than they were even a few years ago worth checking current options before assuming last decade’s rules still apply. If you’re tackling a specific surface next, the cabinet and floor sections above are the best next stop before you pick up a brush.
Frequently Asked Questions
Can you paint over polyurethane without sanding?
Technically yes, using a liquid deglosser instead, but it’s not risk-free. Deglossers chemically etch the surface, which works well on detailed or curved pieces, but large flat surfaces still get the most reliable results from hand-sanding first.
What’s the best primer for painting over polyurethane?
An oil-based bonding primer is the most common recommendation for general adhesion and sealing tannins. For heavy staining or dark wood, a shellac-based primer offers the strongest stain-blocking performance.
Will paint stick to polyurethane without a primer?
Rarely, and not for long. Polyurethane’s smooth, sealed surface gives standard paint almost nothing to bond to, which is why even well-sanded surfaces still need a bonding primer as the chemical bridge.
How long should primer dry before painting over polyurethane?
Most oil-based bonding primers need at least 4–8 hours to dry fully, longer in humid conditions. Painting over a primer that hasn’t fully dried traps moisture and weakens the bond.
Can you paint over polyurethane floors?
Yes, but sanding is essential given the foot traffic floors take. Use a floor-rated bonding primer and a hard-wearing topcoat, and allow the full cure window before walking on it normally.
Does painting over polyurethane cause yellowing?
It can, through tannin bleed, if the primer doesn’t seal the wood properly. A stain-blocking primer oil-based or shellac-based prevents tannins in the wood or old finish from migrating through the new paint color.