Wainscoting takes a beating. Kids’ backpacks, dog tails, chair legs it’s the part of the wall that gets hit first and shown off the most, so how you paint wainscoting matters more than almost any other surface in your home.
Get the prep wrong and you’ll see brush marks, peeling, or yellowing within a year. Get it right, and this guide walks you through the prep, the primer, the paint, and the color decisions that make it hold up.
Table of Contents
ToggleWhat Is Wainscoting, Exactly?
Wainscoting is the panel work that covers the lower third to half of a wall, usually 30 to 42 inches tall. It started as a way to protect plaster walls from chairs and boots. Now it’s mostly decorative.
You’ll run into a few common styles:
- Raised panel — carved, dimensional panels, often in older or formal homes
- Flat panel — simple, clean rectangles, popular in modern builds
- Beadboard — vertical grooved planks, common in cottage and farmhouse styles
- Board and batten — flat boards with vertical strips (battens) layered over them
- Overlay wainscoting — trim applied directly over drywall, no true panel underneath
Each style paints a little differently. Beadboard and board and batten have grooves that trap paint and dust, so they need more attention with a brush. Flat and raised panels take a roller more easily.
Can You Paint Wainscoting? (Yes — Here's What Changes the Process)
Short answer: yes, you can paint wainscoting, including wood, MDF, and previously stained wainscoting. The process shifts depending on what you’re starting with.
- Bare wood: needs sanding, a stain-blocking or bonding primer, then paint
- Previously painted wainscoting: usually just needs a clean, a scuff-sand, and a bonding primer if the old finish is glossy
- Stained wood you want painted: needs a stain-blocking primer (oil-based or shellac-based) or the tannins will bleed through your topcoat, even white
- MDF wainscoting: seals edges well, but exposed MDF cuts soak up paint like a sponge, so prime those edges twice
If your home was built before 1978, test for lead before you sand or scrape anything. Sanding lead paint releases dust you don’t want in the air. A $10 test kit from a hardware store gives you an answer in minutes. If it’s positive, call a professional for safe removal this is one step that isn’t worth a shortcut.
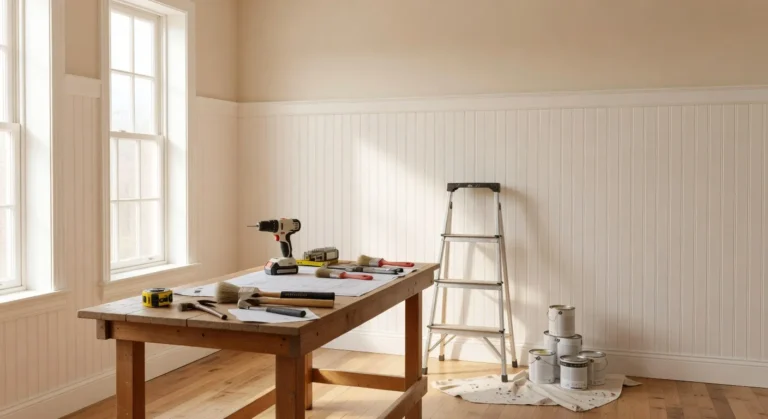
Tools and Materials Checklist
Category | Items |
Prep | Drop cloths, painter’s tape, TSP or degreaser, sanding sponges (150–220 grit), tack cloth |
Repair | Wood filler or spackle, caulk, putty knife, caulk gun |
Priming | Bonding primer (water-based) or stain-blocking primer (oil/shellac-based) |
Painting | Angled sash brush (2–2.5″), mini foam roller, paint tray, extension pole (optional) |
Safety | Lead test kit (pre-1978 homes), respirator mask for sanding, gloves |
Step-by-Step: How to Paint Wainscoting
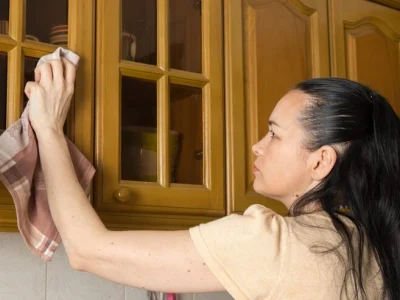
1. Clean it first.
Wainscoting collects grime at hand height. Wipe it down with a degreaser or TSP substitute, then rinse and let it dry fully. Paint doesn’t stick to grease.
2. Test for lead (older homes).
Covered above, don’t skip it if your house predates 1978.
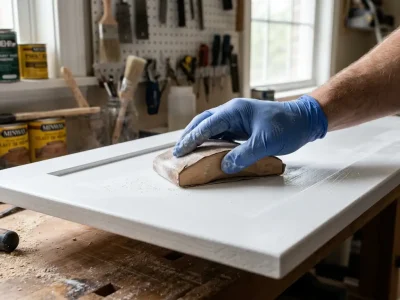
3. Sand every surface.
Scuff-sand glossy paint or bare wood with 150–220 grit. You’re not stripping the finish, just knocking down the shine so the primer has something to grip. Wipe away dust with a tack cloth.
4. Fill and caulk.
Fill nail holes and dents with wood filler. Run a thin bead of caulk along every seam where panel meets wall, panel meets panel, and panel meets trim. This one step is what separates a DIY paint job from a finished, built-in look.
5. Tape and protect.
Tape off adjoining walls, floors, and baseboards. Lay drop cloths wainscoting painting drips more than wall painting because you’re working close to the floor.
6. Prime.
Use a bonding primer over old paint, or a stain-blocking primer over bare or stained wood. Cut in the grooves and edges with a brush first, then roll the flats. Let it dry fully rushing this step is the #1 reason paint fails on trim.
7. Paint your first coat.
Load your brush and cut in the details grooves, corners, edges before rolling the broad panels. Thin, even coats beat one thick coat every time.
8. Let it dry, then apply coat two.
Check your paint can’s recoat window, usually 2–4 hours for latex. Apply a second coat the same way. Pull tape at a 45-degree angle before the paint fully cures to avoid peeling it off with the tape.
9. Cure before daily use.
Dry to the touch isn’t the same as cured. Give painted wainscoting 5–7 days before you push furniture back against it or let kids lean on it.
Best Paint for Wainscoting: Sheen and Formula Compared
Wainscoting takes more contact than walls, so sheen and durability matter more here than almost anywhere else in the house.
Sheen | Durability | Hides Imperfections | Best For |
Flat / Matte | Low | High | Rarely recommended for wainscoting |
Eggshell | Medium | Medium | Low-traffic formal rooms |
Satin | Medium-High | Medium | Most homes — the balanced choice |
Semi-Gloss | High | Low | Kids’ rooms, hallways, mudrooms |
High-Gloss | Highest | Lowest | Formal dining rooms, statement trim |
On formula: 100% acrylic latex is the standard pick for wainscoting today. It doesn’t yellow the way oil-based paint does, it cleans up with water, and it flexes with wood movement instead of cracking. Oil-based paint still exists for a reason it self-levels better and resists dents but the fumes, cure time, and yellowing make it a hard sell for most homeowners in 2026.
Wainscoting Colors: White, Dark, and Two-Tone
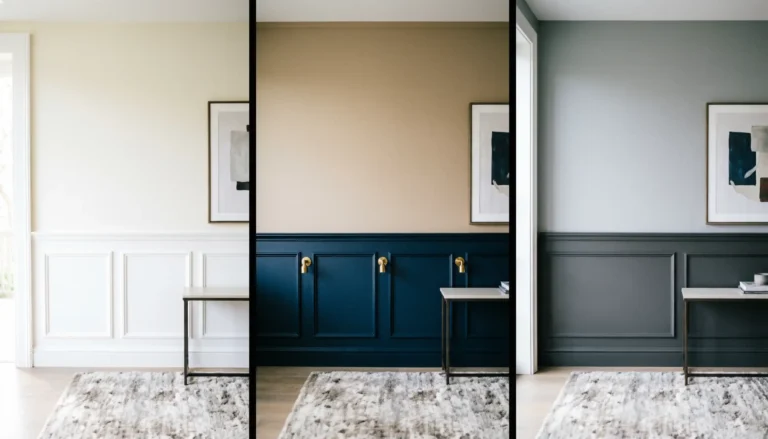
White paint for wainscoting is still the most requested option, and for good reason. White wainscoting reads as classic and clean, it makes a room feel taller, and it pairs with almost any wall color you pick later. The trade-off: white shows scuffs fastest, so stick with satin or semi-gloss, not flat.
Dark wainscoting has picked up serious momentum the past few seasons, think navy, charcoal, or deep green. Dark wainscoting under a lighter wall adds visual weight low in the room, which reads as more architectural and intentional. It also hides scuffs and fingerprints better than white.
Two-tone painting wainscoting — a different color on the panel than the wall above it is the move if you want the room to feel designed rather than just painted. A few reliable combinations:
- Same color, two sheens (wainscoting in satin, wall in flat) for subtle, monochrome depth
- Light wall, dark wainscoting for a grounded, formal look
- Dark wall, white wainscoting for high contrast in a small powder room or entryway
Whatever direction you pick, order a sample pot first. Wainscoting catches light differently than a flat wall because of its grooves and edges, so a color can look noticeably different once it’s actually on the panel.
Myth vs. Fact
Myth: You have to strip old paint before repainting wainscoting.
Fact: Stripping is only necessary if the old paint is failing cracking, alligatoring, or lifting. If it’s sound, a scuff-sand and bonding primer is enough.
Myth: One coat of paint is enough if the color is close to the old one.
Fact: Even a similar color needs two coats on trim. Single coats show roller and brush marks under side lighting, especially in semi-gloss.
Myth: Primer is optional if you’re using paint-and-primer-in-one.
Fact: Paint-and-primer-in-one is still painted. It doesn’t bond to glossy or stained surfaces the way a true primer does. Skip it and you risk peeling within a year.
What a Pro Painter Wants You to Know
After 26-plus years painting trim and wainscoting across San Diego homes from 1920s bungalows to new coastal builds the single biggest mistake we see homeowners make isn’t the paint color. It’s skipping caulk on the seams. A $6 tube of caulk is what makes wainscoting look like it was built that way, instead of looking like a DIY project with visible gaps.
The second most common issue: painting straight over glossy old trim without a bonding primer. It looks fine for a few months, then starts peeling at the edges where hands and furniture touch it most. We’ve re-done more “quick weekend projects” for that exact reason than for any color mistake.
A recent industry survey found that 68% of interior repaint failures on trim and wainscoting trace back to inadequate surface prep, not the paint itself.
Conclusion
Painting wainscoting comes down to a handful of decisions that actually matter: test for lead if your home is old enough, prime properly for the surface you’re covering, caulk every seam, and pick a sheen built for a high-contact surface. Get those right and the color choice white, dark, or two-tone becomes the fun part instead of the risky part.
Trends will keep shifting between crisp white paneling and moody dark trim, but the fundamentals of surface prep and primer choice won’t change. That’s what actually determines whether your paint job looks good in five years, not just on move-in day.
If this project sounds like more than a weekend you want to give up, SD Custom Painting handles wainscoting, trim, and full interior repaints across San Diego including the prep work most guides skip over. Browse our interior painting services in San Diego to get a quote, or keep exploring our guides for your next room.
Frequently Asked Questions
How long does it take to paint wainscoting?
Most single rooms take a full weekend — one day for prep, primer, and caulk, and one day for two coats of paint plus dry time. Rushing the dry time between coats is the most common reason for a streaky finish.
Can you paint wainscoting without sanding?
If the existing paint is intact and low-sheen, a light scuff-sand is still recommended so primer bonds properly. Skipping it entirely raises the risk of peeling within the first year.
What’s the best paint for wainscoting in a bathroom or mudroom?
Satin or semi-gloss 100% acrylic latex. Both resist moisture and scrubbing better than eggshell or flat, which matters most in high-humidity or high-traffic rooms.
Should wainscoting match the trim color?
Not necessarily. Many homes pair white wainscoting with white door and window trim for a unified look, but a two-tone room can carry a different wainscoting color and still keep matching trim on doors and windows.
How do I paint wainscoting with grooves or beadboard detail?
Use an angled brush to cut into every groove before rolling the flat sections. A roller alone will skip the recessed lines and leave uneven coverage.