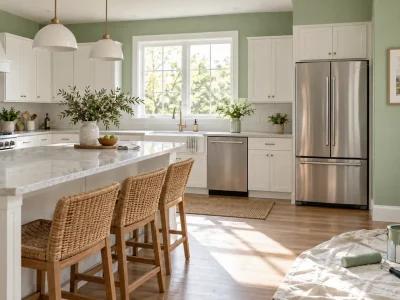

Do you feel like the center of your home is always in the kitchen? From prep and wash to gathering spaces, the walls take a hit—from food and water splashes to running dishes through the dishwasher to constant cleanup. If you’re thinking about painting an update to the kitchen walls, choosing the right paint and prepping your walls can save you time and hassle down the road.
Are you ready to roll up your sleeves to learn how to paint kitchen walls like a pro? So, painting your kitchen isn’t just about choosing a beautiful color. To do it correctly, you’ll want to strip grease, patch all the damage, choose the right finish of paint, and paint each coat in the correct order. Otherwise, you’ll end up with flaking paint, a lumpy finish, or a stain bleeding through. Have a small or big kitchen?
Table of Contents
ToggleWith some prep time and the SD Custom Painting team of experts, you can get your kitchen looking showroom-ready and functional. Let’s get started!
1. Prepare Your Kitchen Walls Before Painting
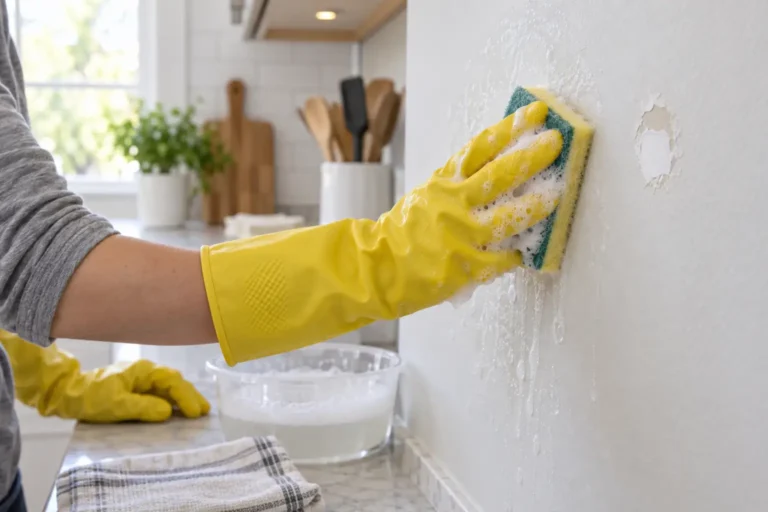
But have you ever thought about why your wall paint in the kitchen doesn’t stay? Actually, prepping your kitchen wall is the single most significant factor for any project. You may believe your kitchen is absolutely clean; however, cooking oils, cooking steam, grime, and even leftovers will accumulate on your wall.
And subsequently, painting over that buildup will cause you issues like bubbling, flakiness, or even uneven paintwork. What now? You can also take the easy route here by using your household detergent, which is safe for your painted walls, to easily clean away the loose dirt on your wall.
Repair Cracks, Holes & Defects
Have you ever come into a room and all you can see are the nail holes in the wall and cracks in the wall? Fresh paint won’t hide them either! Now, run your hand down the wall.
So, what if you do have a lot of peeling or soft drywall? Well, here’s the thing: whatever problems you have, you need to fix them before you repaint. Did you fix the problem, or are you just hiding it? If your home was built before 1978, follow the EPA’s lead-safe renovation guidelines before you sand or scrape any old paint.
2. Select Kitchen Wall Paint Colors Carefully
Would you like to see just how powerful a paint color can be in an open-concept kitchen? For instance, it’s the first thing you see when you walk into your house. Want more tips on transforming your kitchen? And it’s not as easy as reaching for the can of paint and applying it to your wall. There is the lighting, the cabinets, the countertops, the floors, and your style.
Popular Colors for Different Kitchen Styles
Finally, seeking a clean, sharp look for your kitchen? Warm white is likely your best bet. Can you see it now: a feel-good, uplifting vibe? Or are you craving a more muted undertone? Off-white whites, greige, and other shades of soft beige will provide the neutrality you want with the wood cabinetry and stone counter surfaces.
Muted sage green and dusty blue are breezy shades that bring in little sprinkles of color instead of overwhelming every square inch. Want to go bold? Just contrast deep navy or charcoal with white cabinets to add a splash of color in the right light.
So, when you’re choosing the paint colors for your kitchen walls, consider the whole room. Choose a paint color that matches the cabinets, backsplash, counter, and floor. What color have you decided on?
3. Protect Cabinets, Countertops, and Appliances
Have you ever gotten dried paint off of cabinets or floors? It is a pain! Before you even reach for the can of paint, make sure you’ve blocked anything that shouldn’t be painted. First, take off any light fixtures and anything easily removable. Do you have plastic or paper? Wrap your counters or floors in it. Do you have tape? Tape the casings around the windows, the door frames, the trim, and especially the fronts of cabinets. Now press on the tape to keep it down.
Organize the Workspace for Easier Painting
Is your ventilation right? Ventilate with windows and/or other systems you have. And stay safe! Always follow the safety instructions on the paint label, especially around gas appliances. Are you painting warm, hot, humid, or steamy surfaces? Avoid it!
4. Apply Paint With the Right Tools and Technique
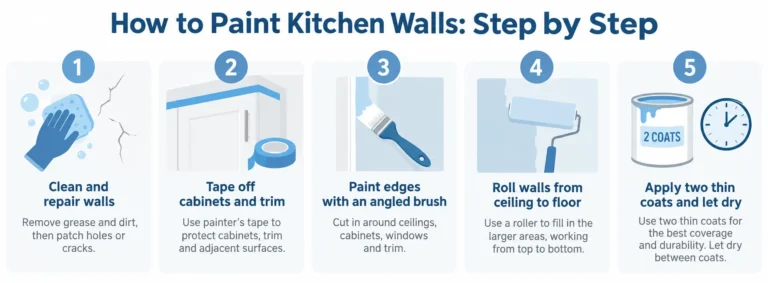
Fortunately, there are many painting tools for almost every job, so you can have beautiful-looking results with clean lines. An angled brush is used for corners, and a paintbrush is used to paint around the ceiling, in the corners, closets, windows, doors, and trim first.
Then a roller is used, beginning at the ceiling and moving toward the floor. You want to keep a wet edge as you move across the surface you’re painting. Never roll back over paint that has already started to dry. How do I keep my paint from streaking? Keep that edge wet and work in small sections.
Apply Thin, Even Coats
The myth that one thick coat of paint is going to do the trick is not necessarily true. Thick coatings of paint will tend to run, which may create drips and be quite uneven, and will also, of course, take longer to dry. Thin coats of paint should be applied, and read the label instructions for coverage and recoat time.
Most paints need two coats, depending on the type of paint, the surface, and the maximum color change required when switching from one color to another. Follow the drying time between coats as per the product label, and peel off the painter’s tape once the time stated on the label is over.
If you want a professional finish. Then we provide interior painting services in San Diego in which we cover the bathroom, kitchen, and other rooms in the house.
5. Avoid Common Kitchen Painting Mistakes
Have you questioned the longevity of your paint? Don’t miss the cleaning phase. If there’s plenty of kitchen grease, that will prevent paint from adhering well to the surface—even the most expensive paint will not adhere to a dirty wall. The moral of the story: appearance alone shouldn’t determine your choice of finish, especially if you think you’ll be cleaning that wall often.
Hurrying between coats? Yes, it’s an urge, but a wall may seem dry to the touch when, in fact, it isn’t dry enough. Look at your product instructions—don’t be guided by your fingertips. Also repair any moisture damage before painting, especially on walls.
Watch out for ventilation and drying time.
Where do you think kitchen ventilation comes into play? It plays a vital role with regard to moisture and air quality. To add, you should always remember to read the ventilation directions on your paint label—a little knowledge can go a long way. You wouldn’t want improper ventilation to prevent paint from drying or cause it to bubble, would you?
And, well, those brand-spanking-new painted walls: those fresh coats of paint take time to dry and cure! Be sure to never splash, rub, scrub, or clean until your paint has dried and cured entirely. That’s right, ‘drying’ is not the same as ‘curing’! Cure times will vary based on the product and conditions.
6. Keep Your Newly Painted Kitchen Walls Looking Fresh
Once you are done painting, stains get harder to remove the longer you wait. However, when the paint on your kitchen wall is dry and cured, it will only require some maintenance when needed. For example, it’s recommended to immediately wipe down food stains as well as grease stains instead of waiting for the stains to accumulate on the wall over time.
You don’t want to be scrubbing with abrasives, caustic chemicals, and a lot of elbow grease on those matte finishes. If it takes a big dose of elbow grease to remove that stuff, then you should be checking out the cleaning guidelines from the paint manufacturer!
Maintain the Charm of Your Kitchen
But what can you do to make sure you still get to keep that swish kitchen? Use your cooker hood or kitchen fan (exhaust fan) if you have one! Ventilate your kitchen correctly and identify any damp patches you may have so you don’t spoil your paintwork.
Why Professional Kitchen Painting Can Be Worthwhile
You’ve just looked at your kitchen walls and asked yourself, “Why is it that I always seem to have to scrub harder?” Don’t worry, you’re in good company! A busy, cluttered space full of grease, moisture, and stains isn’t the easiest room to paint (with a million cabinets to boot). If you don’t take your time, you could end up with roller marks, uneven edges, or paint that doesn’t stick.
Honestly, as professional painters, we can look at your walls, advise on quality products, and paint your cabinets like pros.
If you want a flawless finish, call the experts at SD Custom Painting. Why not have a gorgeous kitchen? As long as you prepare properly and pay close attention to detail, you’ll have a gorgeous kitchen without any issues!
Conclusion
Considering painting your kitchen? You’ve come to the right place! Priming, painting, and finishing your kitchen walls with professional-grade paint, choosing the right paint and finishes for your décor, and using your paint like a professional all contribute to a beautiful finished product.
But how do you do that in your own house? Here are some steady steps: Fix the broken paint. Use a washable paint. Apply primer if necessary. Wait as long as you need until each coat is dry. Smooth, professional job! Just think about what that would do for you in your kitchen!
Want that sleek, silky smooth, and classy finish without the work? SD Custom Painting is here to plan, strategize, and bring your dream kitchen to life with our expert painting services.
Frequently Asked Questions
How many coats of paint on kitchen walls?
Usually, two coats are used for a uniform finish, especially when using different colors. The number of coats required can vary depending on the coverage of the paint, the color of the wall or surface you are covering, the condition of the surface, etc.
Should I use primer before painting my kitchen?
If the painted wall is in good condition, you don’t need a primer; check the topcoat directions, which may recommend a water-based primer.